Use postman tests as API Builder regression tests
7 minute read
Introduction
API developers or API owners who use Postman to test their APIs can very easily incorporate those tests in their API Builder projects, and by doing so, make it easy to incorporate those tests in their DevOps flow. This document shows you how you can do this quickly and easily, using a downloadable example. This page first contains a primer for how Postman tests are created, and then described how you incorporate them into your project. If you already have Postman tests to try out, you can skip to the section Running Collections in API Builder.
You may not be the person who’s responsible for creating these tests, in which case the API tester may design the interfaces, the documentation, and the expected responses, and use a tool like Postman to perform regression testing on the API with Postman API , Collections , and Environments . While API Builder supports unit-tests that achieve the same kind of regression testing, they are more of a developer tool, and not a designer tool and is not really accessible in organizations that have separate roles and responsibilities. This document describes a general process for how to use Postman Collections that were created by an API designer and use them as regression tests in API Builder to ensure compatibility and compliance when upgrading an existing API Builder application.
Prerequisites
To recreate the example described, you will need the following:
- The API Builder demo application demo-postman.zip
- The Postman application
If you wish to skip the manual Collection creation, you can import the “pdf-collection.json” and “dev-environment.json” files into Postman Collections and Environments respectively within the Postman application.
Extract API Builder application
Download and extract demo-postman.zip. Then, install and the demo API Builder application.
// Start API Builder

unzip demo-postman.zip
cd demo-postman
npm install
npm start
Import an API collection
Ensure API Builder demo-postman application is started. Then go to Summary and copy the link for the Download Swagger (it is usually http://localhost:8080/apidoc/swagger.json).
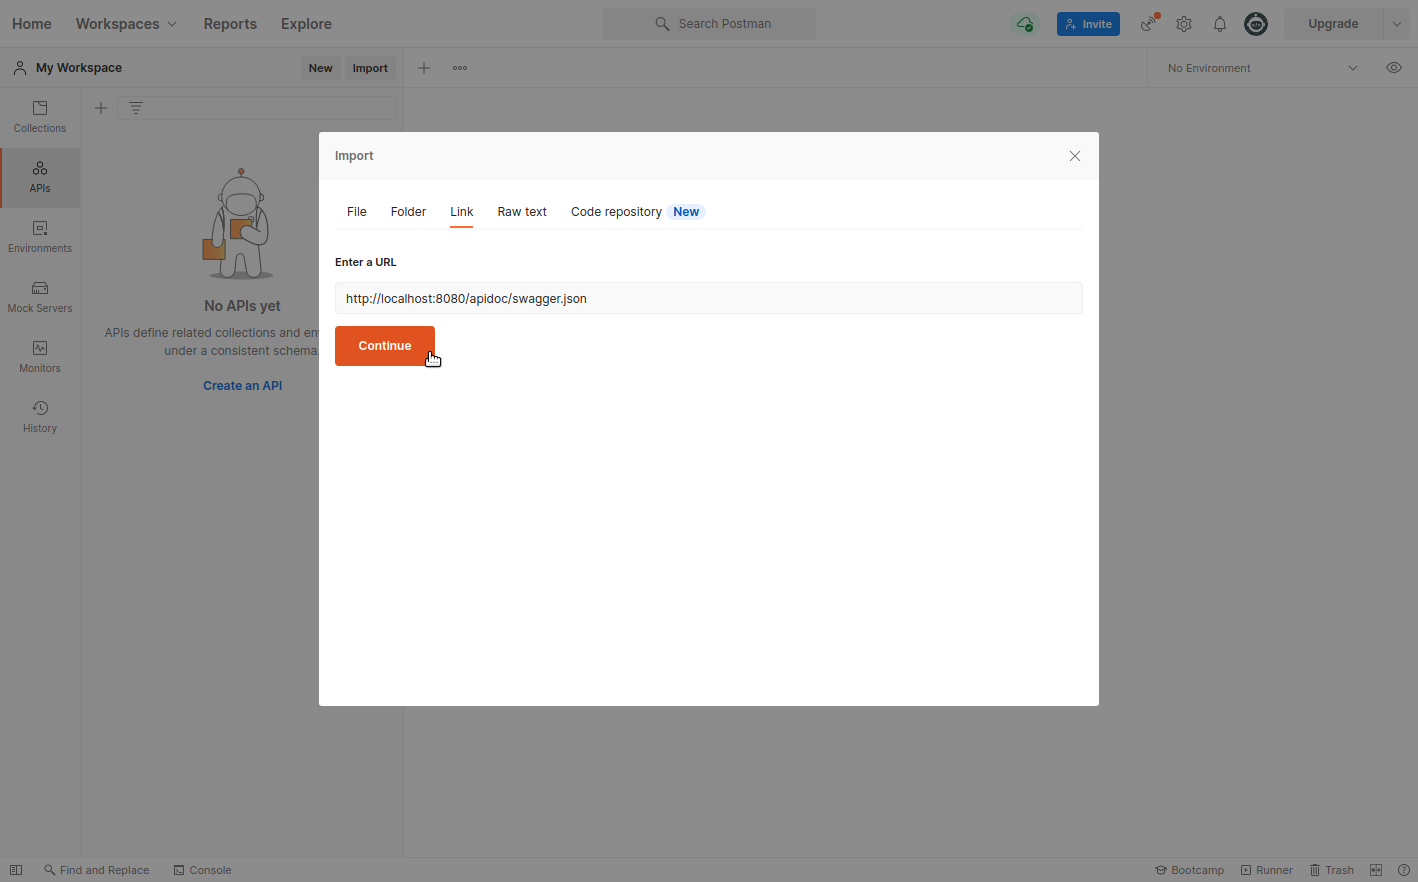
The API may already exist in Postman. If so, you can skip this step. Otherwise, create a new Workspace and click Import.

Then click Link and input the URL for the API Builder application’s Swagger document in Enter a URL, and click Continue
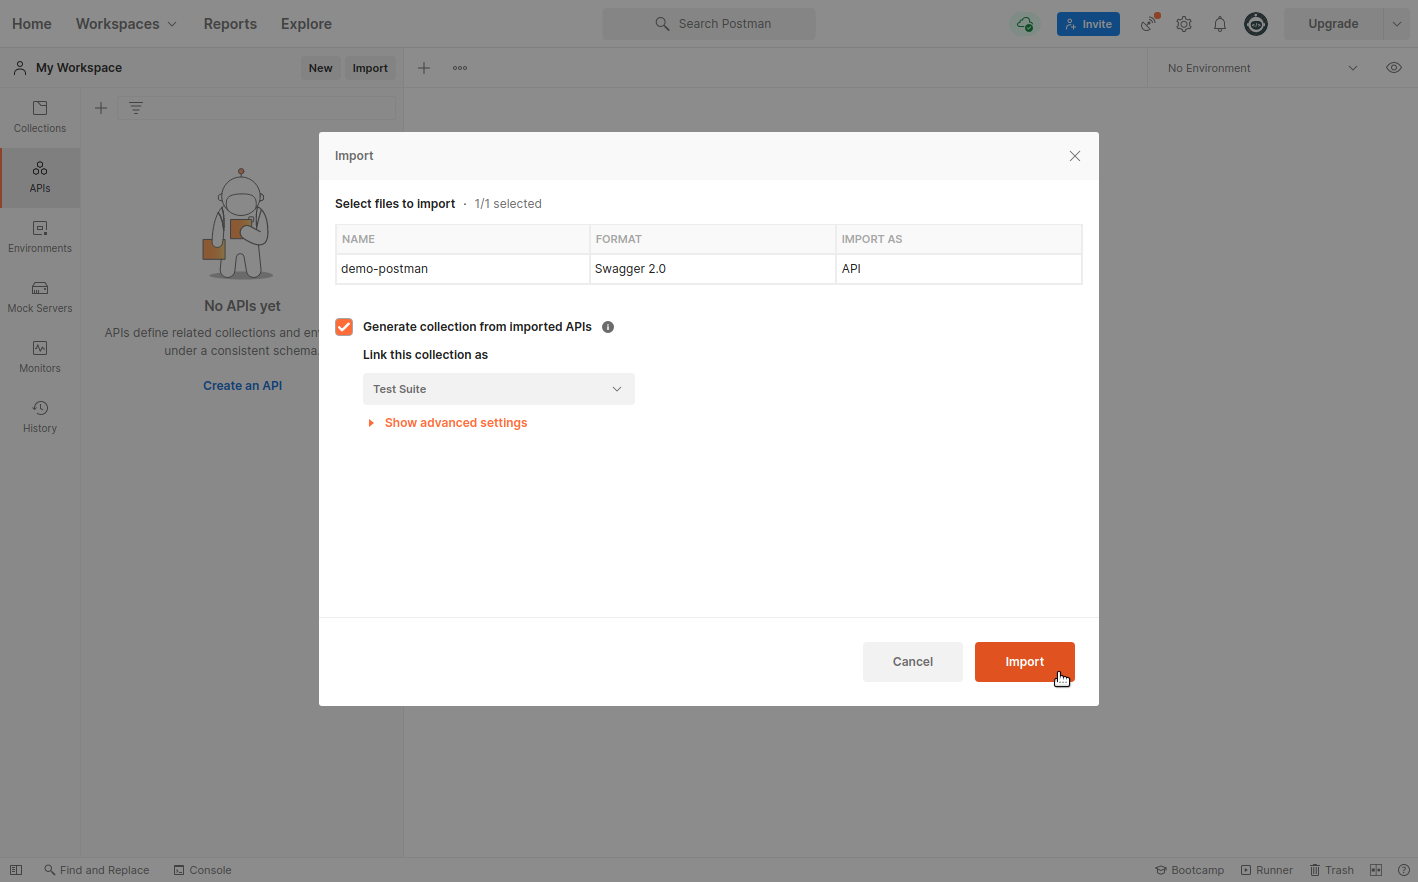
Then, enable Generate collection from Imported APIs and Link this collection as “Test Suite”, and click Import
Create an environment
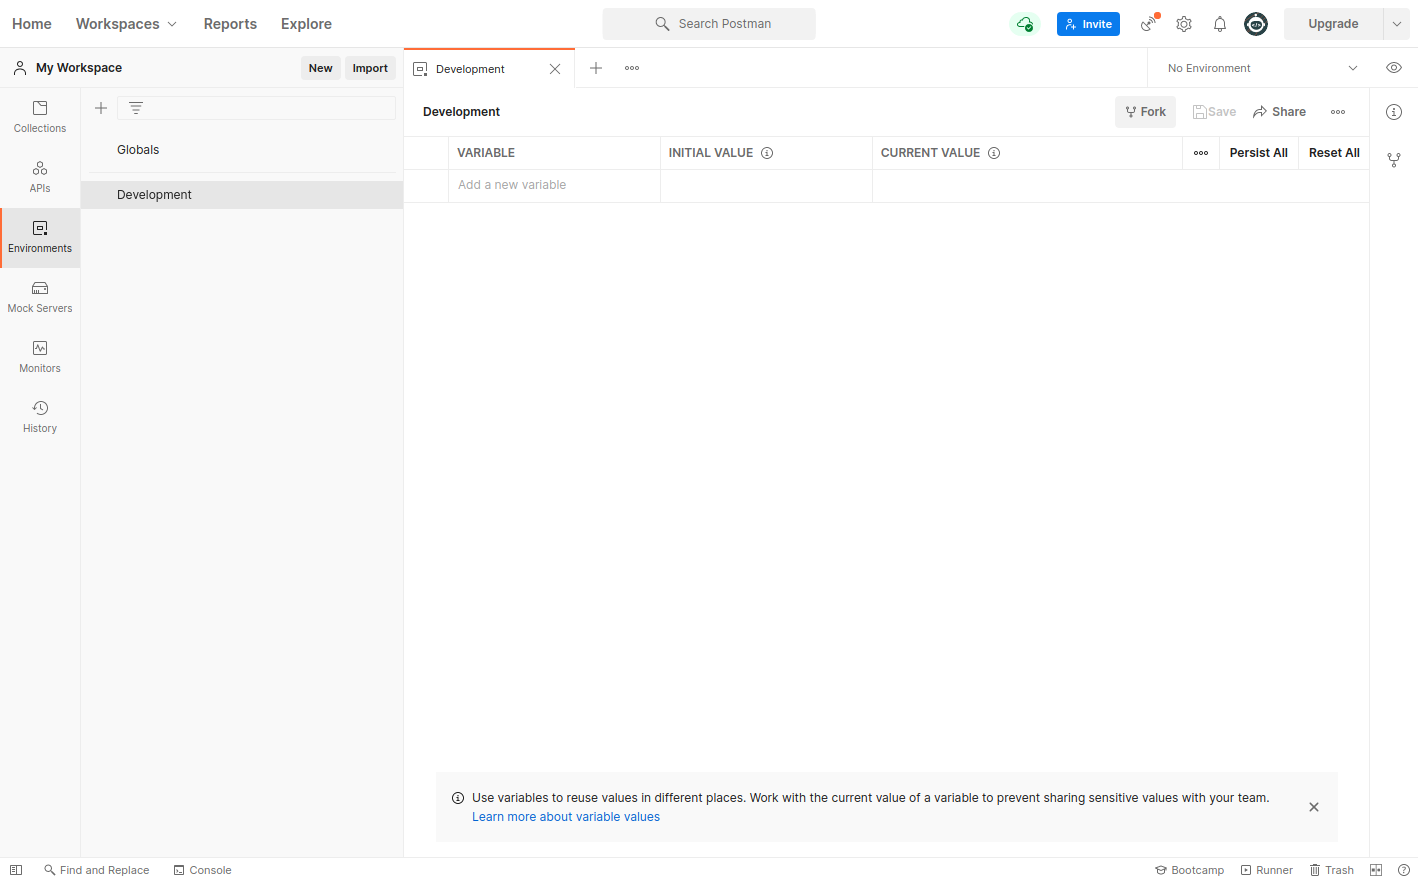
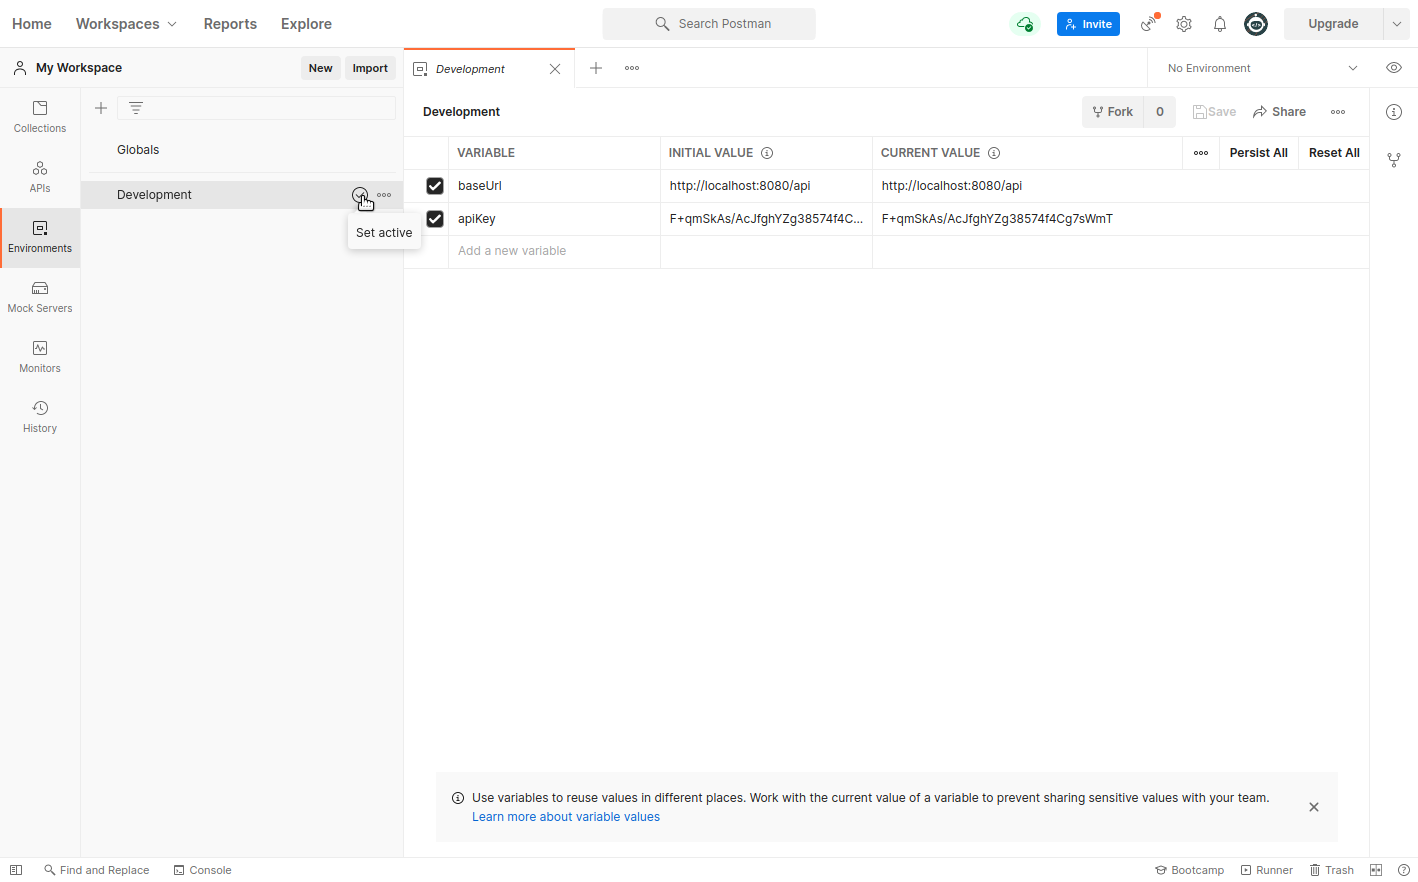
In Postman, Environments are a way of changing test parameters between different environments, such as development, test, and production. In this case, we want to create a development environment so that the API Builder developers can ensure that any changes they make comply with the specific API design. Click on Environments and then Create Environment, and name it “Development”.
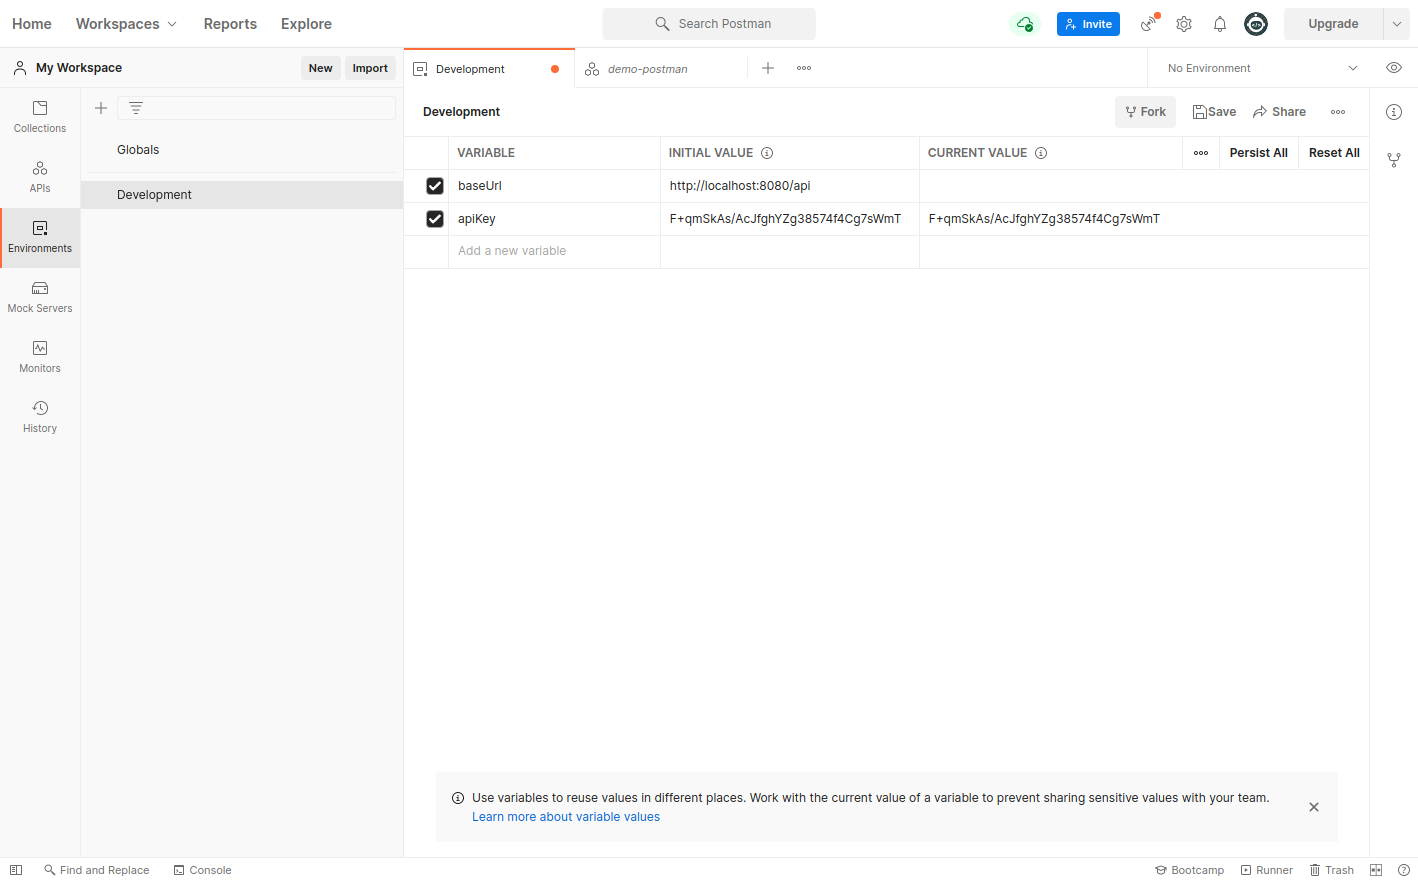
Then, define environment variables for baseUrl and apiKey. The baseUrl is normally “http://localhost:8080/api”, and apiKey can be found at the top of your conf/default.js file. Then, Save the environment (Ctrl + S).
Then, it is important to enable “Development” as the active environment. Hover over “Development” and click Set Active.
Create a test collection
Rename the collection
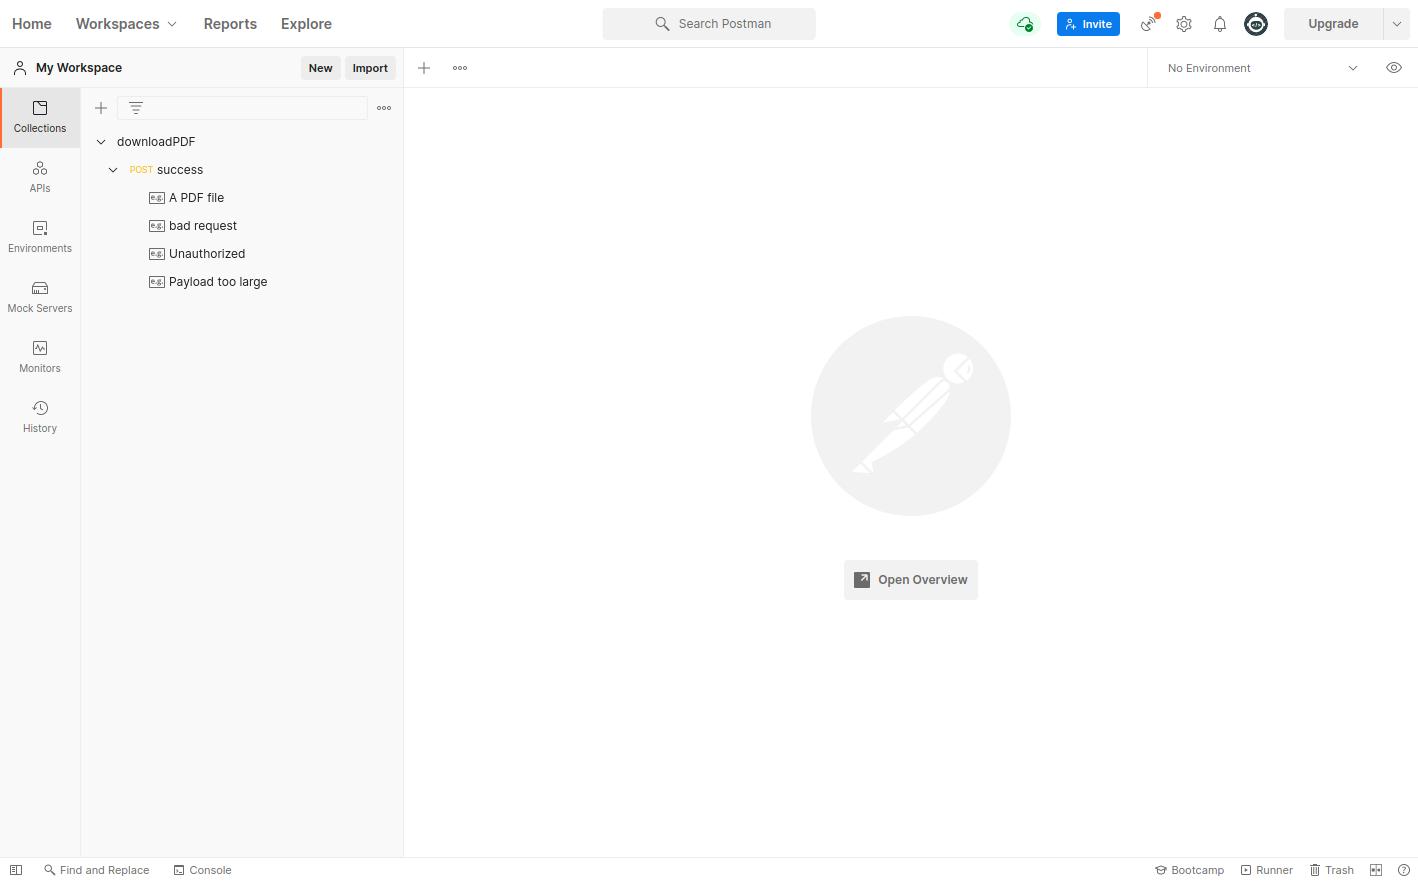
In Postman, Collections are group of saved requests you can organize into folders. In this example, we will keep it simple. We will create examples of a “success” download and a “bad request” download for our test suite. For clarity, will rename Collection to the path we want to test (“downloadPDF”). Click Collections, and find the collection that was created when you imported the API - it will have the name of your API Builder application. In this example, it is “demo-postman”. Click the “…” menu and choose Rename, and rename the collection to “downloadPDF”. Then, find the first request and Rename it to “success” using the “…” menu.
Configure the success request
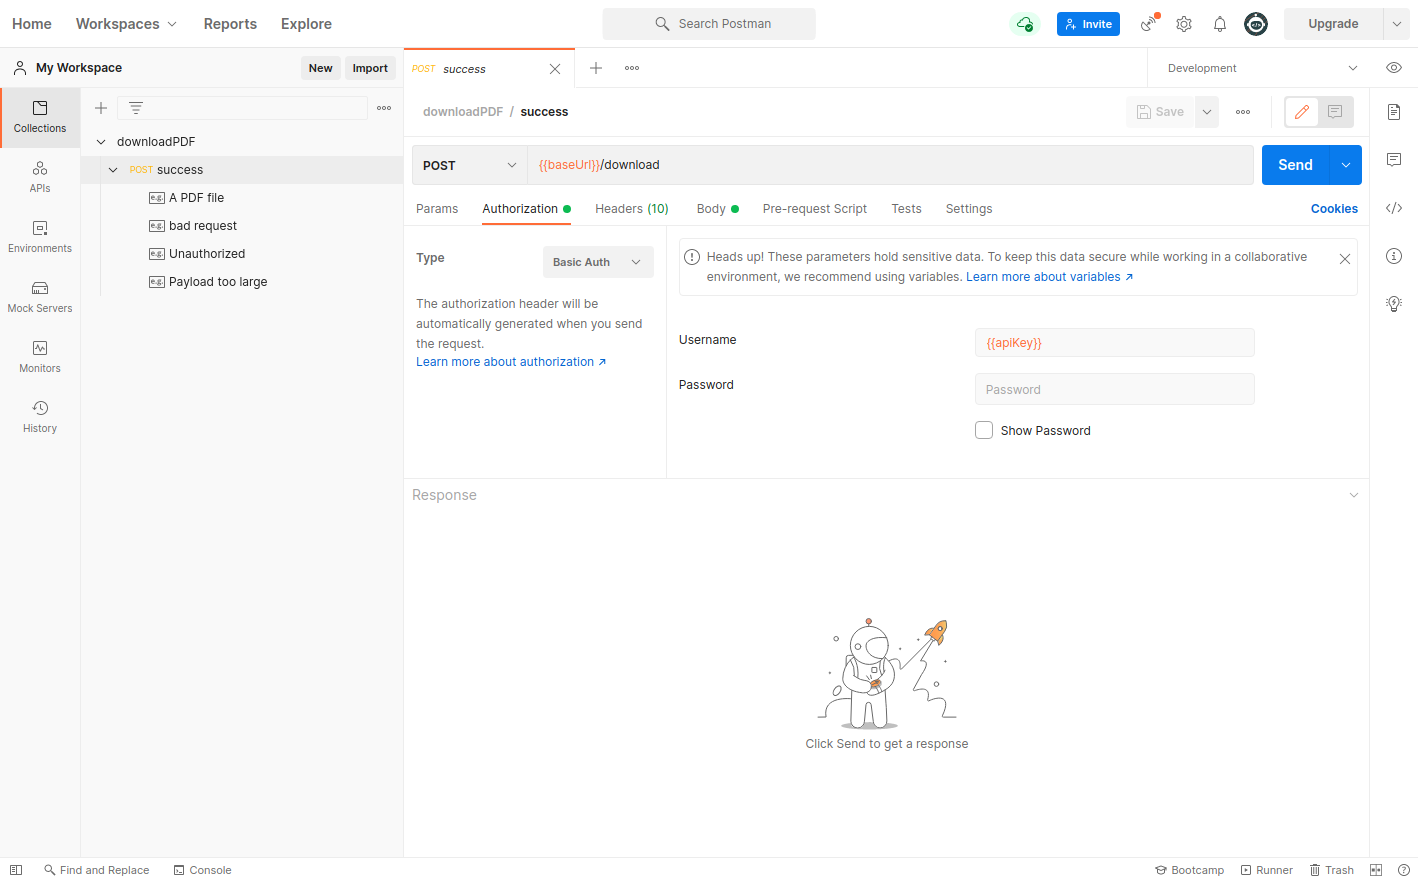
Click and open the “success” request, and then click Authorization. In the Type drop-down, choose Basic Auth. In Username, input the value “{{apiKey}}”. This is an environment variable that was created earlier in Create an environment.
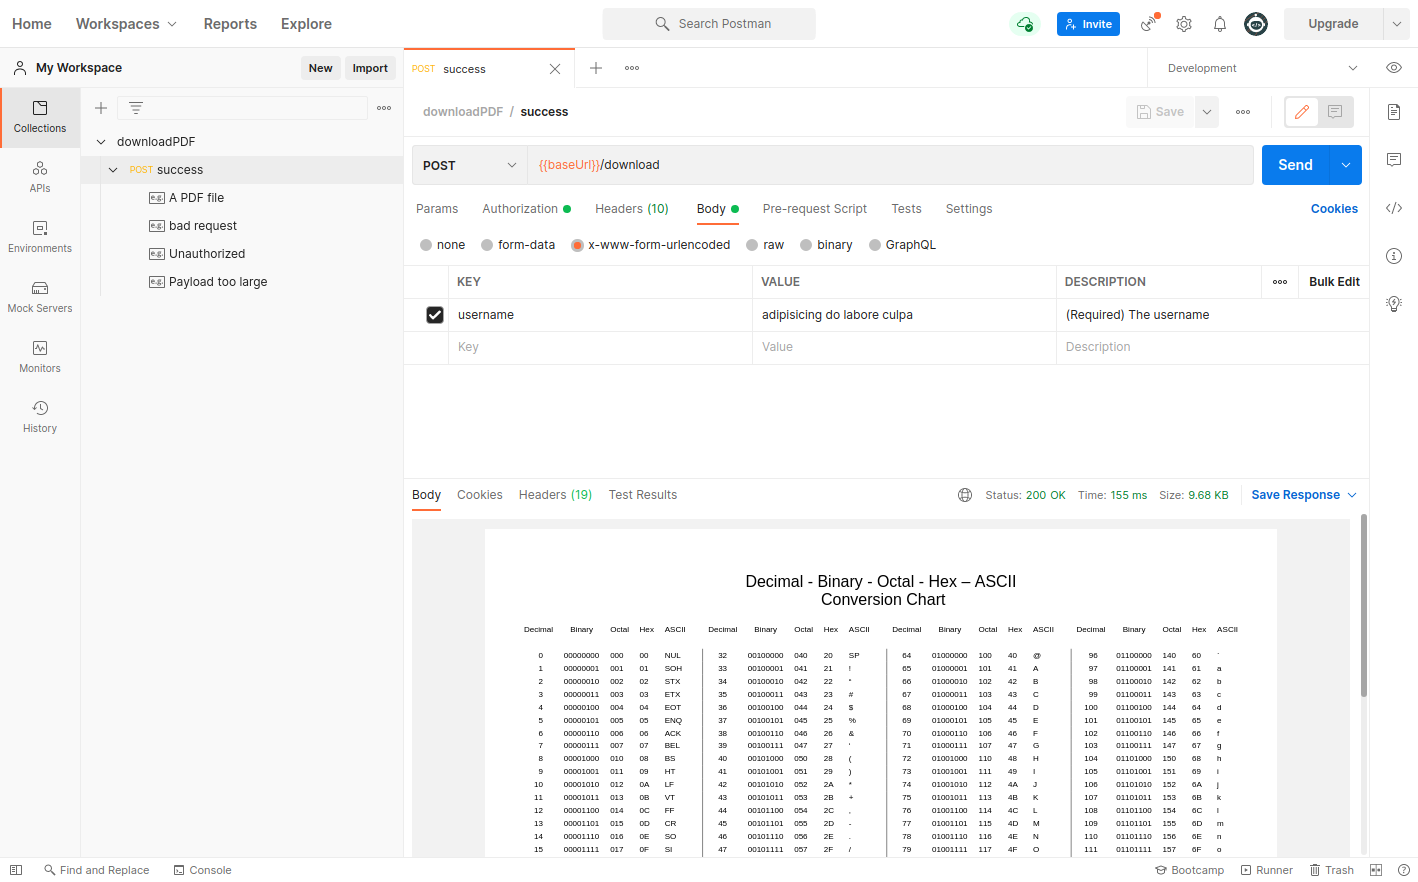
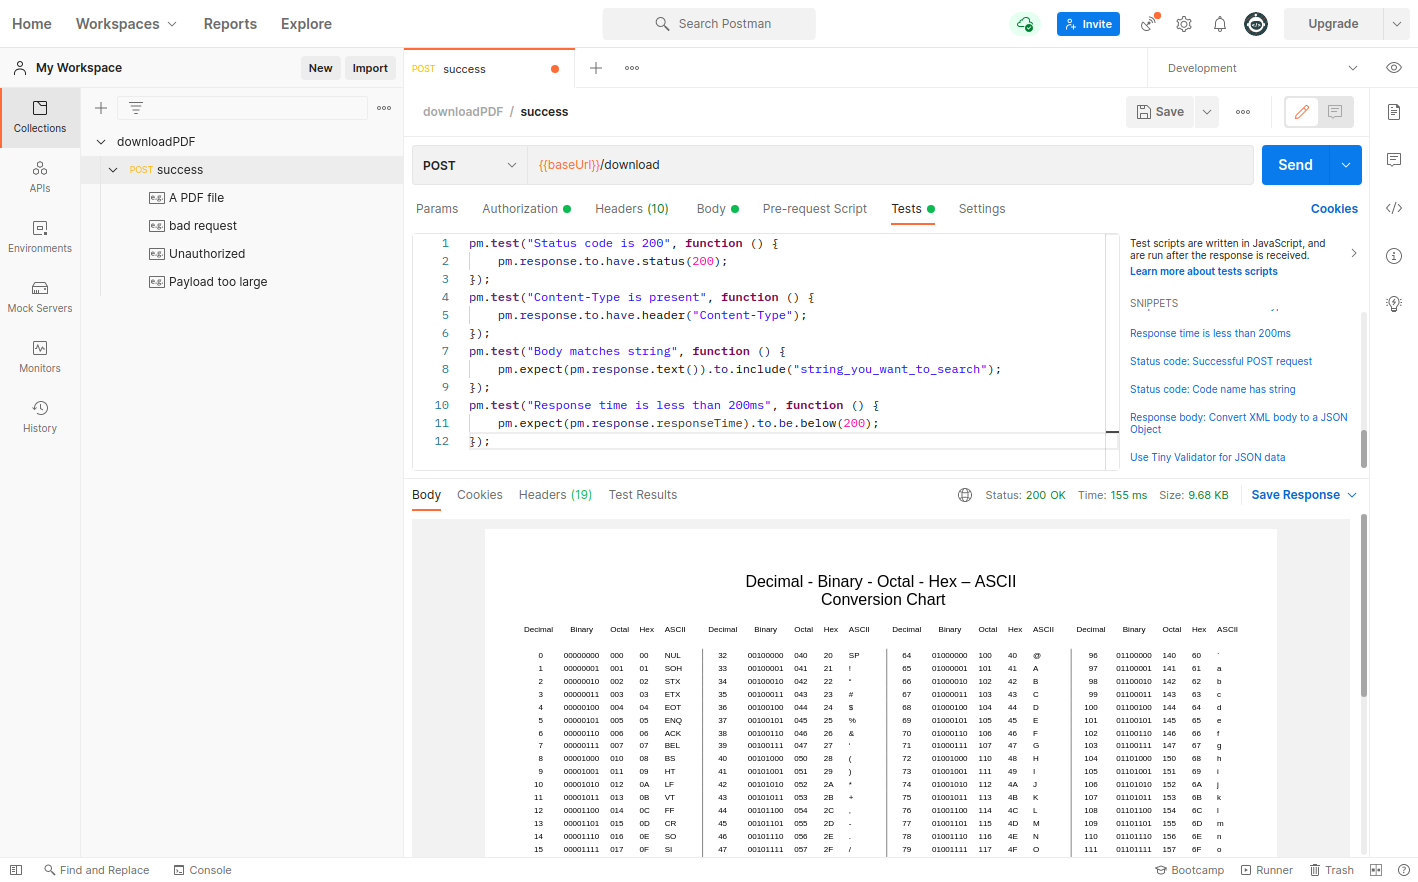
In Body, ensure that it has any required input parameters and then click Send. All going well, you should see a successful response, which is the PDF ASCII chart (do not continue until you have a successful response).
Now, we will create a set of tests for this specific “success” request to ensure that it complies with the expected interface. Click Tests. In the snippets menu on the right, find and add the following:
- Status code: Code is 200
- Response headers: Content-Type header check
- Response body: Contains a string
- Response time is less than 200ms
You should see a test suite with the following:
This is a Postman Script. We want to modify it so that it specifically checks:
- The response is 200 (no changes necessary)
- The Content-Type is “application/pdf” (modify the script)
- The Body includes “%PDF” (modify the script)
- The whole response took less than 200 ms (no changes necessary)
Your test script should look like this:
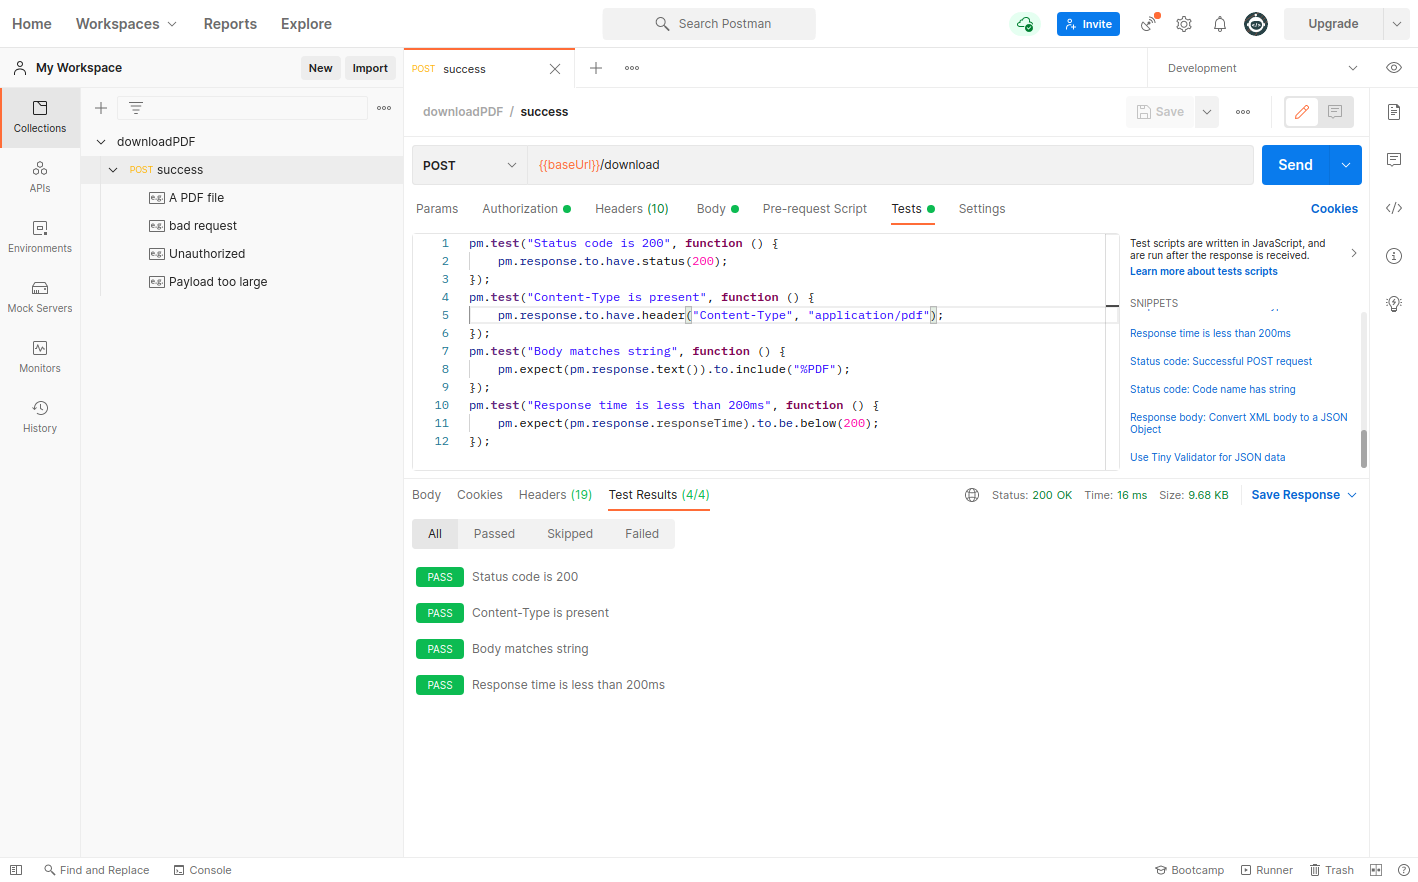
// Postman Test Script

pm.test("Status code is 200", function () {
    pm.response.to.have.status(200);
});
pm.test("Content-Type is present", function () {
    pm.response.to.have.header("Content-Type", "application/pdf");
});
pm.test("Body matches string", function () {
    pm.expect(pm.response.text()).to.include("%PDF");
});
pm.test("Response time is less than 200ms", function () {
    pm.expect(pm.response.responseTime).to.be.below(200);
});
Then, click Send. You should see “Test Results (4/4)” that indicates all tests passed.
Configure the bad request
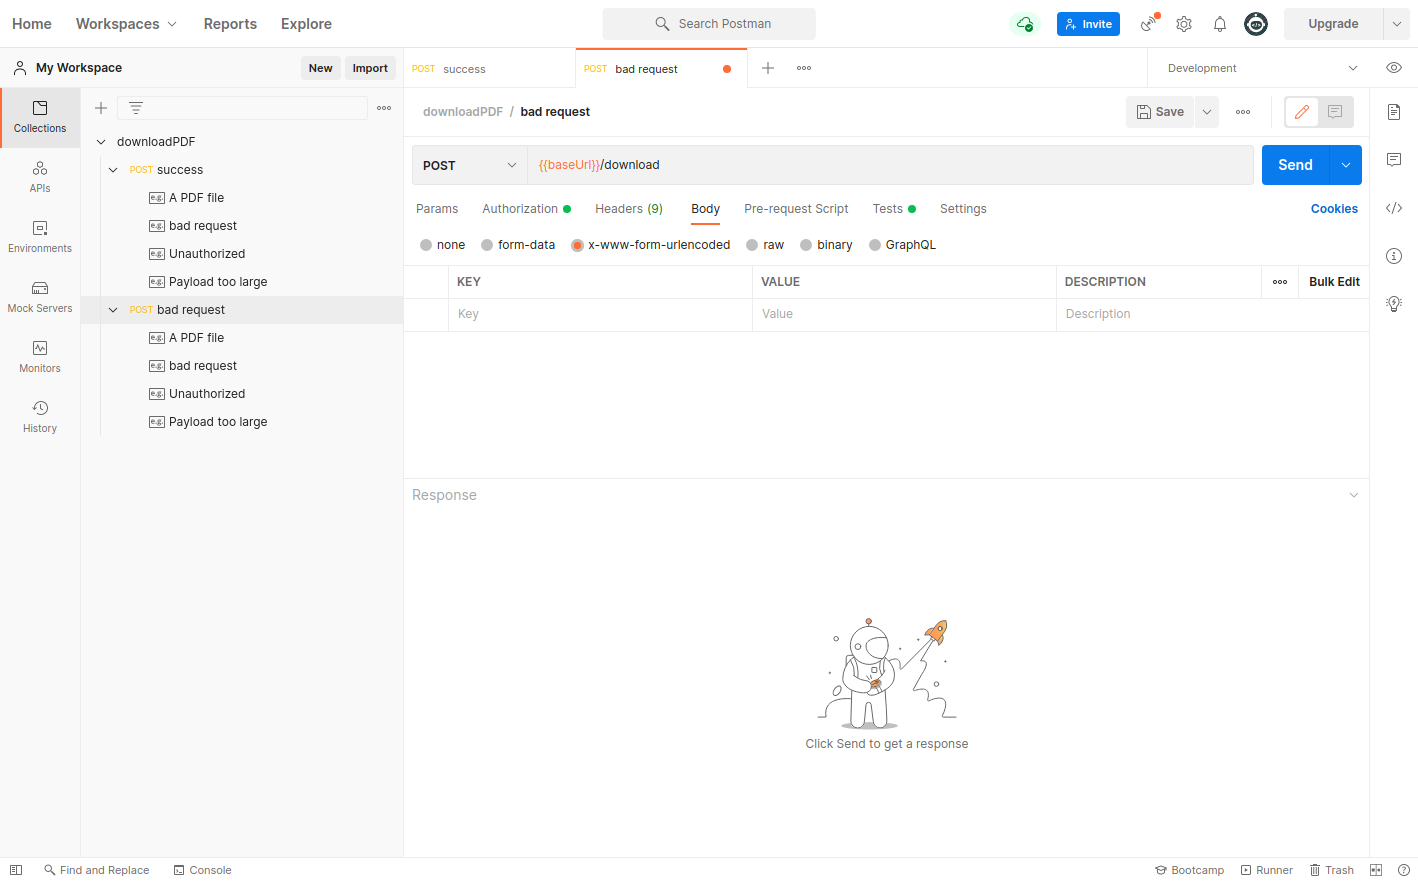
In the Collections menu, find the “success” request and use the “…” menu to Duplicate it. Rename the new request as “bad request”. Edit “bad request”, and in the Body, delete the required username. You should see the following:
Edit Tests and change the script to the following:
// Postman Test Script

pm.test("Status code is 400", function () {
    pm.response.to.have.status(400);
});
pm.test("Content-Type is present", function () {
    pm.response.to.have.header("Content-Type", "application/json; charset=utf-8");
});
pm.test("Body matches string", function () {
    pm.expect(pm.response.json().error).to.equal('Request validation failed: Parameter (username) is required');
});
pm.test("Response time is less than 200ms", function () {
    pm.expect(pm.response.responseTime).to.be.below(200);
});
When you click Send, you should see Test Results (4/4).
This completes your test suite.
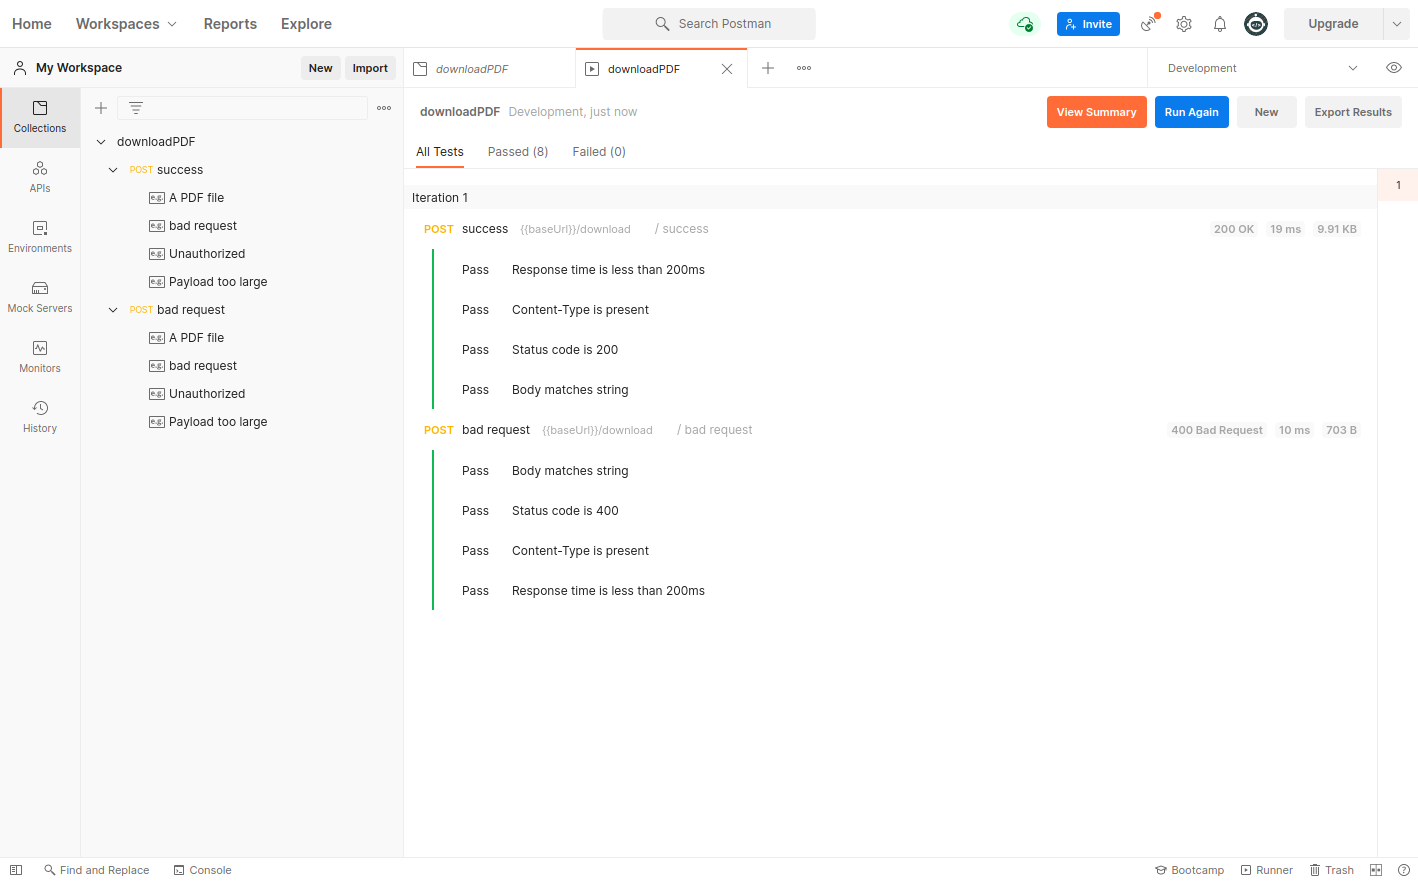
Run test suite
In Postman Collections, click “downloadPDF” and use the “…” menu to Run collection, choose the defaults and click Run downloadPDF. You should see 8 passing tests.
Hand-off test suite to developers
As an API designer, you have now created a contract for your API using Postman. You will want to export this Collection so that it can be used by the API Builder developers to ensure there are no regressions. It is important to keep this suite up to date, and to coordinate any updates with the development team regularly as they will use this as part of their test suite.
Export the Collection by clicking Collections, “downloadPDF”, and then Export.
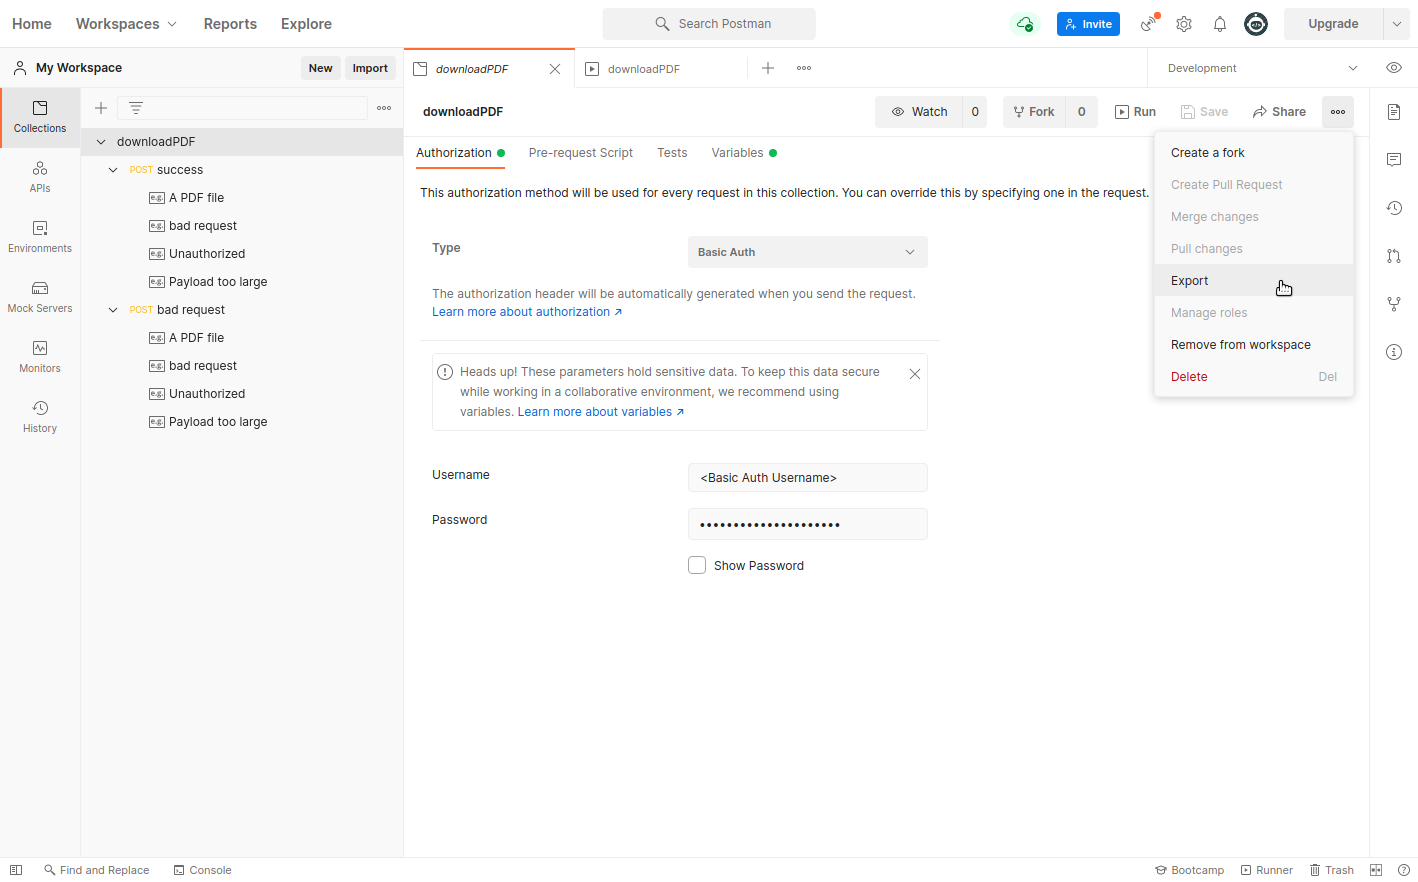
Save this file to disk as a Collection v2.1 file and click the Export button. Give it a sensible filename, e.g. “pdf-collection.json”.
Then, click Environments, “Development”, and run a similar Export, saving the file as something sensible, e.g. “dev-environment.json”.
Give each file to the API Builder development team.
Running Collections in API Builder
Once you have received the respective collection and environment JSON files, you can include them in your API Builder application.
Note
dev-environment.json should not be committed to source control for security. Ensure it is included in .gitignore so that it only exists locally. The file will need to be provided to each developer who wants to run these tests.Postman has a tool called newman that enables Postman Collections to be run as unit-tests. This already installed as a dependency into the sample “demo-postman” project, but can be installed into existing applications as a dev-dependency:
// Install newman

npm install newman --save-dev
And then in the package.json “scripts”, create a “test:postman” script to execute the following command, pointing to the Postman JSON files that are now in your application:
"scripts": {
  "test:postman": "newman run -e dev-environment.json pdf-collection.json",
  ...
}
To run the Postman Collection, your API Builder application should be running. Then run:
// Run the Postman Collection

npm run test:postman
After running, you will see the summary of the Collection test suite:
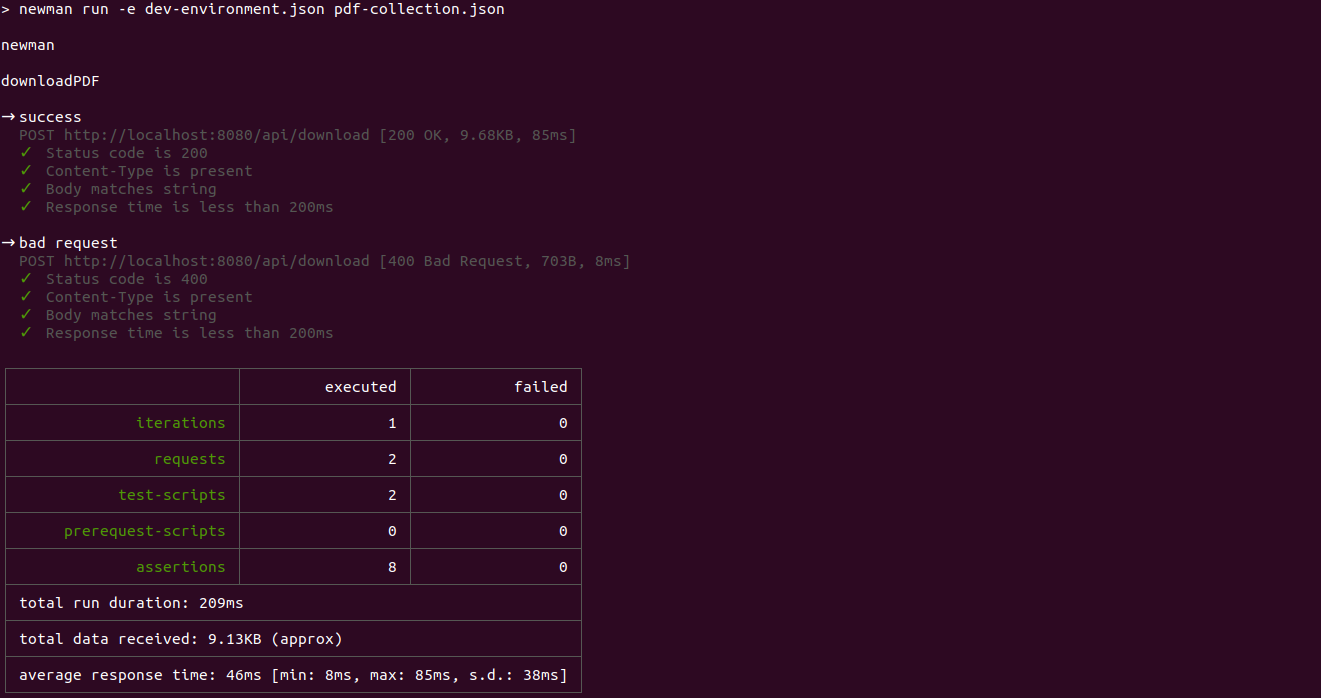
This ensures that changes made to the API Builder application conform to the expectation from the API designer. The collection may need to be updated regularly as the API evolves. You can read more about the API lifecycle and how to use Postman to solve regression and integration testing.