Import an API Builder API into API Manager
5 minute read
This document describes how to import an API Builder API into API Manager.
Introduction
API Manager provides a web-based interface that enables an API owner (either in a technical business role or IT operational role) to easily register back-end REST APIs, apply policies, and to virtualize them on the API Gateway. In this document, we will explore how API Builder services can be managed by API Manager.
Prerequisites
This document assumes that you are familiar with API Manager and have it deployed and running in your infrastructure. For more information on API Manager, refer to the API Manager Guide or sign up for an API Management Trial.
This document also assumes that you have API Builder installed and that you have created and deployed a service. For this document, we will use the vanilla starter application, which will be referred to as the API Builder Greet service. Refer to the Getting Started With API Builder for the command to create the API Builder Greet service.
For configuration purposes:
- API Manager is deployed on apimgmt.gateway.192.168.99.100.nip.io
- API Builder Greet service is deployed on greet.apibuilder.192.168.99.100.nip.io
To configuration the API Manager outbound authentication, you need to know the API key of the API Builder Greet service.
Registering with API Manager
If you know API Manager and how to virtualize backend services, integrating API Builder will be a familiar process. The steps are:
- Login
- Import the backend API
- Virtualize the frontend API
Login
Open API Manager and log in. In this case, the URL is https://apimgmt.rdpp-4522.192.168.99.100.nip.io/home.

Import the backend API
- The first step is to import the Swagger service definition for the backend Greet service into API Manager. In the API section, click Backend API.
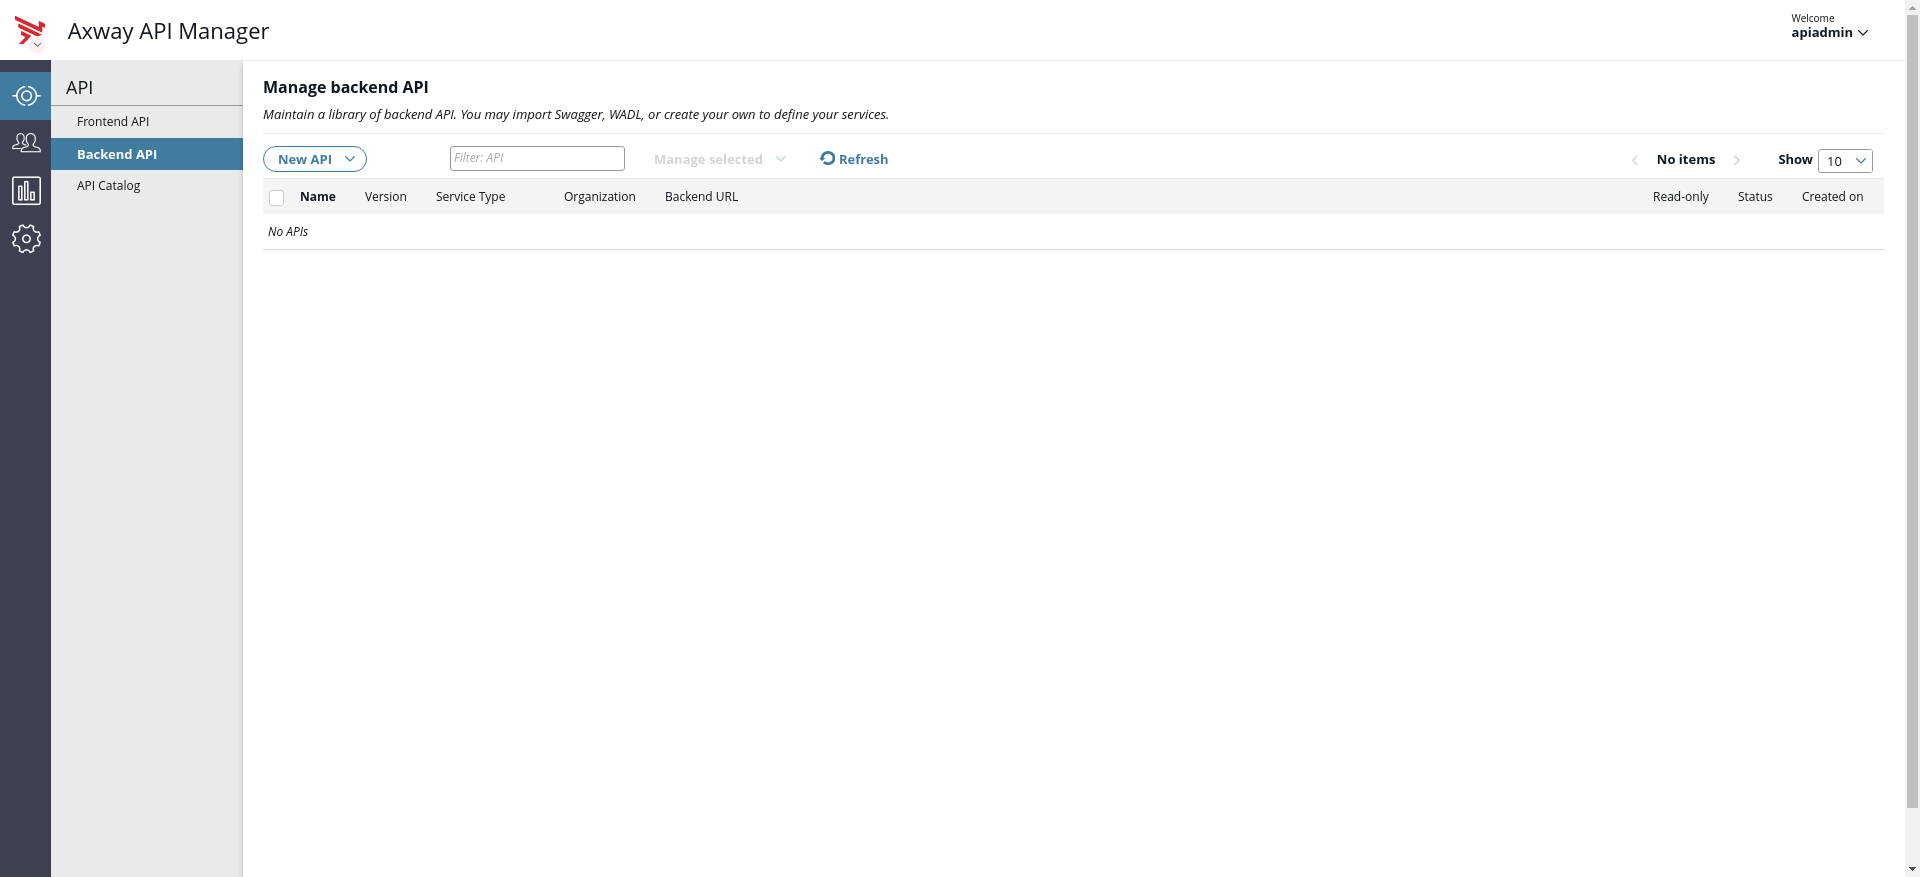
- Click New API.
- Select Import Swagger API.
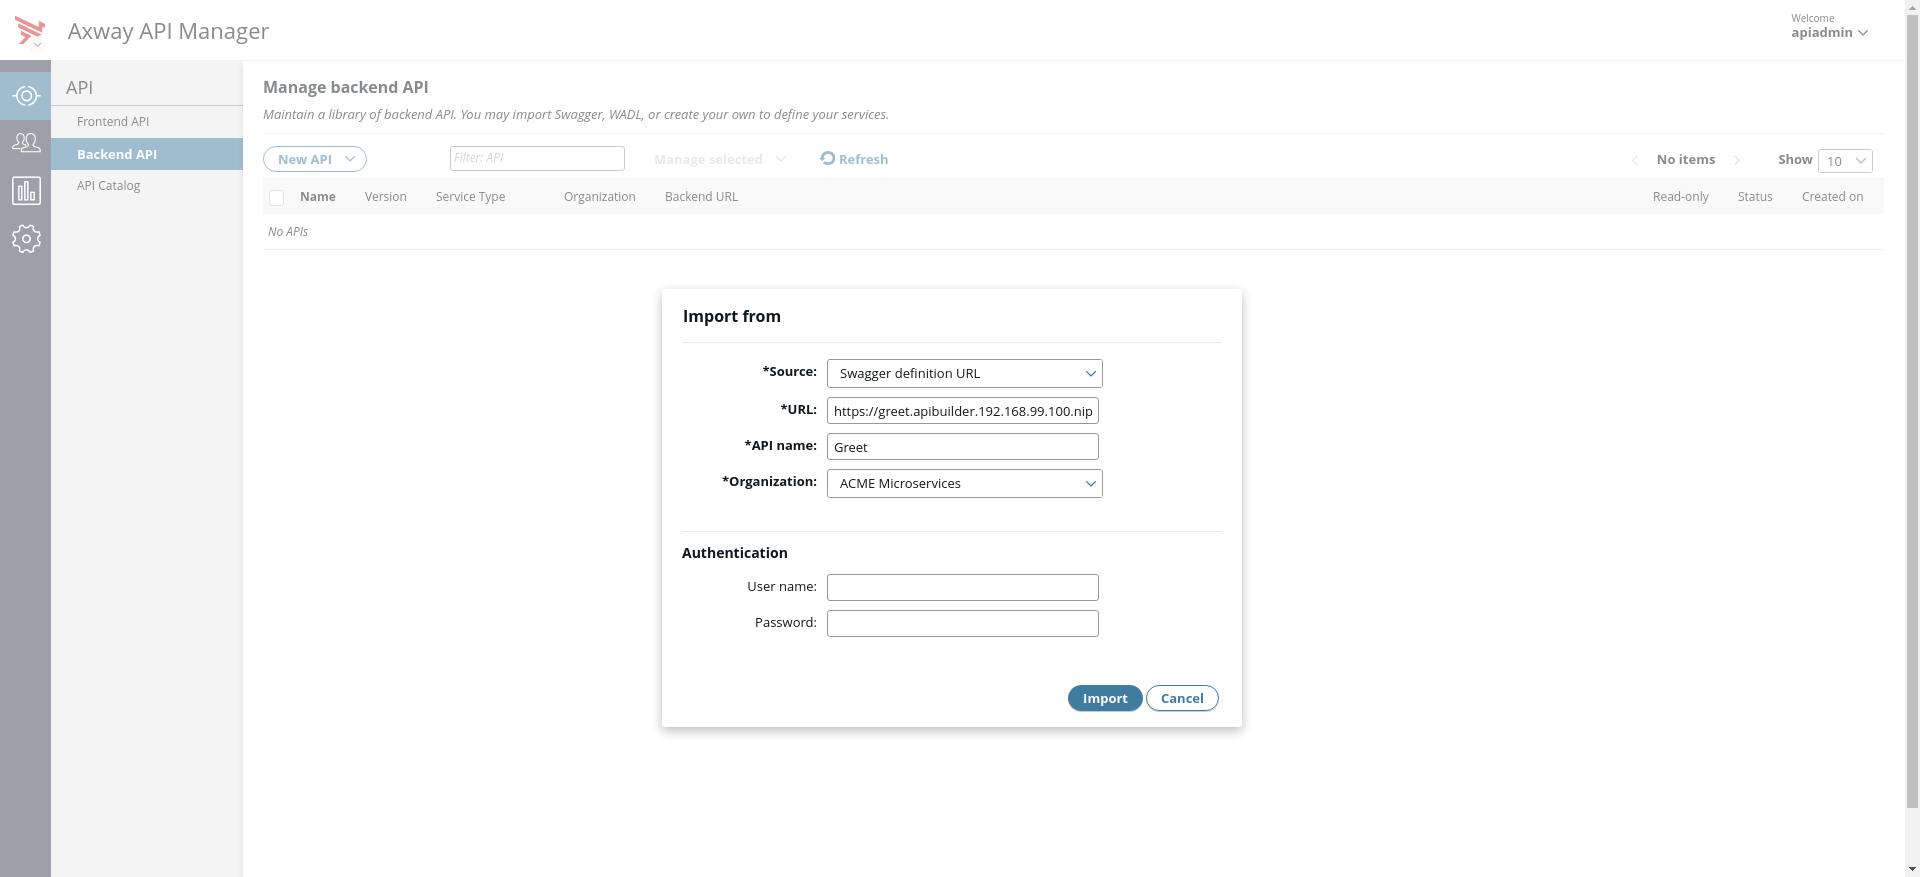
- API Manager requires the URL of the Swagger definition of the API Builder Greet service. Since the service is deployed and running, we will select a Swagger definition URL. API Builder exposes the Swagger definition for the service under greet.apibuilder.192.168.99.100.nip.io.
Note
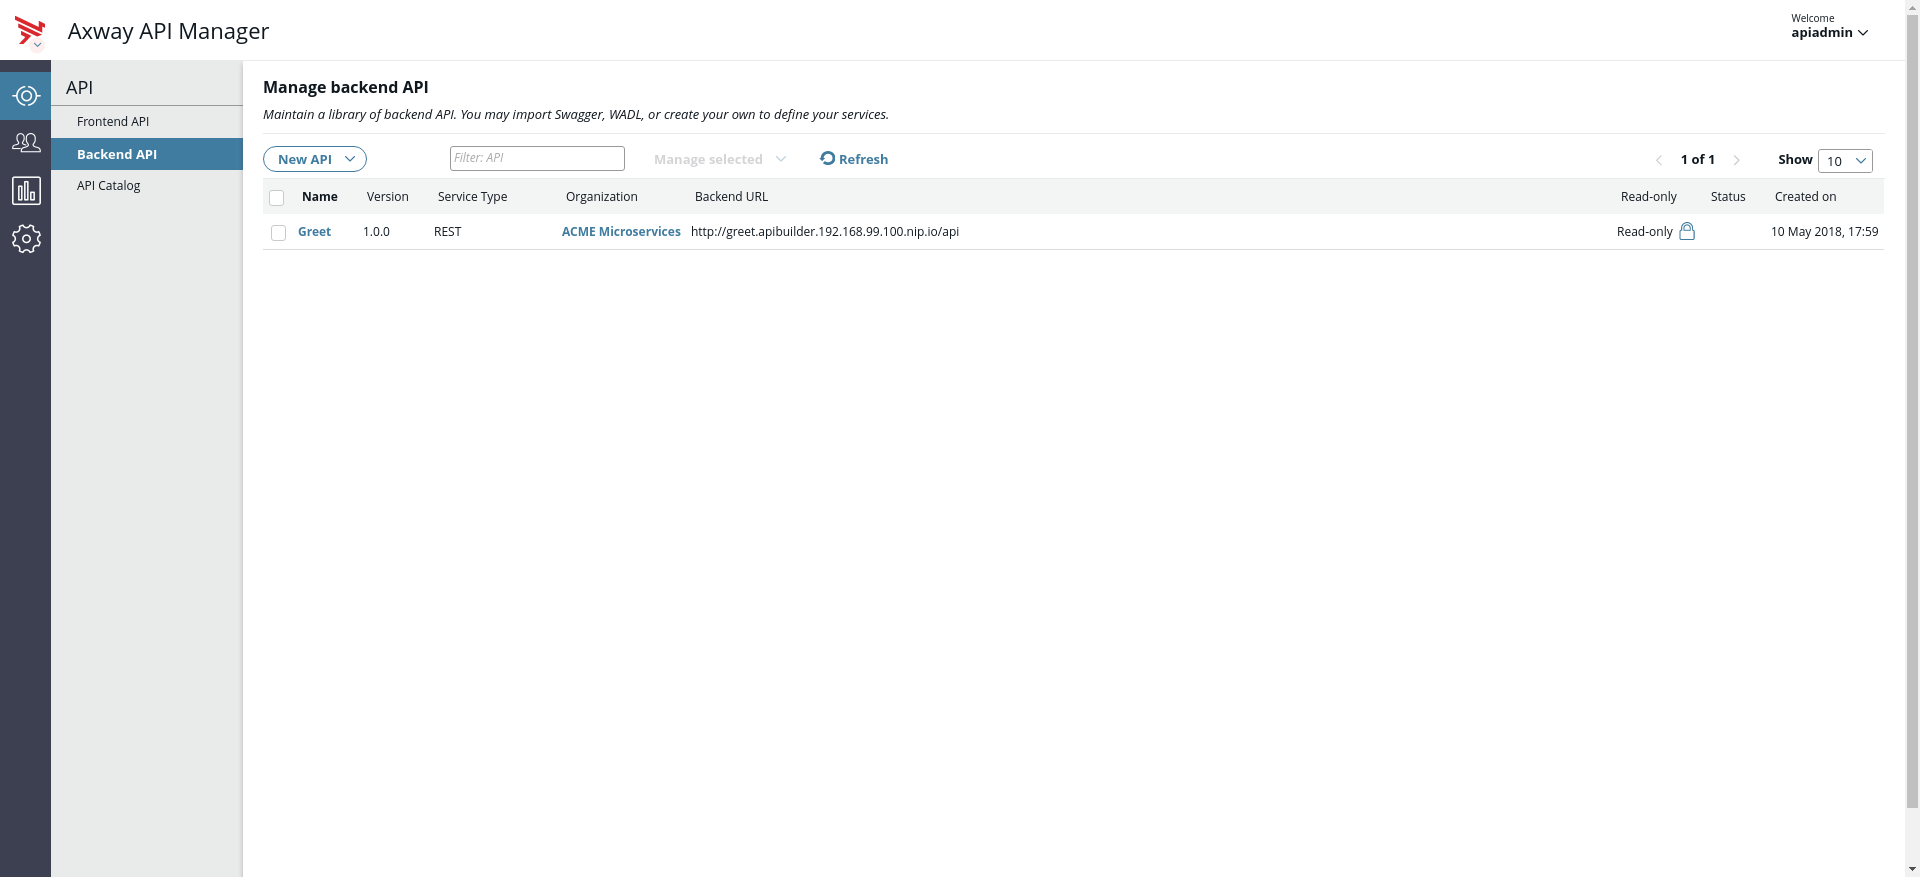
In this example, the Greet service is being hosted in a Kubernetes cluster with Ingress rules. This is why in the image, the URL is using HTTPS and not specifying the port. - Name the backend API Greet and associate it with an organization in your API Manager setup. Once imported, Greet will be listed in the Backend API section.
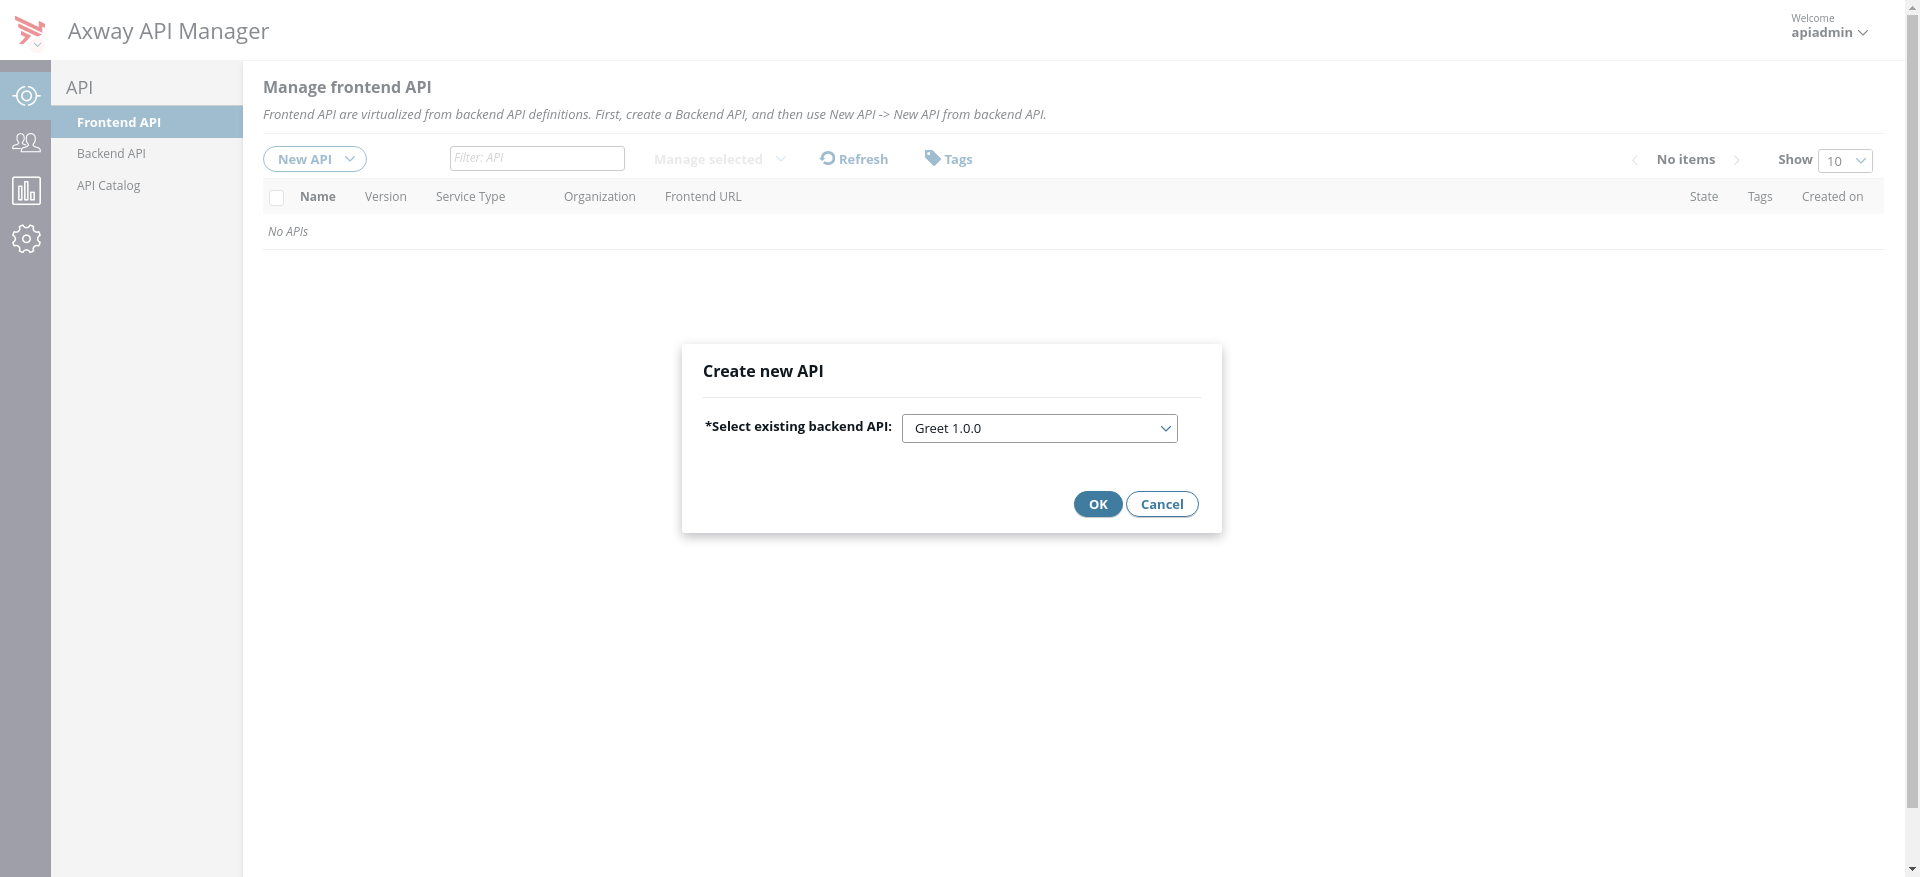
Virtualize and configure the backend API
To allow API Manager to manage the backend API, you need to virtualize it. Virtualizing the API creates a frontend API proxy for your service.
- Navigate to the Frontend API tab.
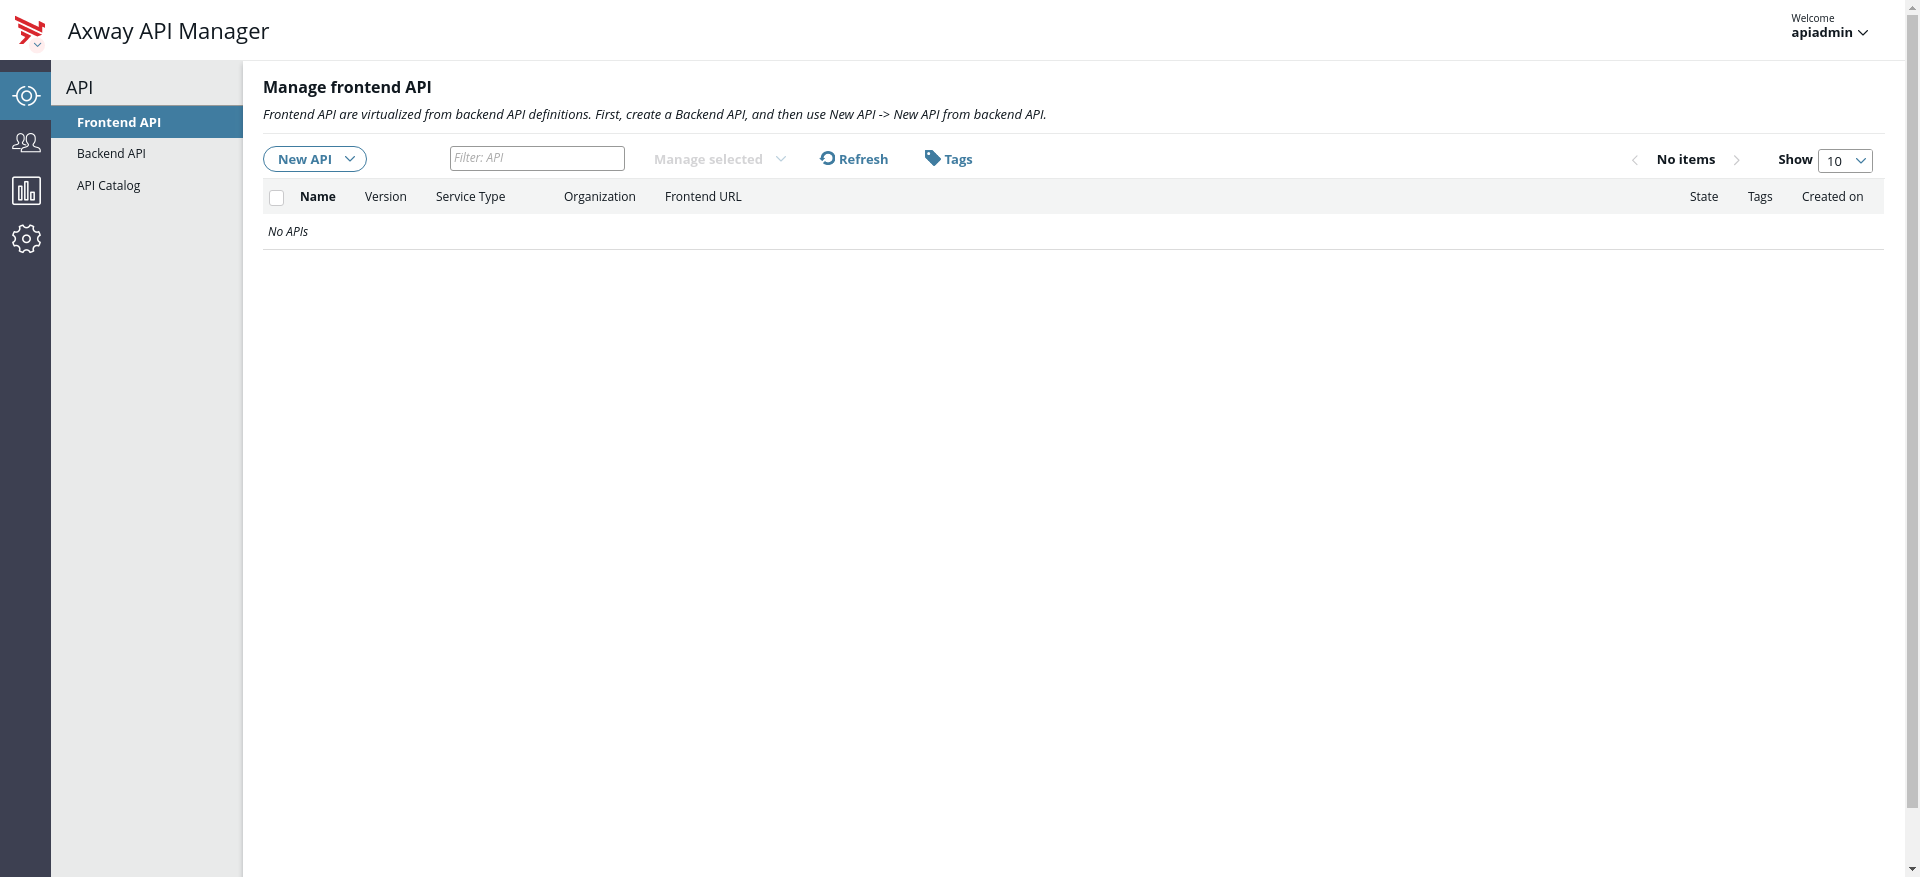
- Click New API.
- Select New API from backend API.
- Select Greet 1.0.0 in the dialog (this is the name of the backend service that we imported earlier).
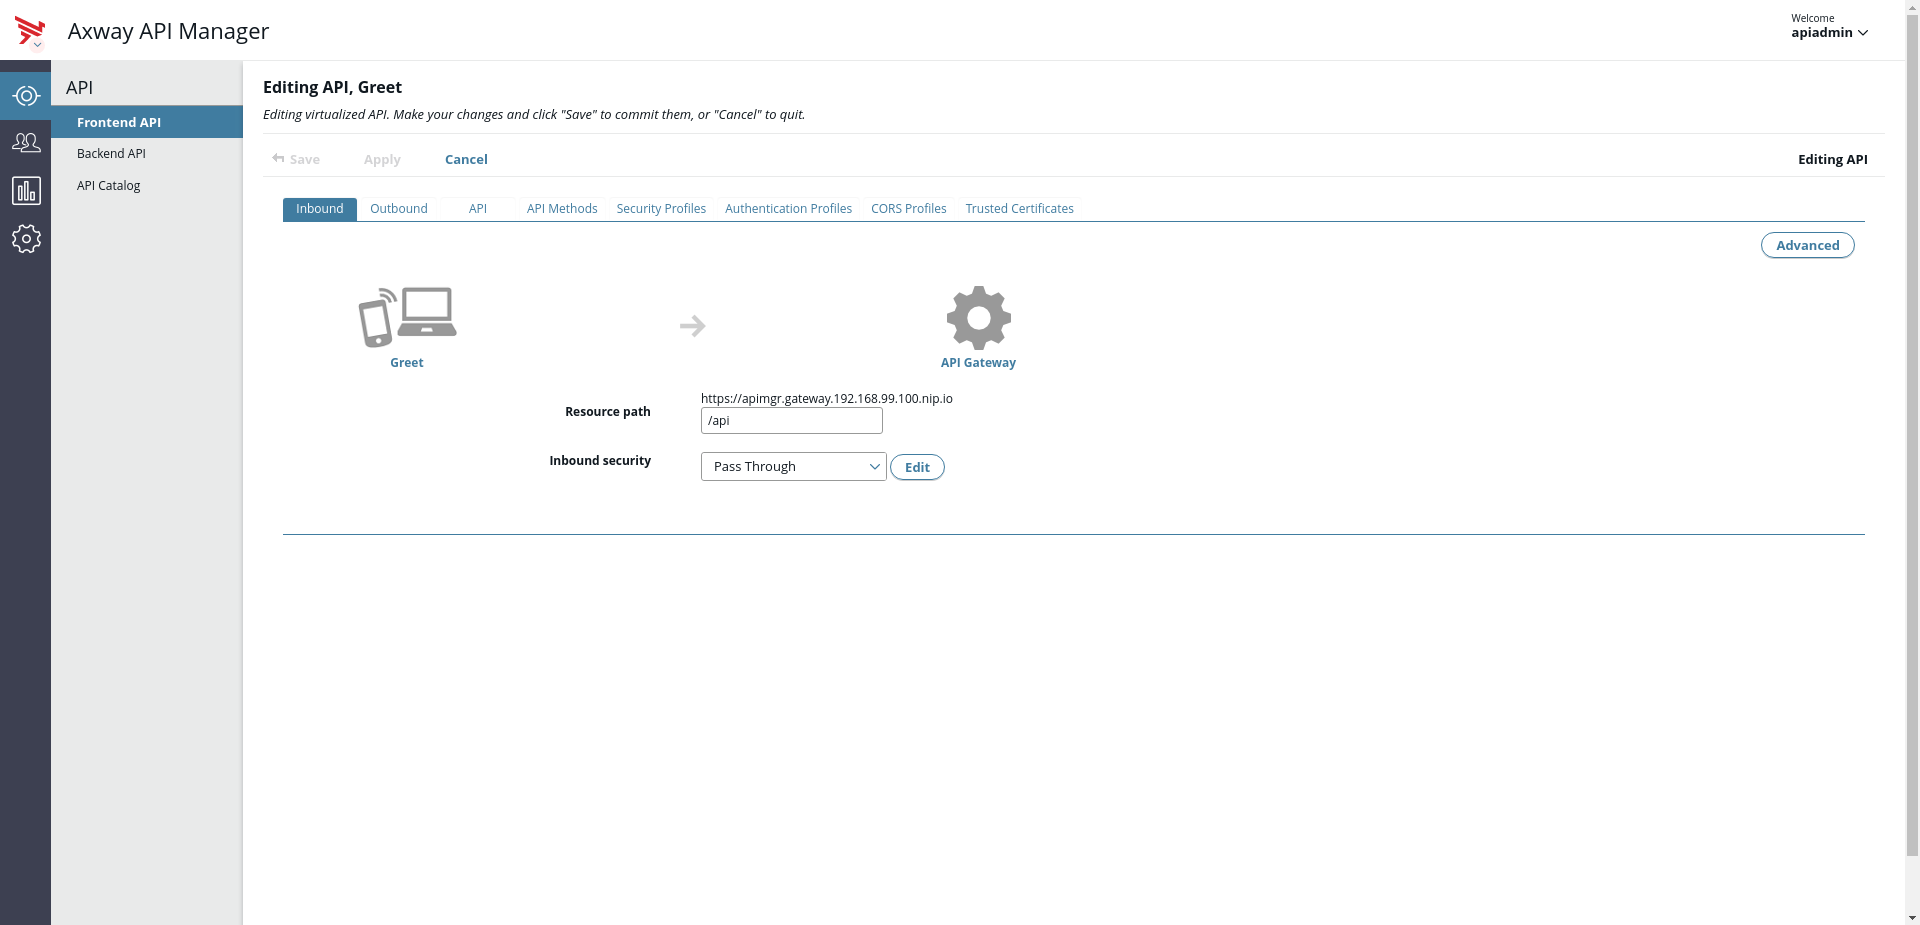
- For demonstration purposes, we will leave the frontend API unsecured (Pass-through). On the Inbound tab, select Pass Through from the Inbound Security drop-down menu.
Note
This is purely for demonstration purposes; API Manager has many authentication mechanisms built-in and is extensible using policies. See Virtualize REST APIs in API Manager for more information.
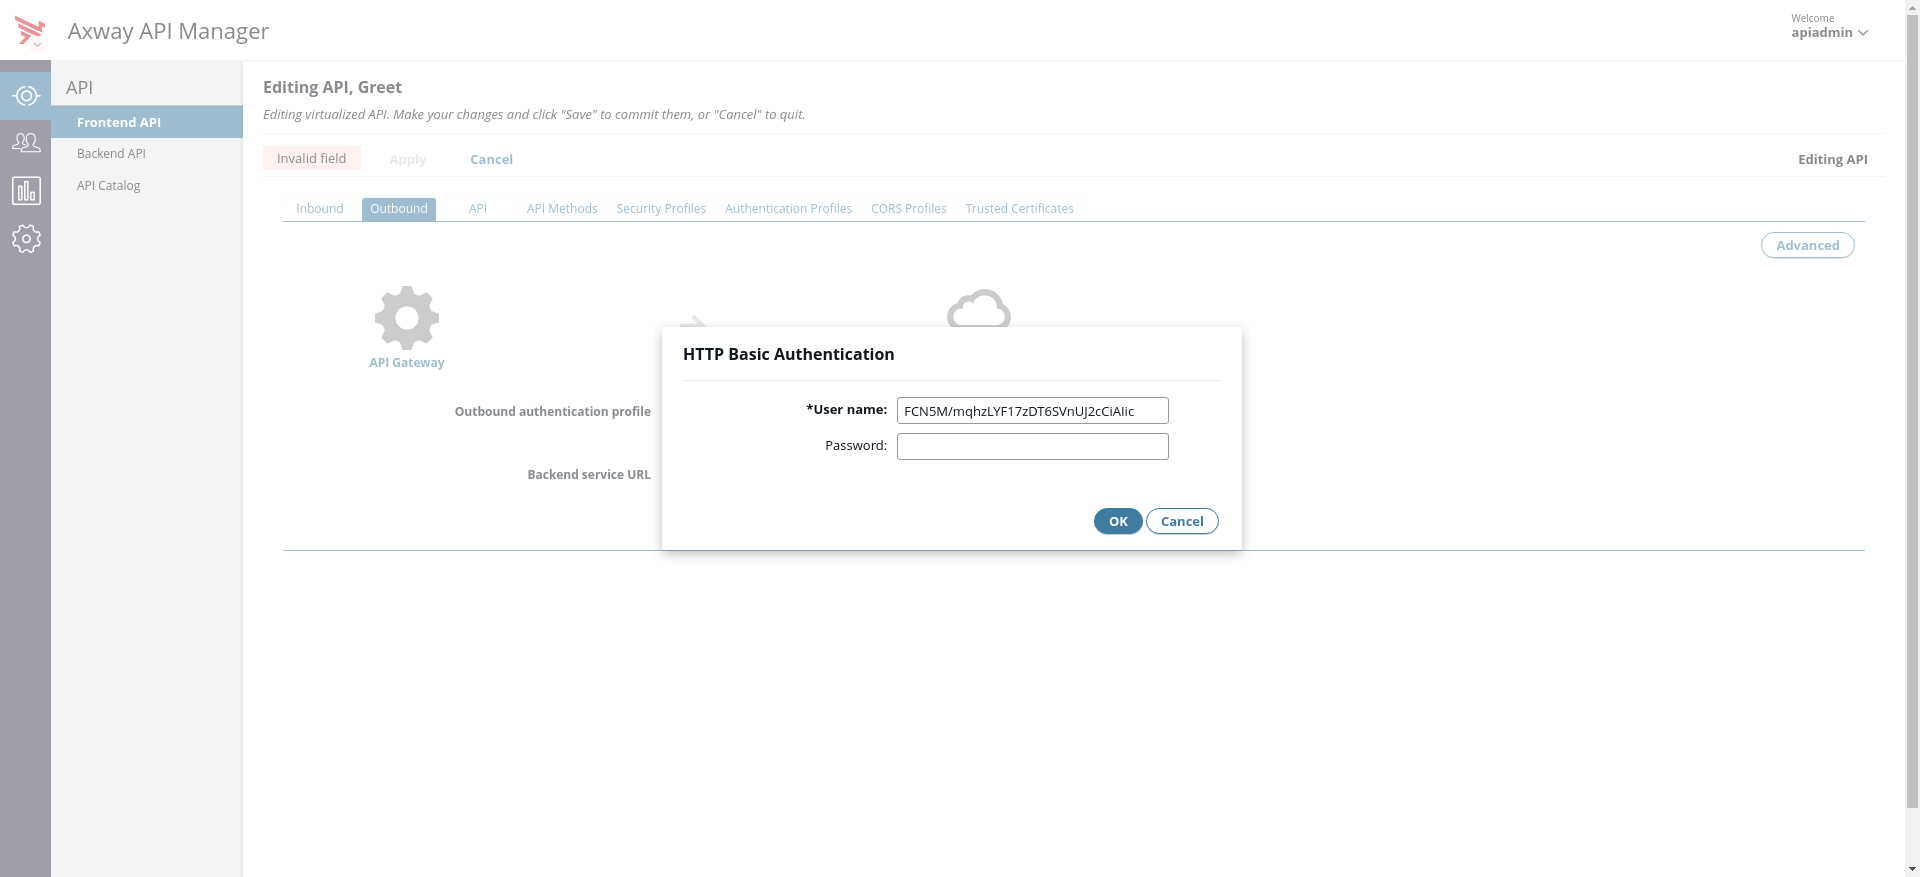
By default, API Builder services are secured using an API key. The default mechanism for passing this key is to use HTTP Basic authentication, where the key is the username, and the password is blank. If you are using a different authentication mechanism for your API Builder service, then this step might differ.
- On the Outbound tab, for Outbound authentication profile, select HTTP Basic.
- Add the Greet service API Key as the username.
Note
The API key is set in theconf/default.js file in your API Builder application and is also displayed on the console when the service starts.
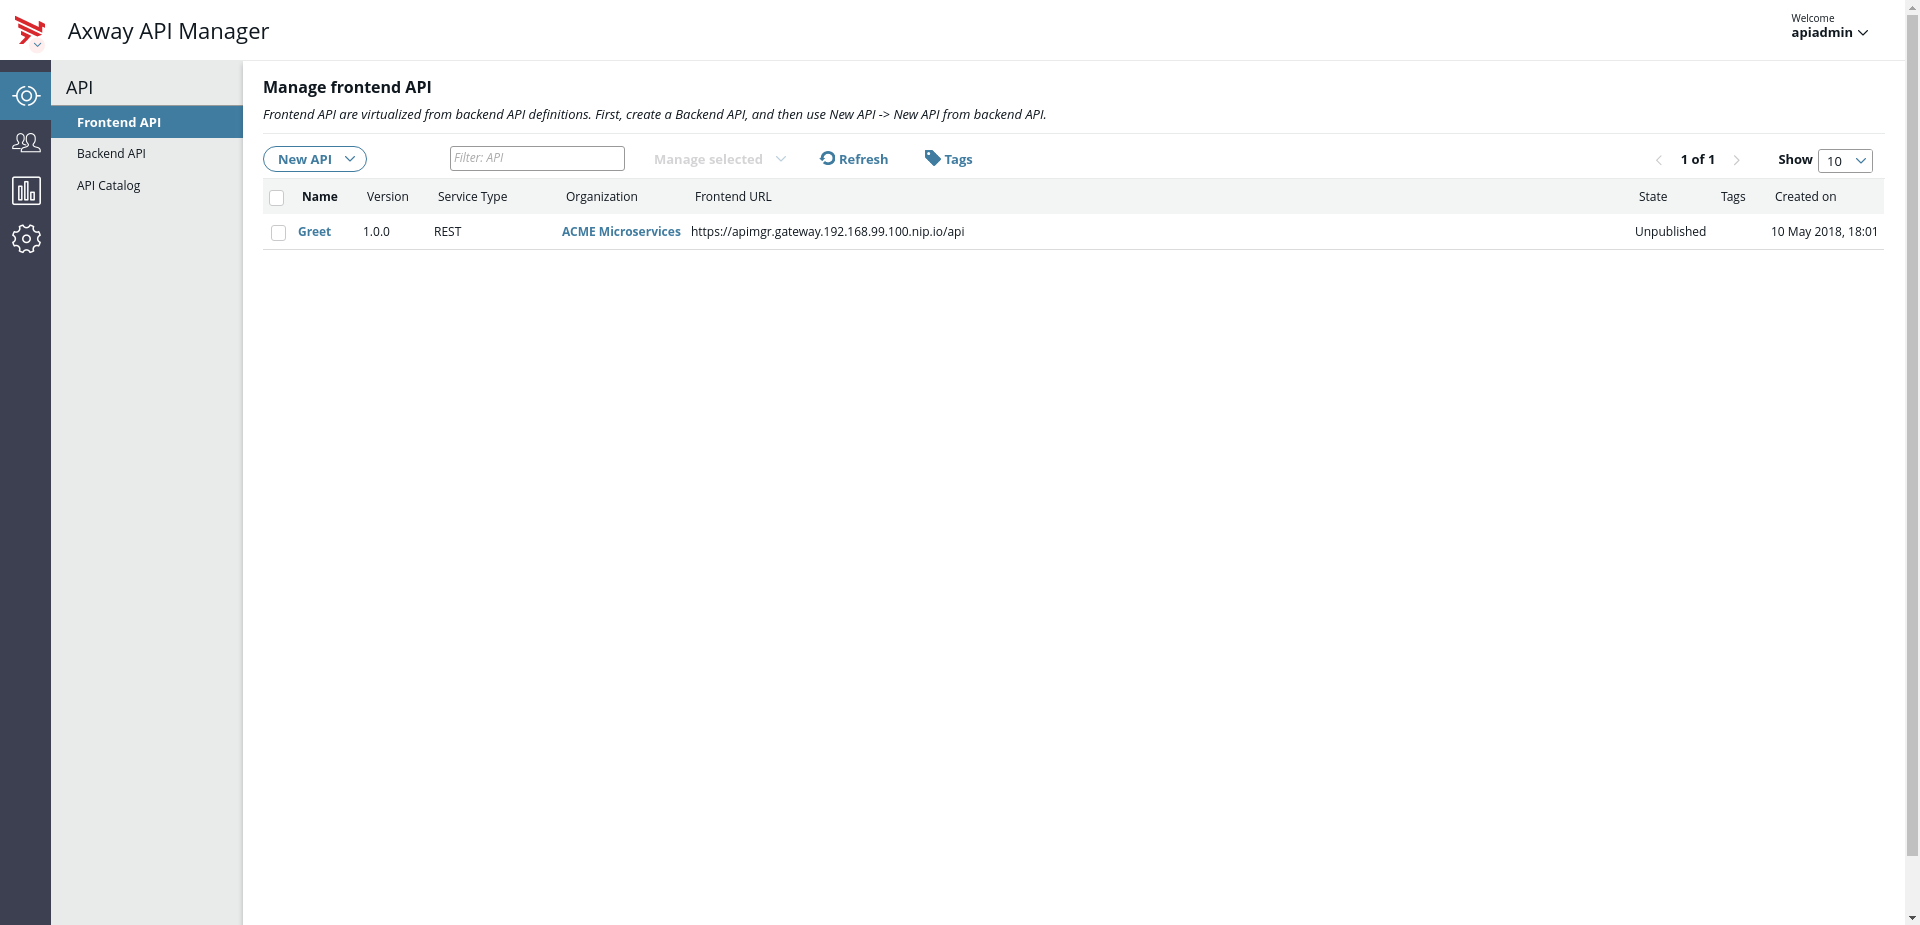
- Save the frontend API. The Greet API should now be listed as a Frontend API.
API catalog
The Greet API will now be listed in the API Catalog.
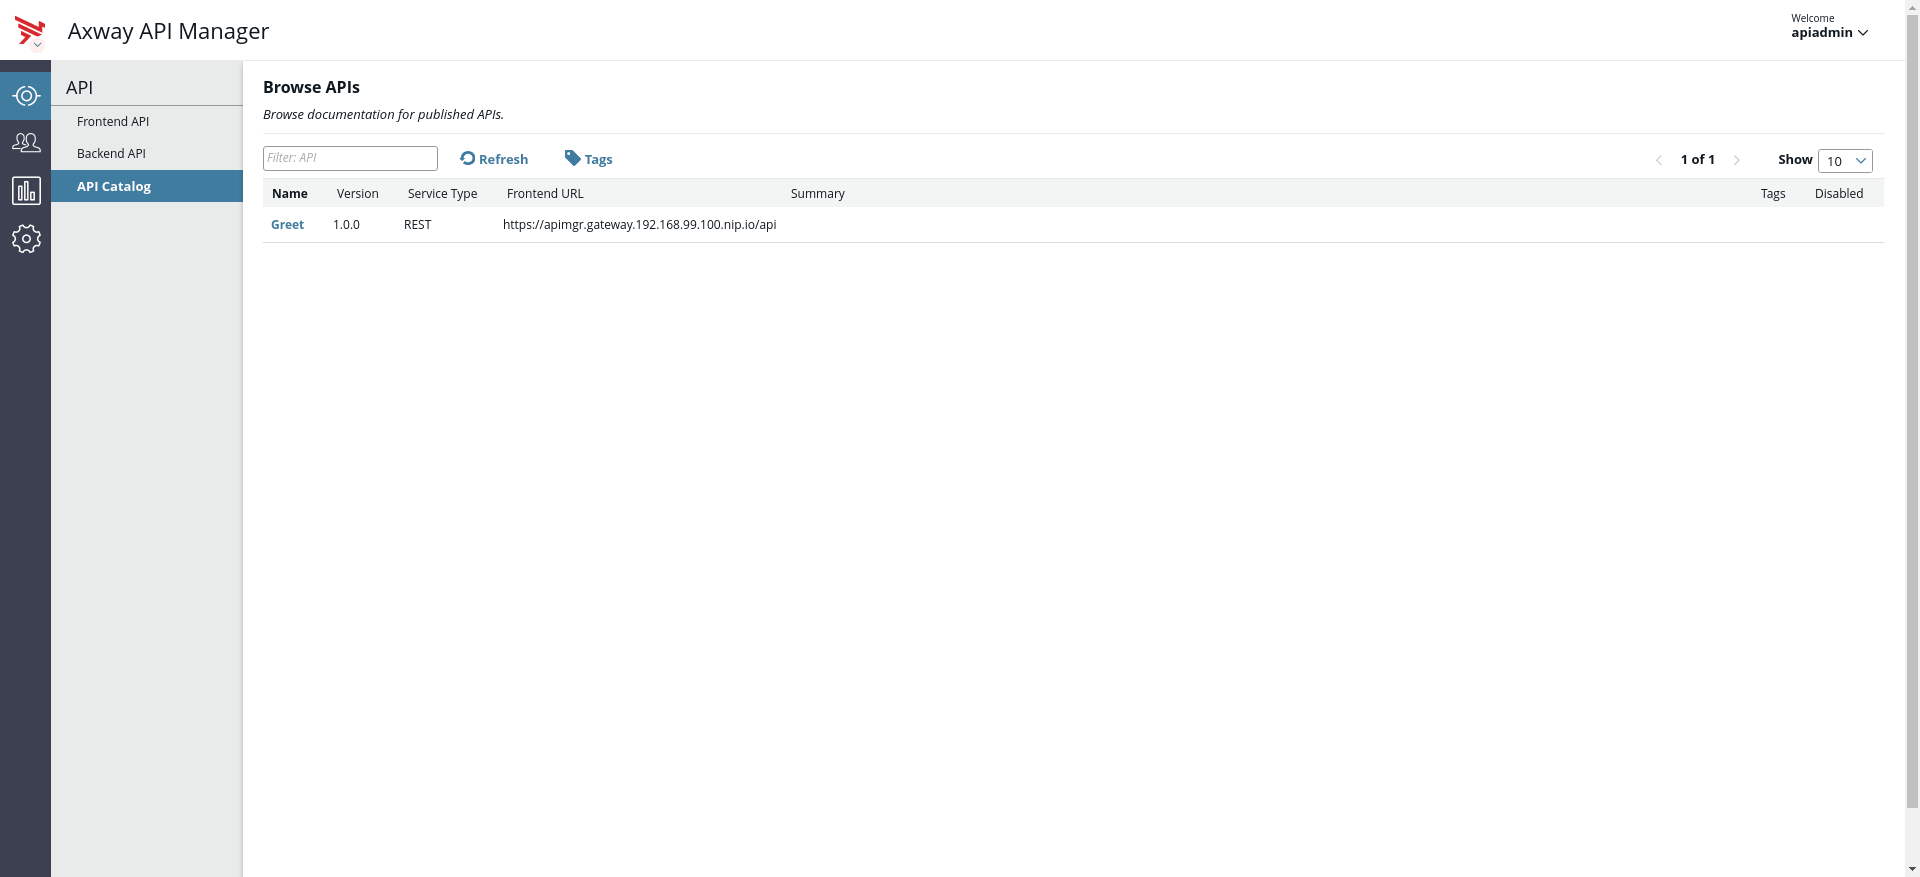
If you view the catalog entry for Greet, you can view the documentation and try out the APIs.
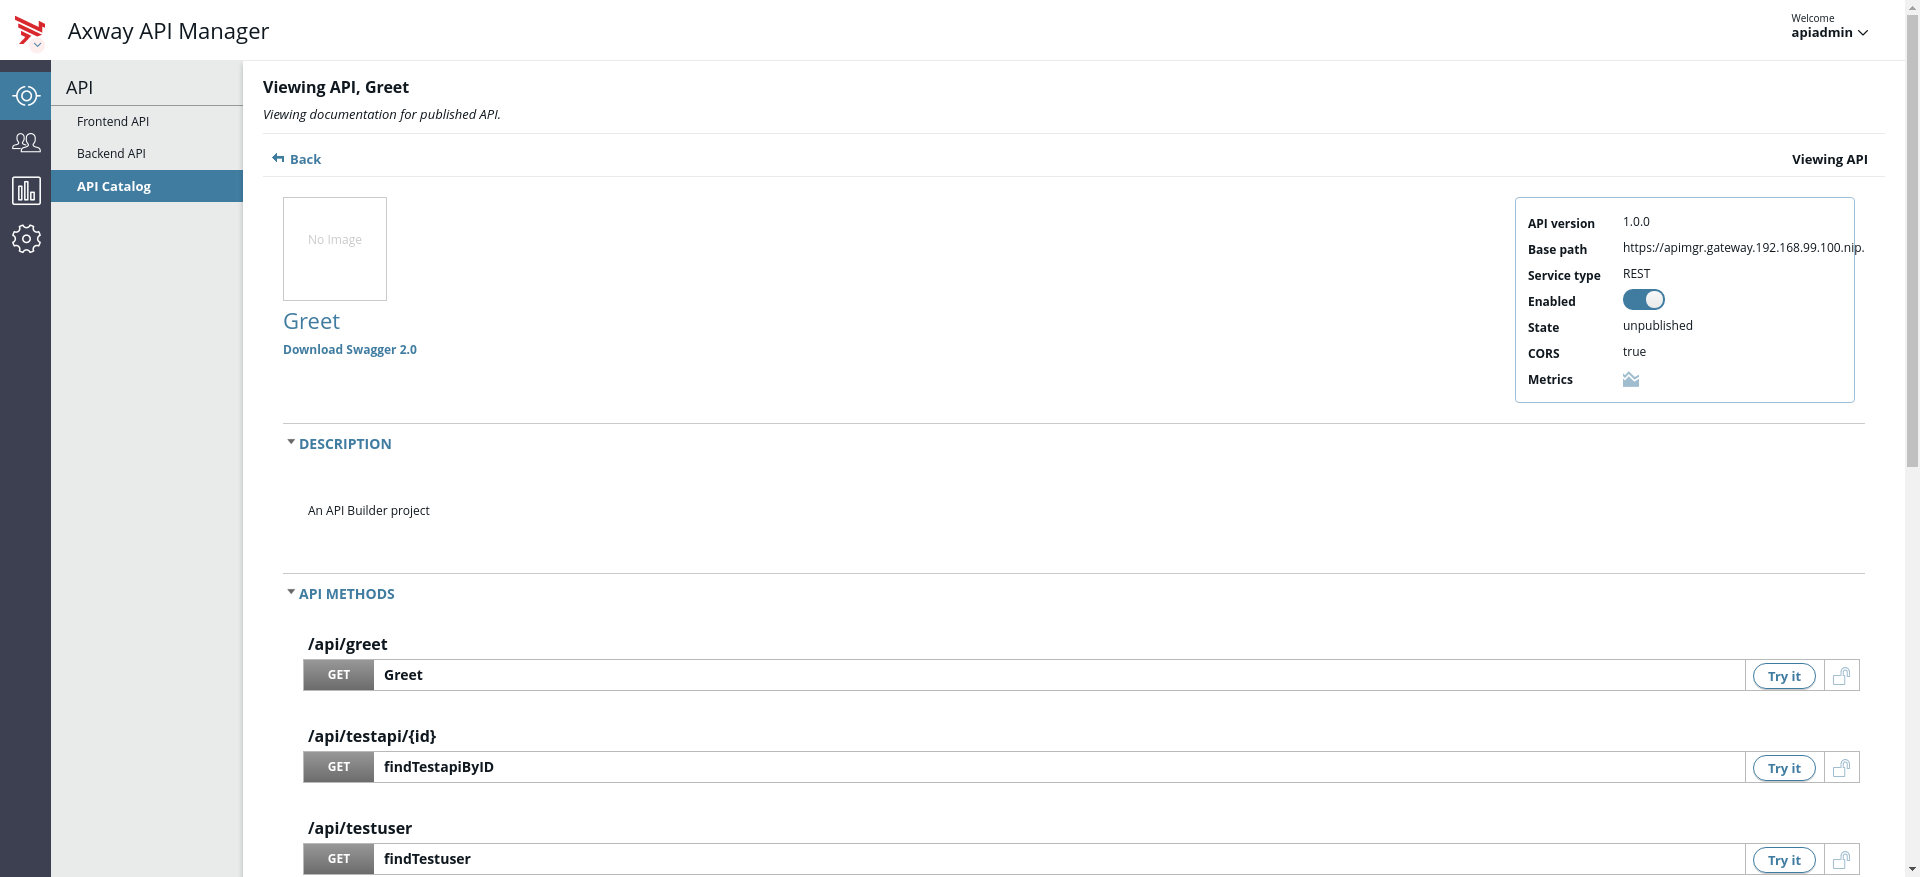
Testing the APIs
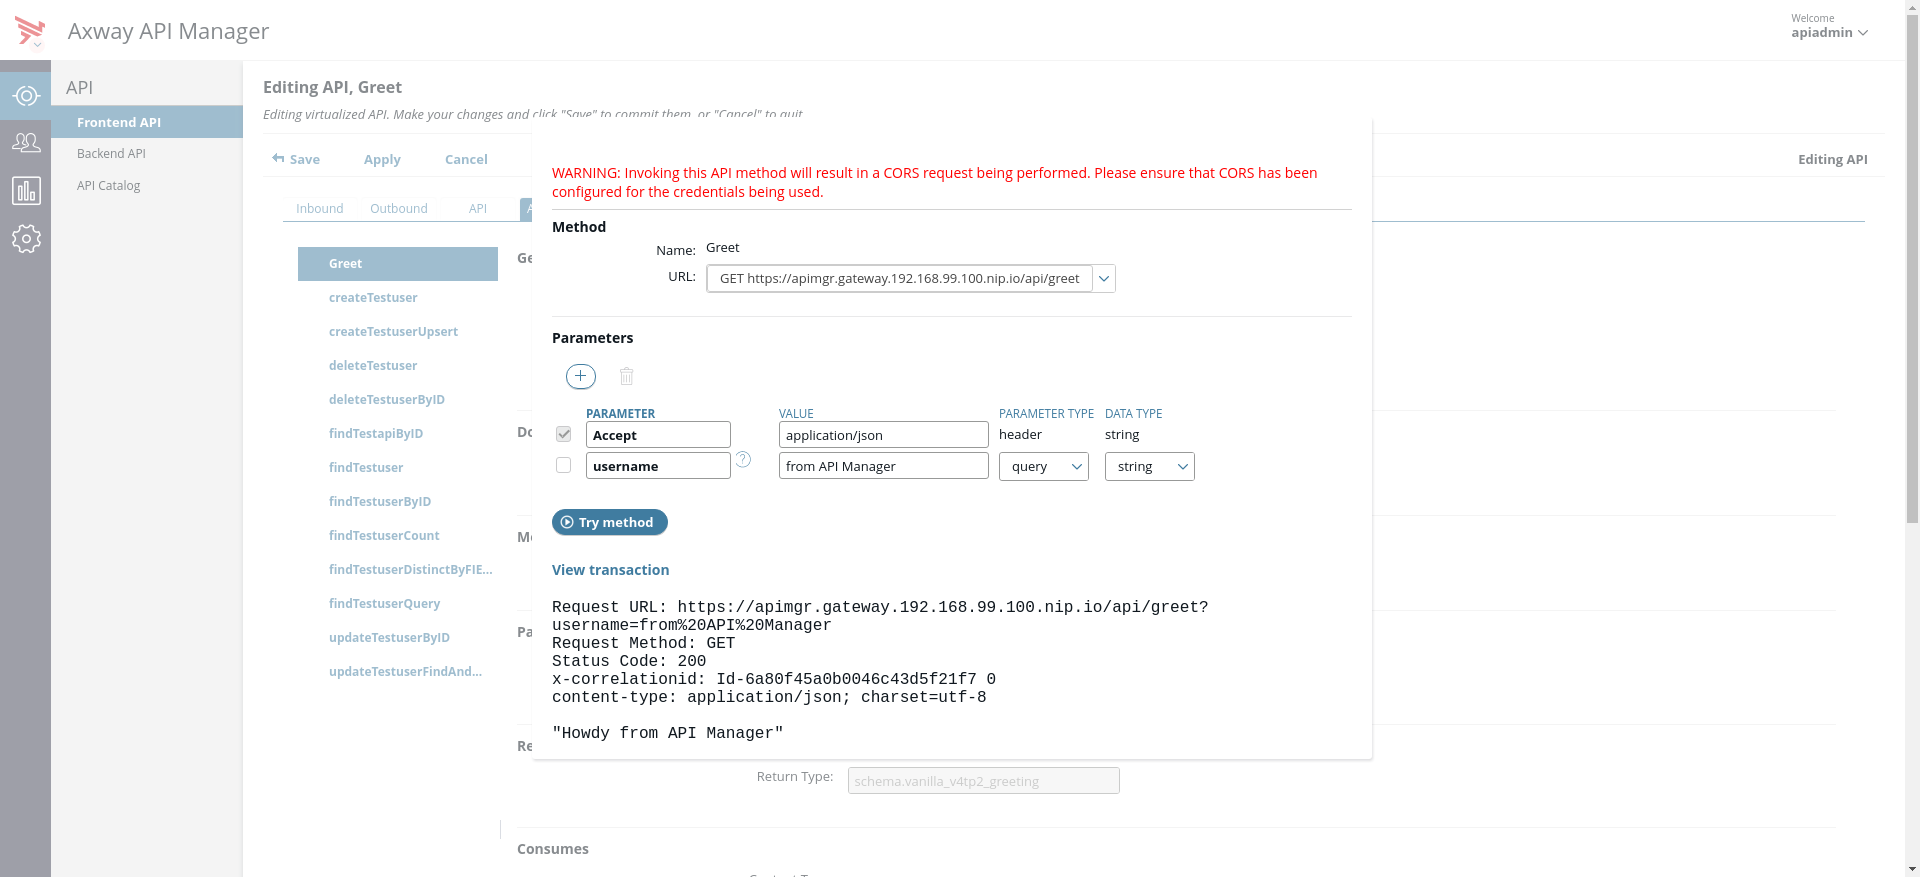
At this stage, you should be able to test your API using tools like cURL or Postman. However, for convenience, API Manager has built-in support for testing your APIs. This can be accessed via the catalog or in the Frontend API. Before using it, some extra configuration is required; the API Manager UI runs on port 8075, whereas the APIs managed by API Manager are hosted on port 8065. Browser security will treat this as a cross-origin request, so to test the APIs from the browser UI, we need to enable CORS.
- In the Frontend API section, open the Greet API and open its CORS section.
- Add a new CORS configuration.
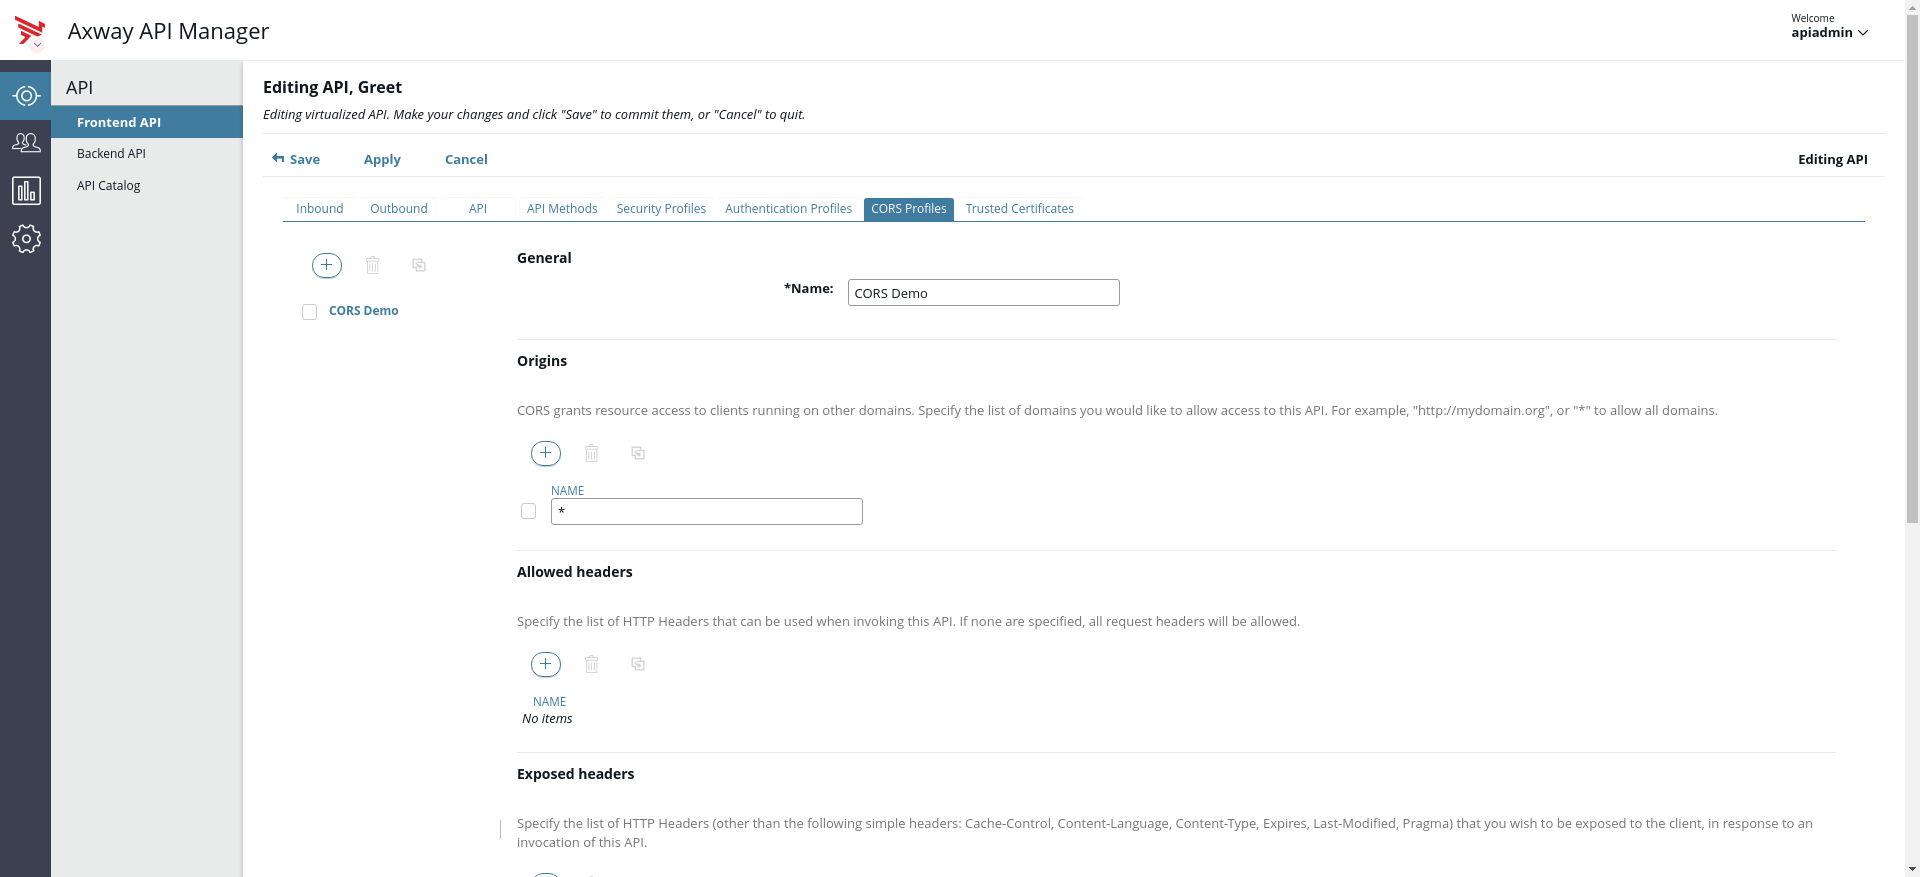
Note
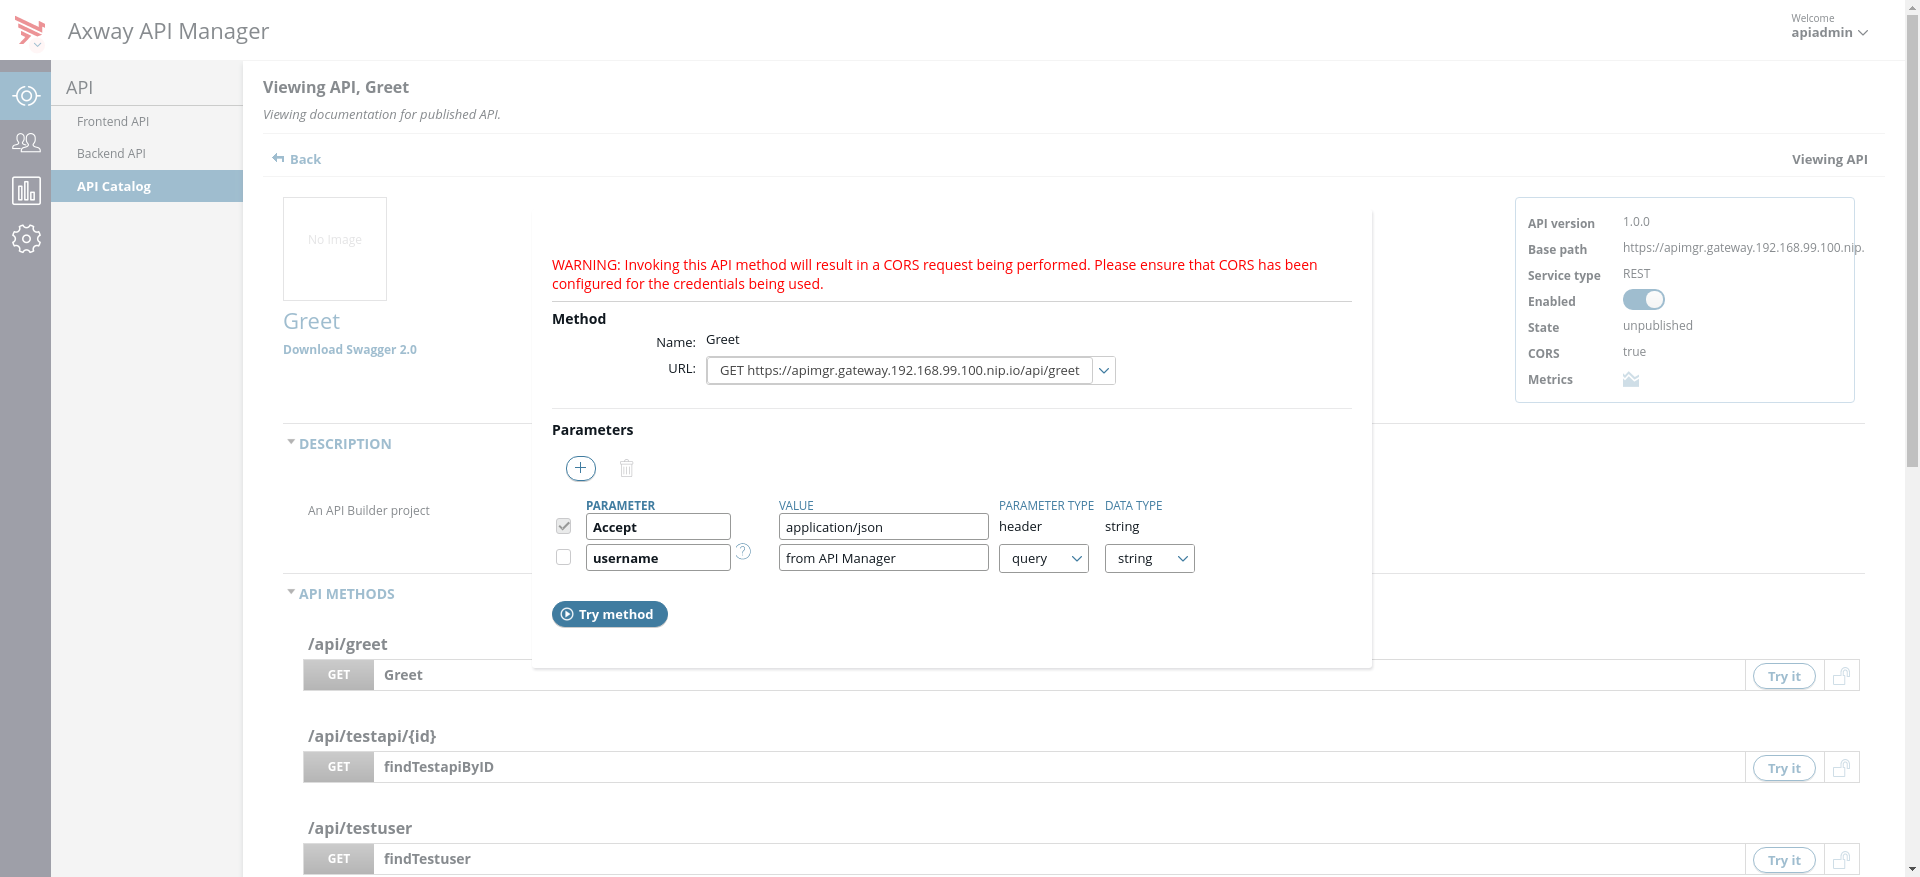
For convenience, we are granting access to all domains. Using * in production should only be done after assessing the security implications.To test the API, click the Try It button. In this case, we are testing GET /api/greet. This is a simple API that takes a username and responds with a greeting string.
Further integration
Now that your services are being managed by API Manager, you can leverage the entire arsenal of available features that it provides. These include:
- Built-in support for common authentication mechanisms such as OAuth, HTTP Basic, API Key, Two-way SSL, and more.
- Integration with third-party Identity Management (IM) infrastructures for authentication and authorization.
- Add governance to traffic using policies; for example, to ensure sensitive information is not being leaked in the response. See Configure API Manager settings in Policy Studio for further information.
- Apply quotas on APIs. See Administer APIs in API Manager for more information.