Authorization - access Microsoft OneDrive using REST flow-node
8 minute read
Overview
This example demonstrates how to configure API Builder to work with OneDrive. It will walk you through the steps of registering and configuring an Application with Microsoft. It will then walk you through setting up API Builder and authorizing it to access the Microsoft application.
We will then create a flow that uses the REST flow-node to invoke the OneDrive API and retrieve a list of contents.
Creating and configuring Microsoft Application
Before starting on API Builder, you need to register your application on the Microsoft application portal (https://apps.dev.microsoft.com/).
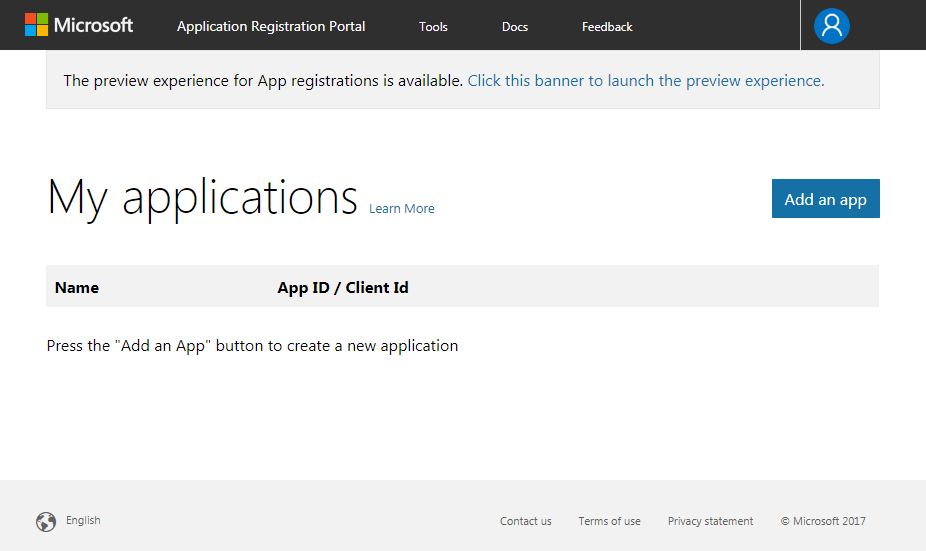
Add an app
-
Click Add an app.
-
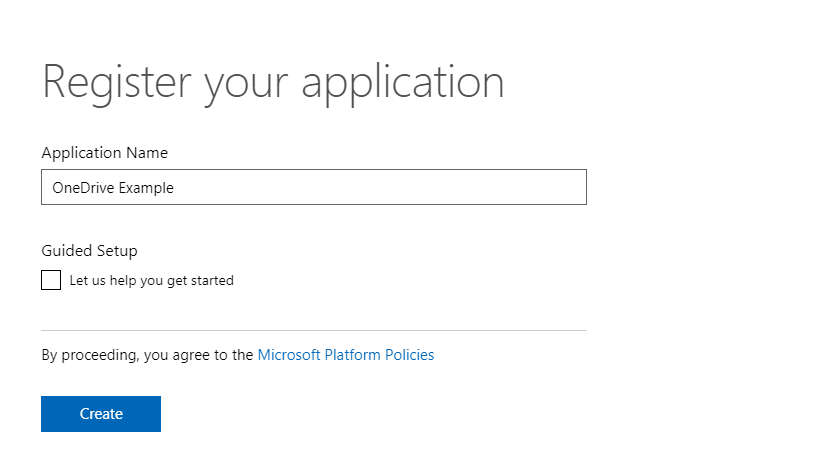
Name your application
OneDrive Exampleand click Create.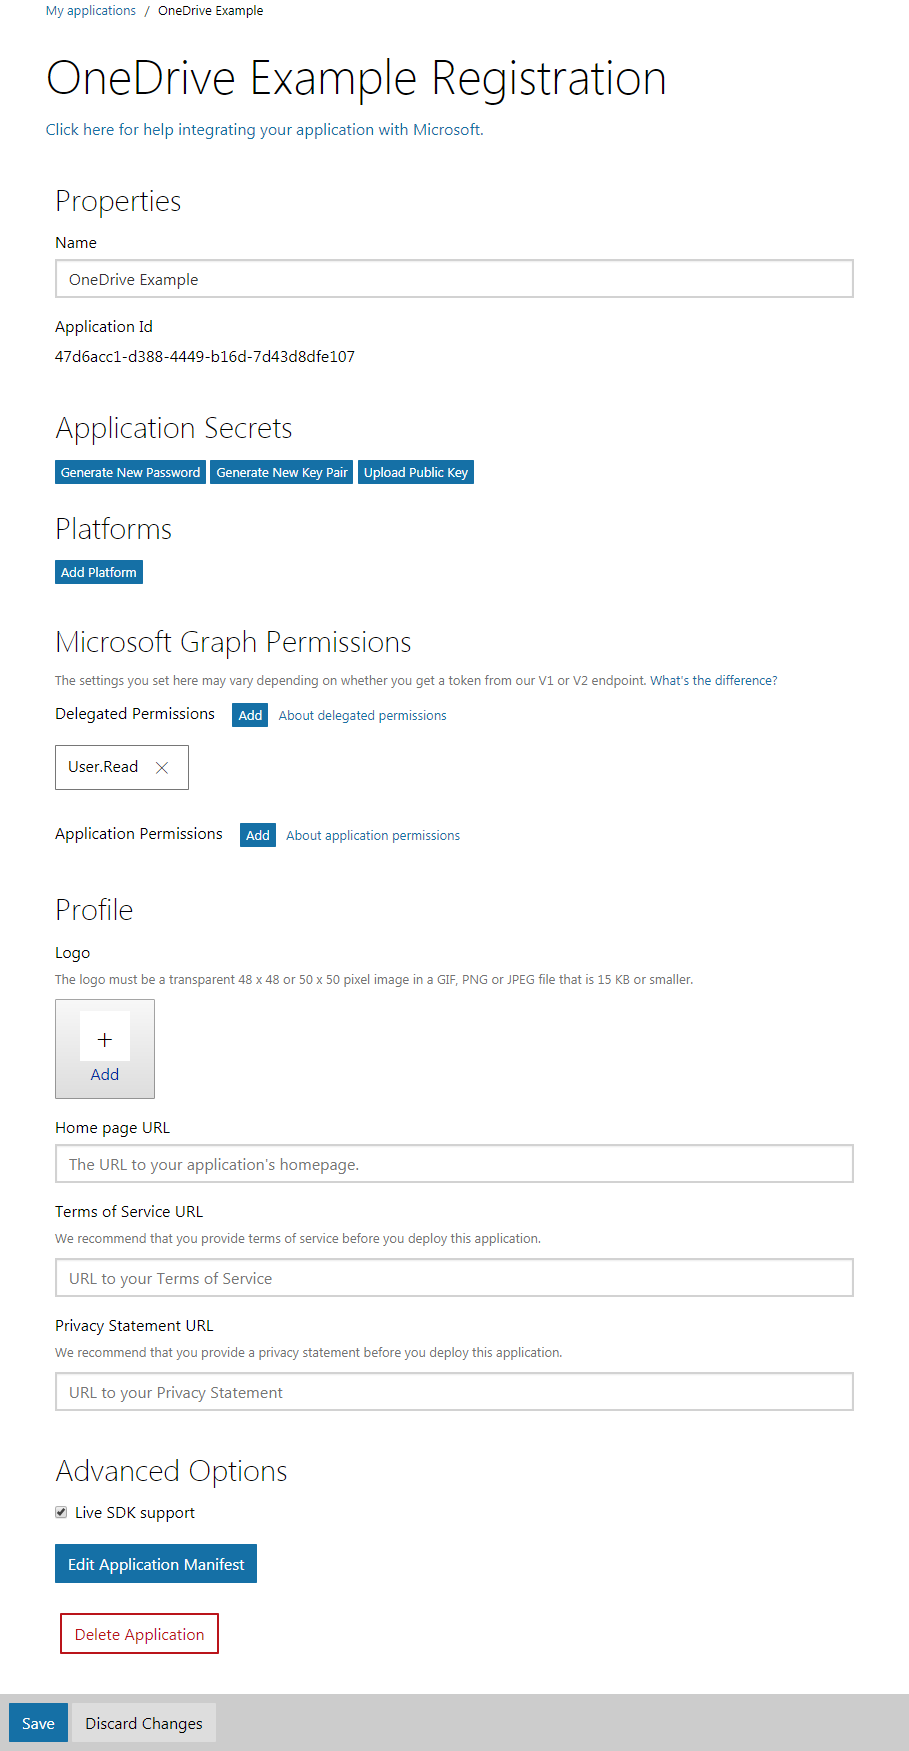
-
Click Save.
Configure application secrets
The Application Id displayed in the Properties section will be the value of the client_id in the API Builder credential. You also need to create a client_secret.

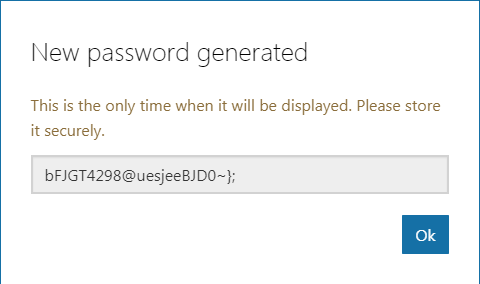
Click Generate New Password. The value displayed will be your client_secret; this is the only time it is visible, so make a note of the value and do not lose it. If you lose it, you can repeat this step to generate a new client secret.
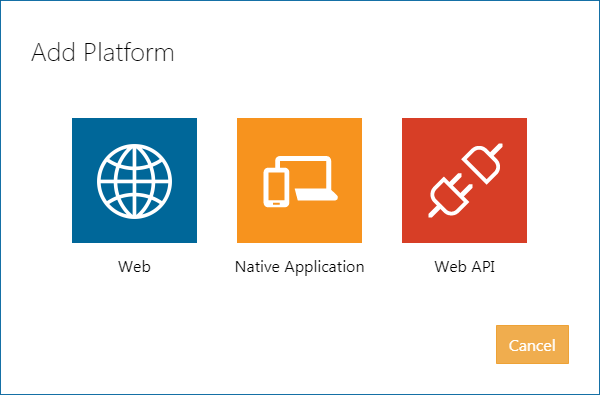
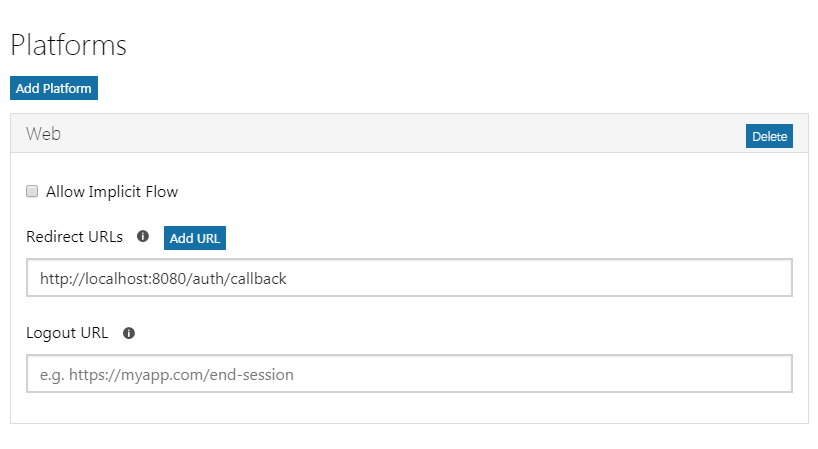
Configure platform
-
You need to add OAuth support to your application and add the API Builder redirect URI. Under Platforms, click Add Platform.
-
Select Web.
This will add a Web panel to the Platforms list.
-
Uncheck Allow Implicit Flow (API Builder will not be doing an implicit grant).
-
Set the Redirect URLs to
http://localhost:8080/auth/callback.
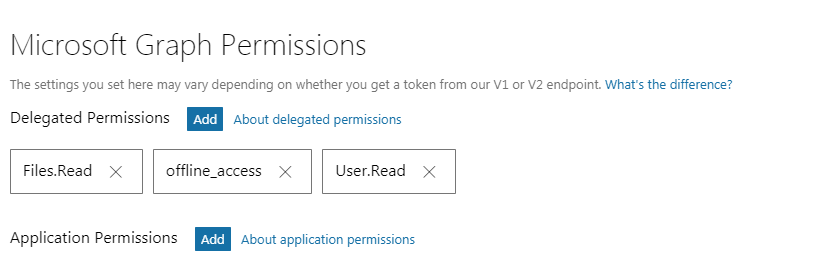
Configure permissions
In this example, you will be reading the user’s files.
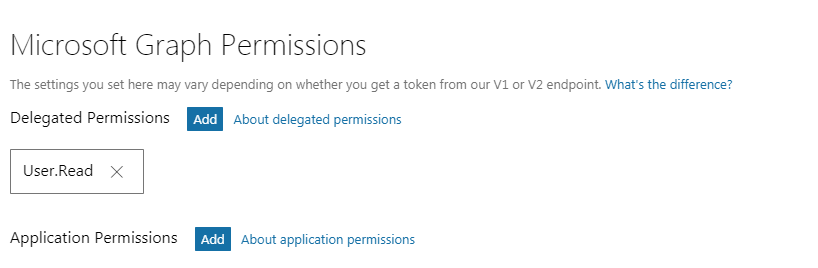
Click Add next to Delegated Permissions. From the list select:
- Files.Read
- offline_access
Save your application
If you have not already done it, save your application.
Setting up API Builder
Create an example application:
npx @axway/api-builder init onedrive-example
cd onedrive-example
npm install --no-optional
node .
Your service is now running and is accessible on http://localhost:8080/console.
Create OneDrive credential
For more information on OAuth 2.0 credentials, see OAuth 2.0 credentials.
To create the credential, you need the following information.
| Key | Value | Description |
|---|---|---|
| flow | accessCode | The OAuth 2.0 access code grant flow. |
| authentication_url | https://login.microsoftonline.com/common/oauth2/v2.0/authorize | The authorization URL will depend on the service to which you are connecting. Consult the vendor documentation for the values, for Microsoft’s identity service, see: https://developer.microsoft.com/en-us/graph/docs/concepts/auth_overview |
| token_url | https://login.microsoftonline.com/common/oauth2/v2.0/token | The token URL, like the authorization URL, will depend on the service you are connecting to. Consult the vendor documentation for the values, for Microsoft’s identity service, see: https://developer.microsoft.com/en-us/graph/docs/concepts/auth_overview |
| client_id | 47d6acc1-d388-4449-b16d-7d43d8dfe107 | This is the Application Id for the application you registered. |
| client_secret | bFJGT4298@uesjeeBJD0~}; | This is the secret you generated when registering the application. |
| scope | https://graph.microsoft.com/files.read offline_access | These are the scopes that our example application will require and which we have enabled earlier when creating the Application. For information on how scopes are formatted in Microsoft Graph see https://docs.microsoft.com/en-us/azure/active-directory/develop/v2-permissions-and-consent |
| access_token | null | This value must be present, and null for this example. |
| refresh_token | null | This value must be present, and null for this example. |
-
On the Configuration tab, open the
default.jsfile. Scroll to thecredentialsection of the file. Create a new OAuth 2.0 credential:// default.js authorization: { callback: '/auth/callback', credentials: { 'My OneDrive': { type: 'oauth2', flow: 'accessCode', authentication_url: 'https://login.microsoftonline.com/common/oauth2/v2.0/authorize', token_url: 'https://login.microsoftonline.com/common/oauth2/v2.0/token', client_id: '47d6acc1-d388-4449-b16d-7d43d8dfe107', client_secret: 'bFJGT4298@uesjeeBJD0~};', scope: 'https://graph.microsoft.com/files.read offline_access', access_token: null, refresh_token: null } } } -
Click Save and then open the Credentials tab.
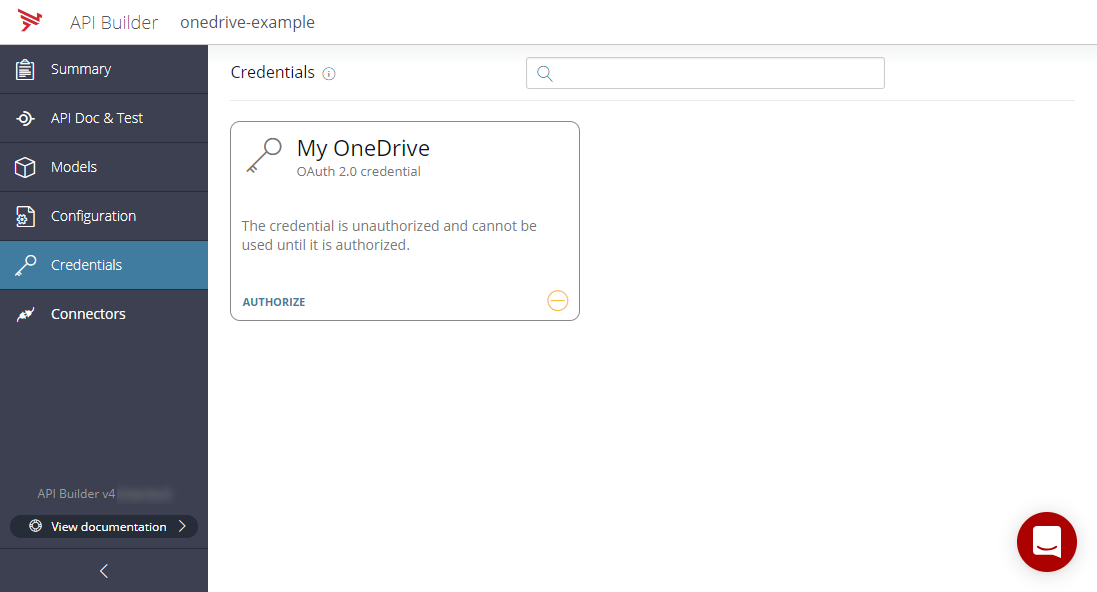
If everything went well, you should now have a credential named My OneDrive.
-
The credential has not been authorized. To authorize the credential, click Authorize.
-
Once you have logged in, you will be prompted to authorize access.
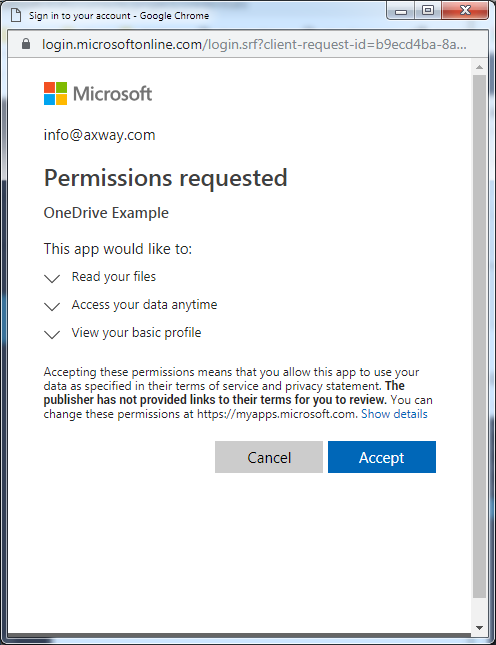
-
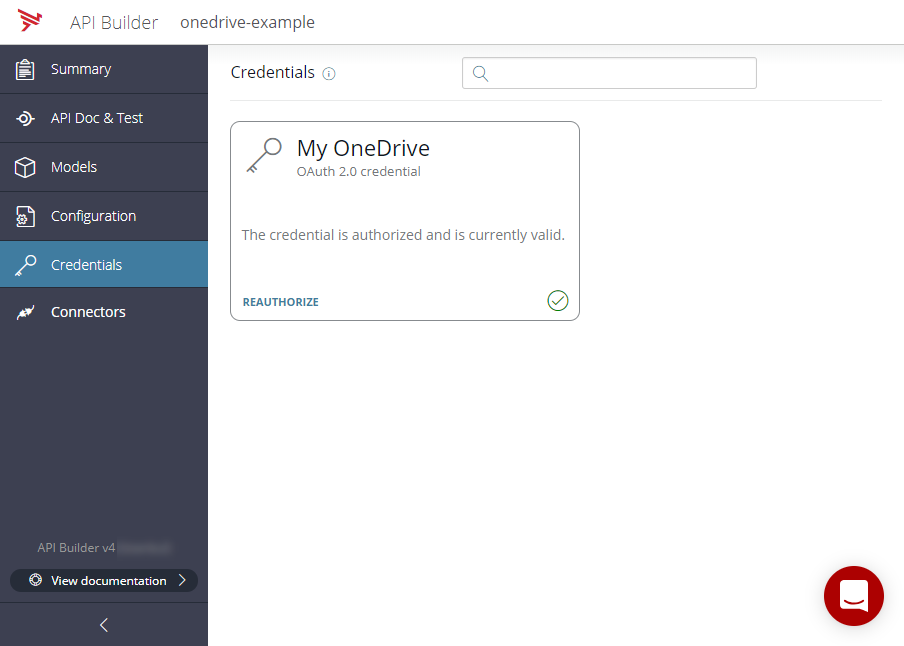
Click Accept. The credential is now ready to use.
Note
By default, the access tokens issued by Microsoft will expire in 1 hour. API Builder will keep the access token valid by refreshing it before its expiration; this is why it needs theoffline_access scope. However, the access token and refresh token are stored in memory only, and if you restart API Builder, you will need to authorize the credential again.
Create a flow to list the OneDrive contents
Before creating the flow, you need to import the API that will expose your flow. Stoplight.io is a great resource for designing APIs and was used to create a very simple API used for this example. This is a very simple API with a single endpoint.
Create the onedrive.json Swagger document
-
Copy the following code into a text editor such as Notepad++:
// onedrive.json { "swagger": "2.0", "info": { "title": "One Drive Auth Demo API", "version": "1.0", "description": "A sample API for the API Builder OneFrive Authorization Demo.", "license": { "name": "MIT" }, "contact": { "name": "Axway", "email": "sales@axway.com", "url": "http://www.axway.com" } }, "host": "localhost:8080", "paths": { "/contents": { "get": { "responses": { "200": { "description": "", "schema": { "type": "object", "properties": {} } }, "400": { "description": "" }, "500": { "description": "" } }, "summary": "This endpoint will list the contents of the OneDrive account.", "operationId": "GetContents", "consumes": [ "application/json" ], "produces": [ "application/json" ], "description": "Get the contents of the OneDrive account.", "tags": [ "api-builder", "onedrive", "authorization" ] } } }, "basePath": "/api", "schemes": [ "http" ], "consumes": [ "application/json" ], "produces": [ "application/json" ], "tags": [ { "name": "api-builder onedrive authorization" }, { "name": "api-builder" }, { "name": "onedrive" }, { "name": "authorization" } ] } -
Name the file
onedrive.jsonand save the file. You will import this file as an API Endpoint.
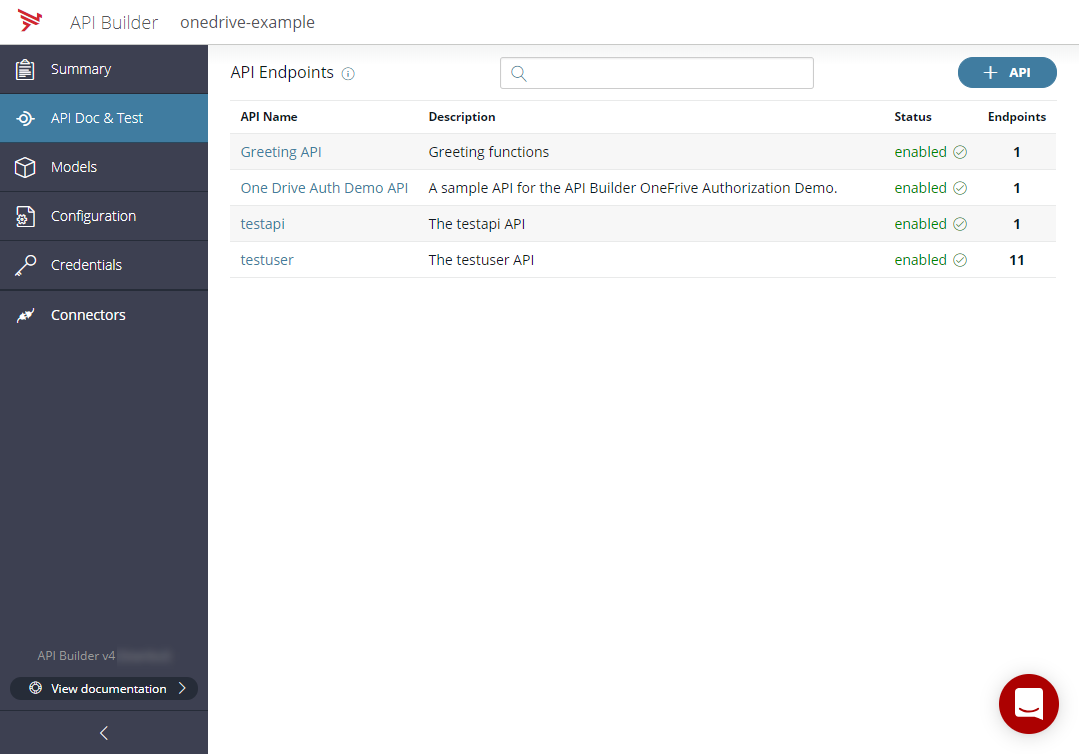
Import the API Endpoint
-
Open the API Doc & Test tab.
-
Click +API.
-
Import the
onedrive.jsonSwagger document. Refer to Create the onedrive.json Swagger document.
-
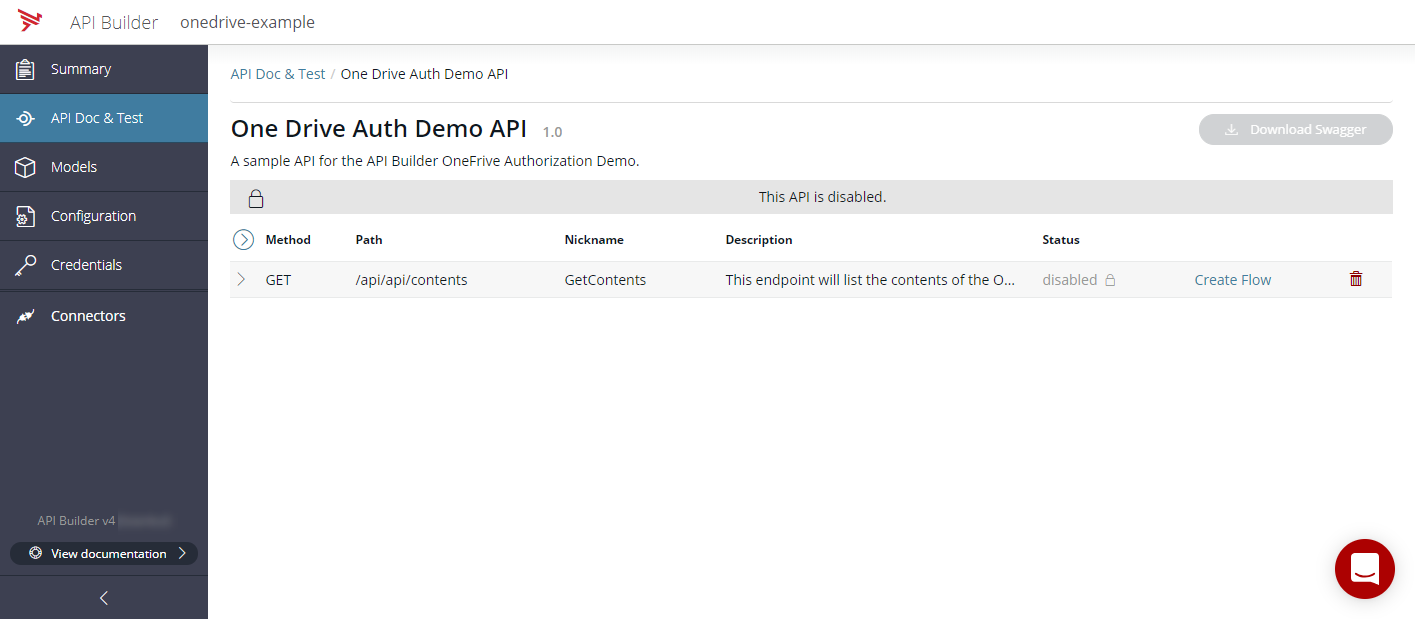
Click Save. This will create the API endpoint in a disabled state, as there is no flow attached to it.
Create the flow for the API Endpoint
On the disabled endpoint, there is a Create Flow icon. Clicking Create Flow will start the Flow Editor where you can create the logic for your API.
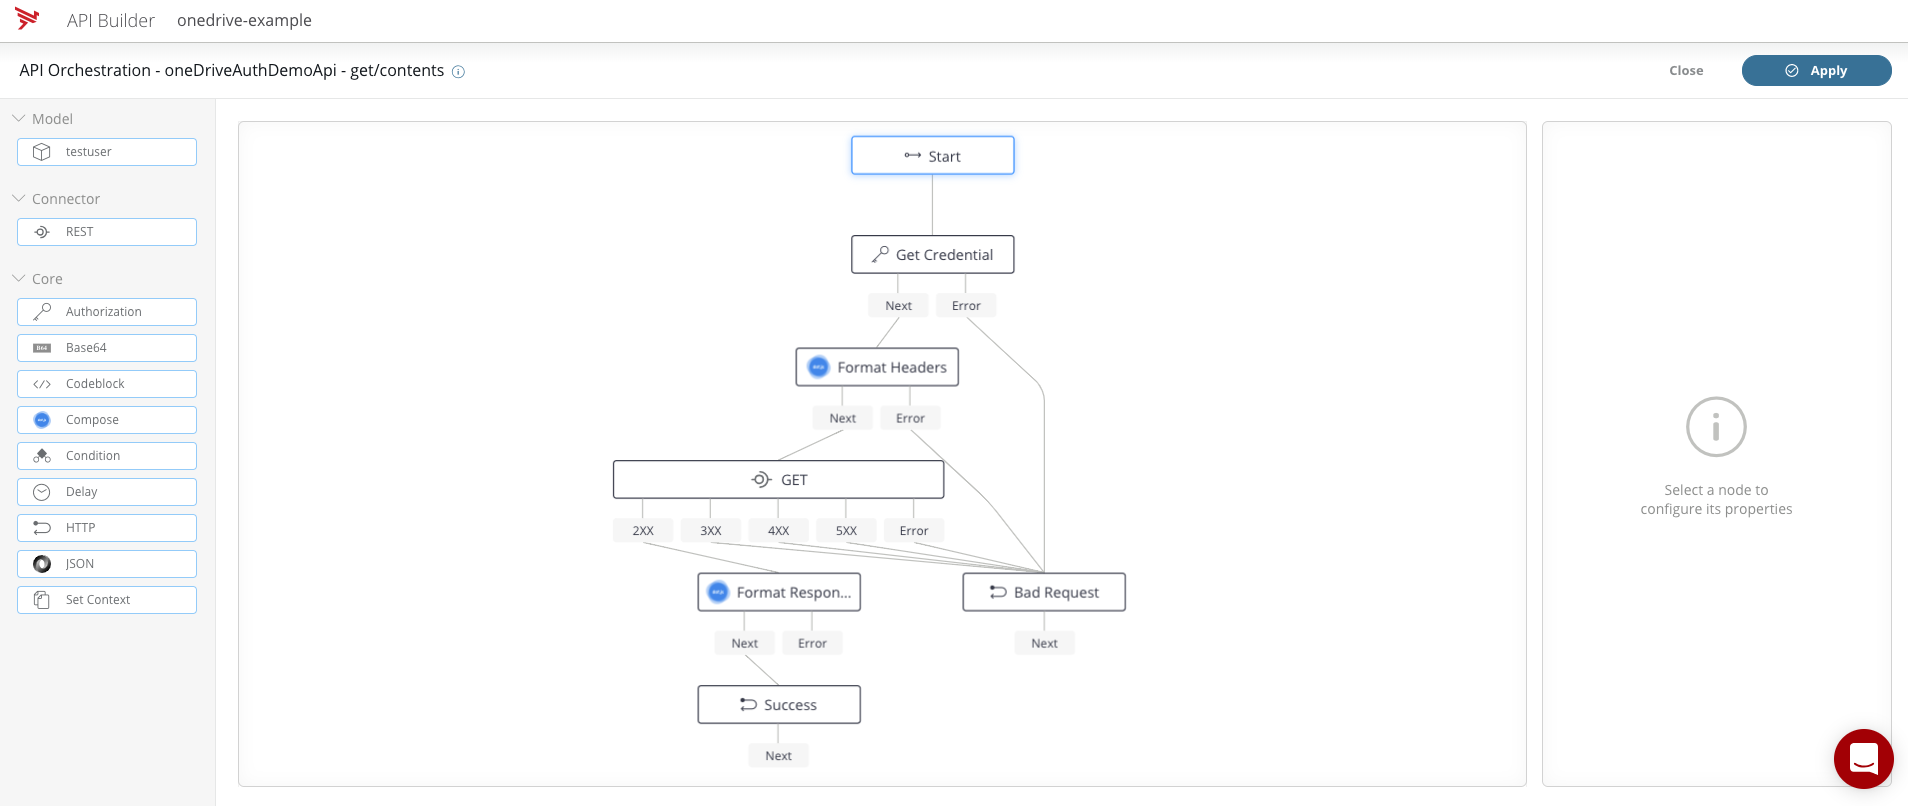
We will go through the steps to create the flow, but for reference, the completed flow that we are building will look like this:
-
Drag an Authorization flow-node from the tool panel. The Authorization flow-node only has a single
Get Credentialmethod. This method allows us to retrieve the managed credential token from API Builder.- On the Parameters tab, set the name to be
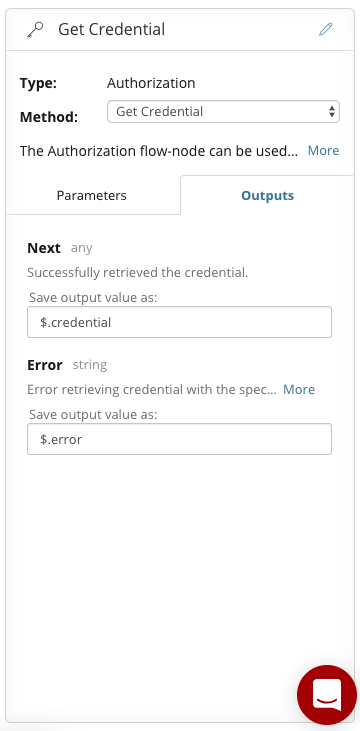
My OneDrive. This is the name you gave your OneDrive credential when creating it in the configuration. - On the Outputs tab, you can see that the credential token is stored in
$.credential. We will use this later when invoking OneDrive.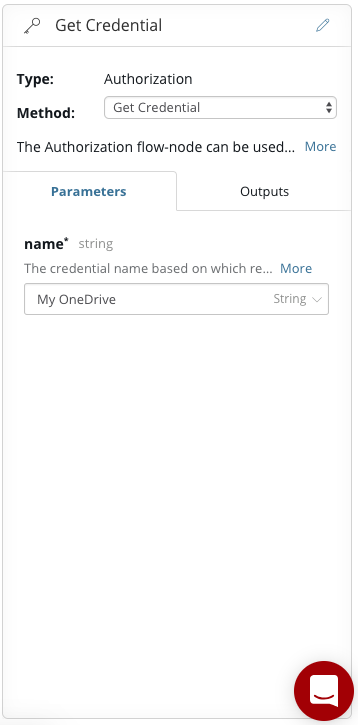
- On the Parameters tab, set the name to be
-
Drag a Compose flow-node from the tool panel and select the
Format objectmethod. We will use this node to create the request headers object that will contain the authorization token.- Connect the next output of the Get Credential node to the new Format object node.
- Click on the Format object title and rename it to Format Headers for clarity.
- On the Parameters tab, set the data to be
$.credential,and set the template to:
{ "Authorization": "Bearer {{=it}}" }-
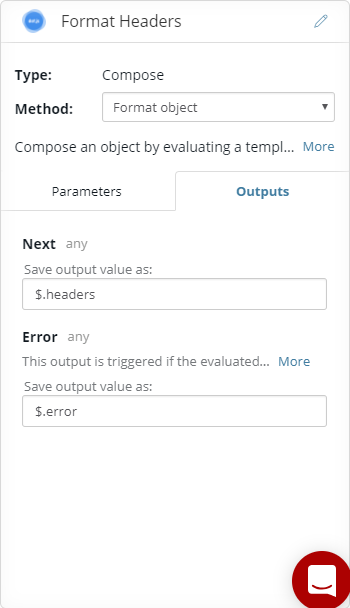
On the Outputs tab, change the Next output to
$.headers.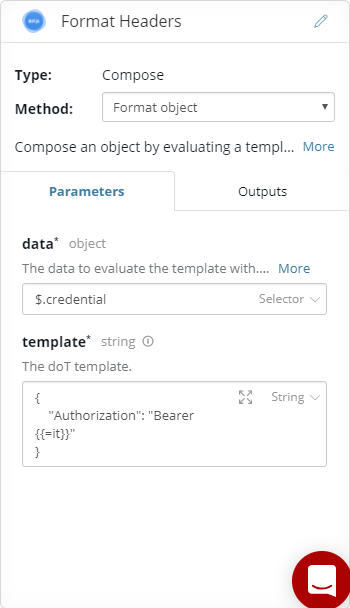
-
Drag in a REST flow-node from the tool panel and select the GET method. This is the node that will make the request.
-
Connect the Next output of the Format Headers node to the new GET node.
-
On the Parameters tab, set the URL to https://graph.microsoft.com/v1.0/me/drive/root/children. Microsoft has a useful Graph Explorer tool that you can use to explorer their API.
-
Also, set the Headers to
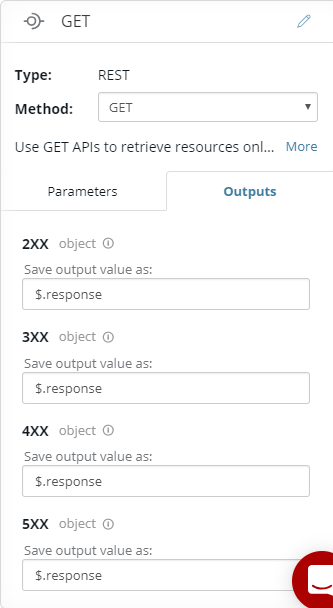
$.headers, which is the object you created in the previous step.On the Outputs tab, you will see that the 2XX response is stored as
$.response. We will extract the response data from that later.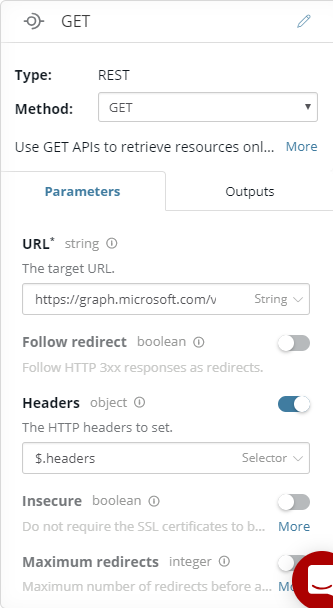
-
-
Drag in another Compose flow-node from the tool panel and select the
Format objectmethod. We will use this node to create a response body.-
Connect the 2XX output of the GET node to the new Format object node.
-
Click on the Format object title and rename it to Format Response for clarity.
-
On the Parameters tab, set the data to be
$.response.bodyand set the template to:[ {{~it.value :entry:index}} {{? index }}, {{?}} { "name": {{=JSON.stringify(entry.name)}}, "webUrl": {{=JSON.stringify(entry.webUrl)}} } {{~}} ] -
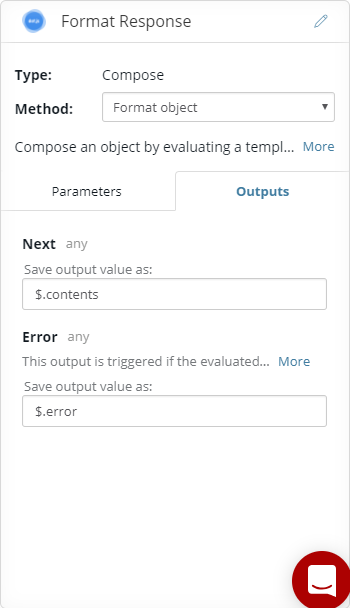
On the Outputs tab, change the Next output to
$.contents.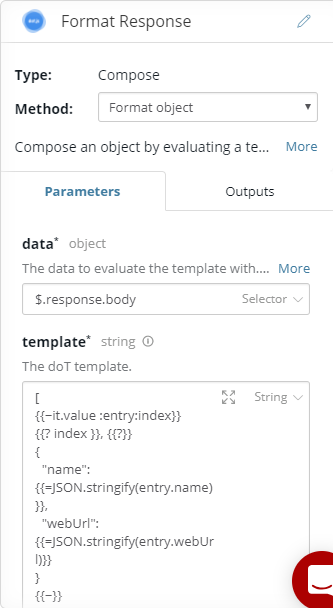
-
-
Drag an HTTP flow-node from the tool panel; this only has a single
Set HTTP Responsemethod. We will use this node to configure the response that is returned to the caller.- Connect the Next output of the Format Response node to the new Set HTTP Response node.
- Click on the Set HTTP Response title and rename it to Success for clarity.
- On the Parameters tab, set the status to be of type Number with the value 200. Set the body to $.contents.
-
Drag in another HTTP flow-node from the tool panel. We will use this node to configure the error response that is returned to the caller in the event of an error. For this demonstration, we will have a single error status - 400.
- Connect all the error outputs and all the unconnected outputs from the GET node to the Set HTTP Response node.
- Click on the Set HTTP Response title and rename it to Bad Request for clarity.
- On the Parameters tab, set the status to be of type Number with the value 400. Set the body to
$.error.message.
-
Click Apply and Close.
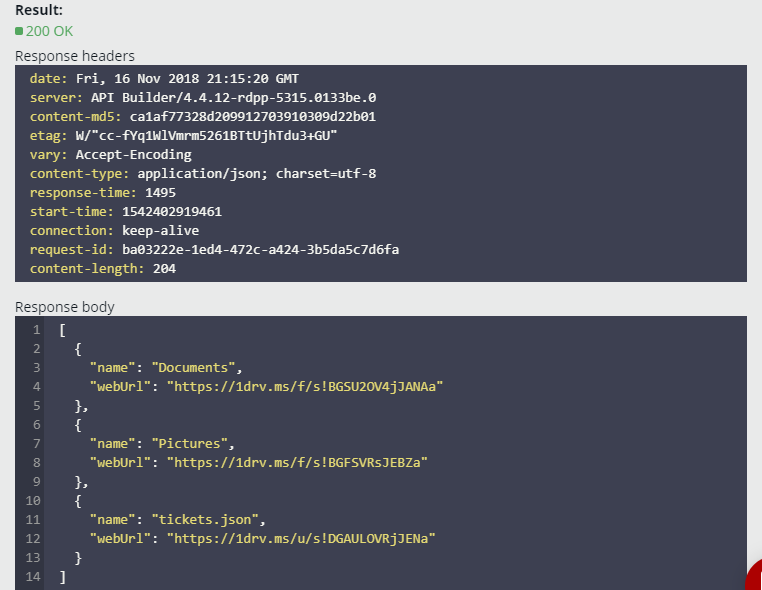
Test your Endpoint
-
Open the Credentials tab and check that your credential is authorized. If it is not, perform the credential authorization.
-
Open the API Doc & Test tab.
-
Click on your One Drive Auth Demo API and expand the GET method.
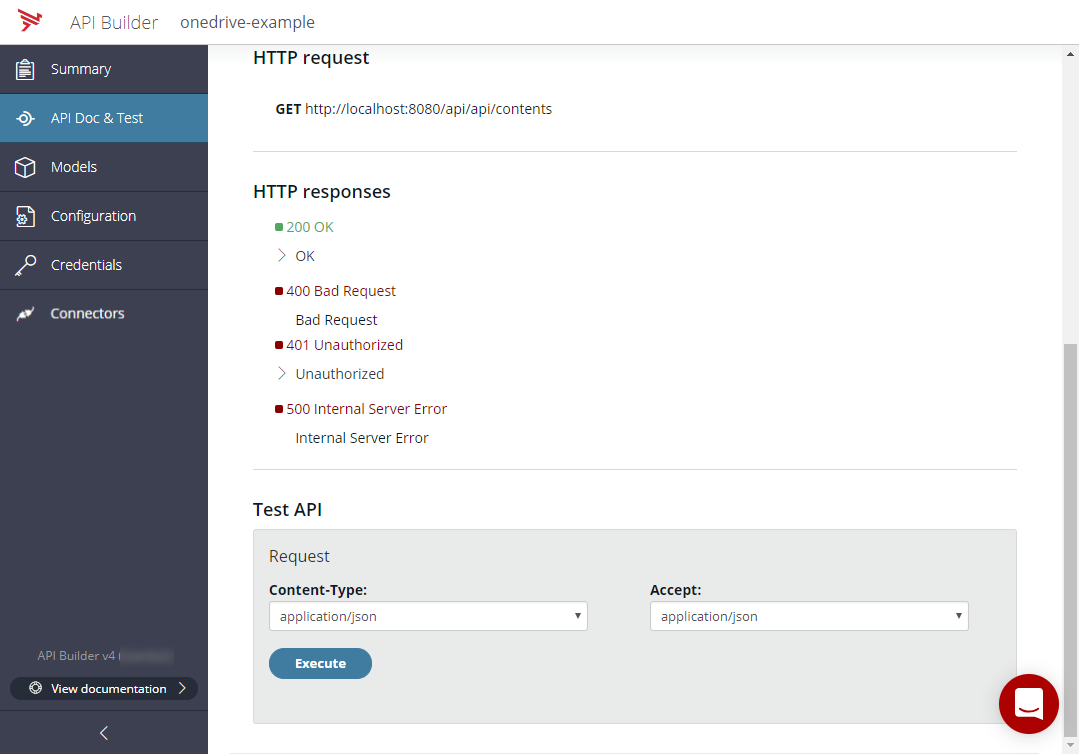
-
Click Execute to test your API. You should get back a list of the name and webUrls of the contents of your OneDrive account.
This was a simple integration between API Builder and OneDrive to access the list of contents, but this same approach applies to the entire Microsoft Graph API, and so the integration possibilities are endless.