Authorization - access Gmail using OpenAPI client
5 minute read
Overview
This example demonstrates how to configure an API Builder application to work with Gmail. It will walk you through the steps of registering and configuring an application with Google. It will then walk you through setting up API Builder and authorizing it to access the Google application.
We will then create a flow that uses the OpenAPI client plugin to invoke the Gmail API and retrieve the number of the emails received from a provided address.
Creating a new Google application
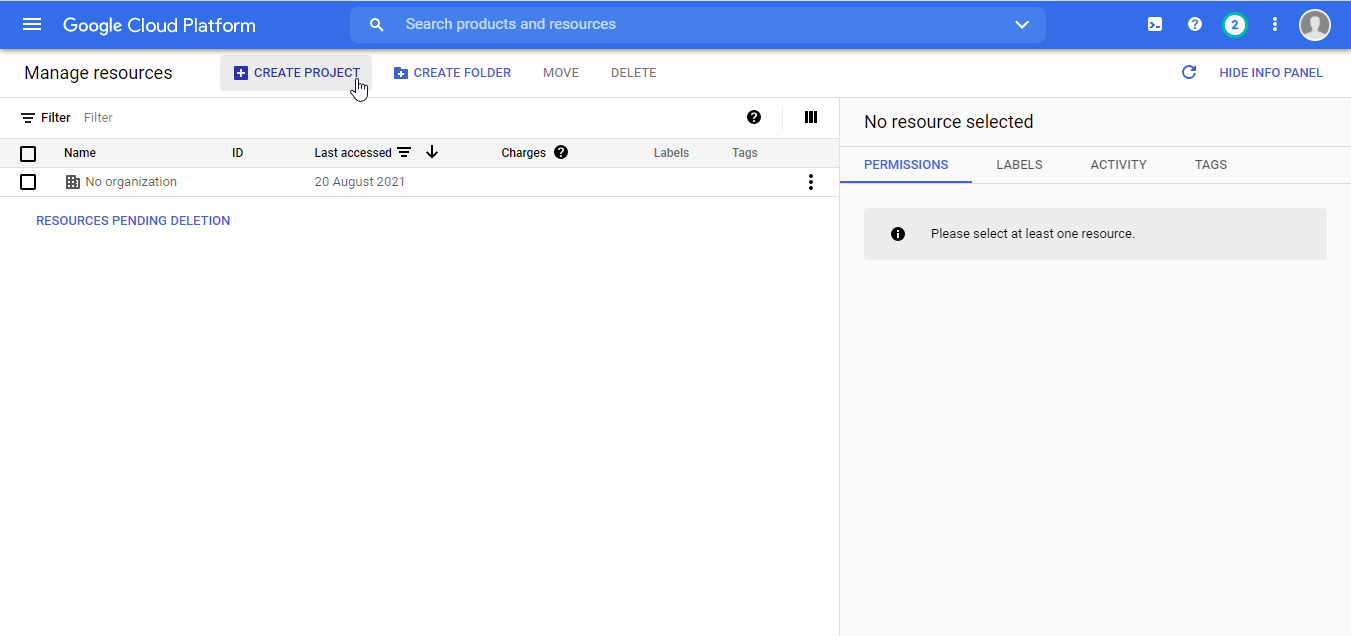
Before starting on API Builder, you need to register your application on the Google developer console (https://console.developers.google.com/cloud-resource-manager).
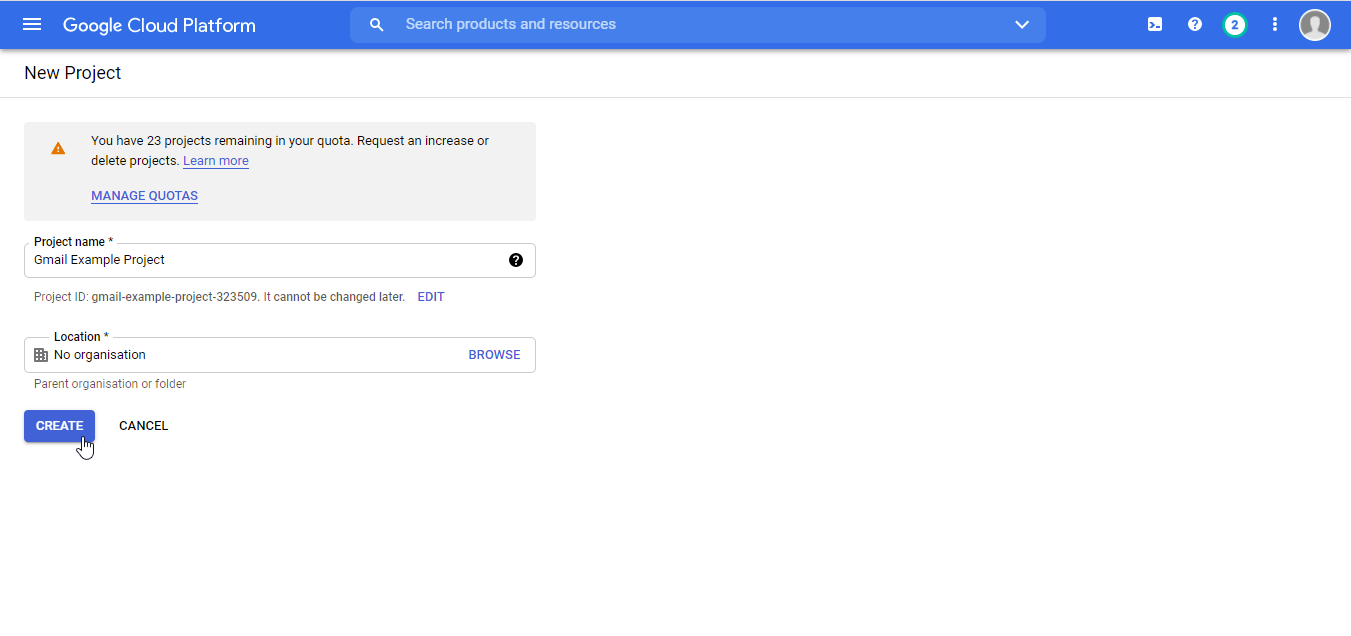
To create a project, click Create project.
Name your application, “Gmail Project” and click Create.
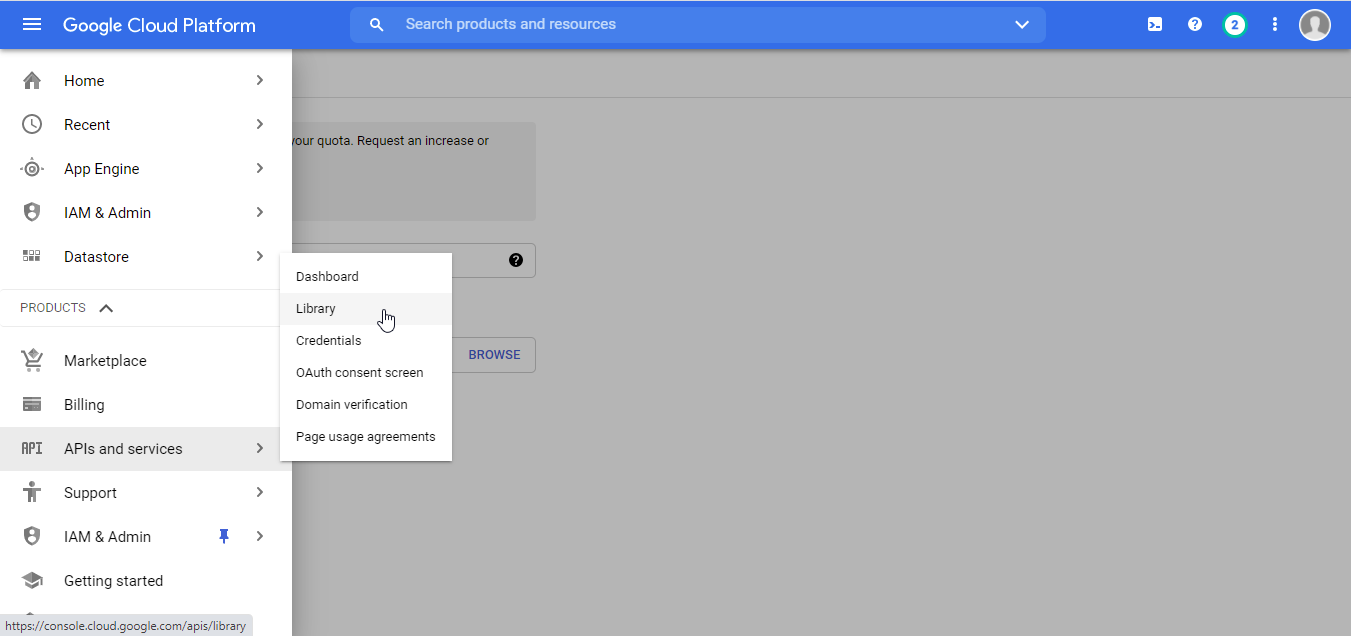
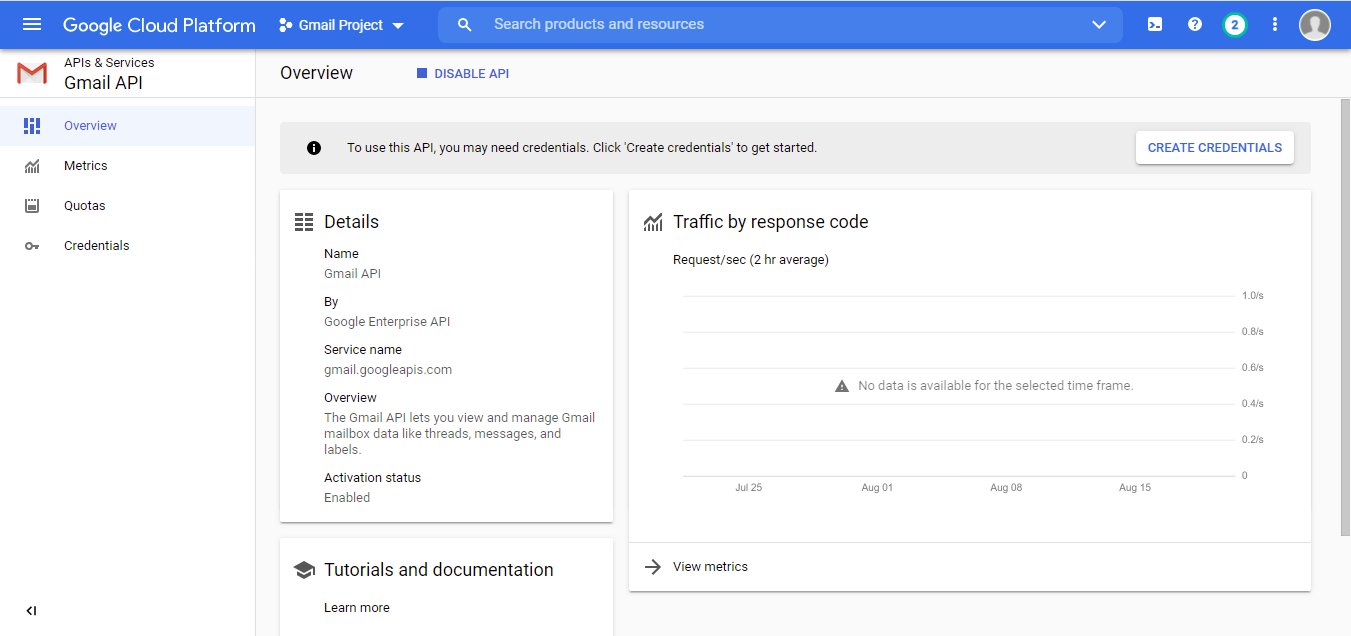
Click Select Project for the new “Gmail Project”, and from the top-left hamburger menu, Navigate to Products > APIs and services > Library.
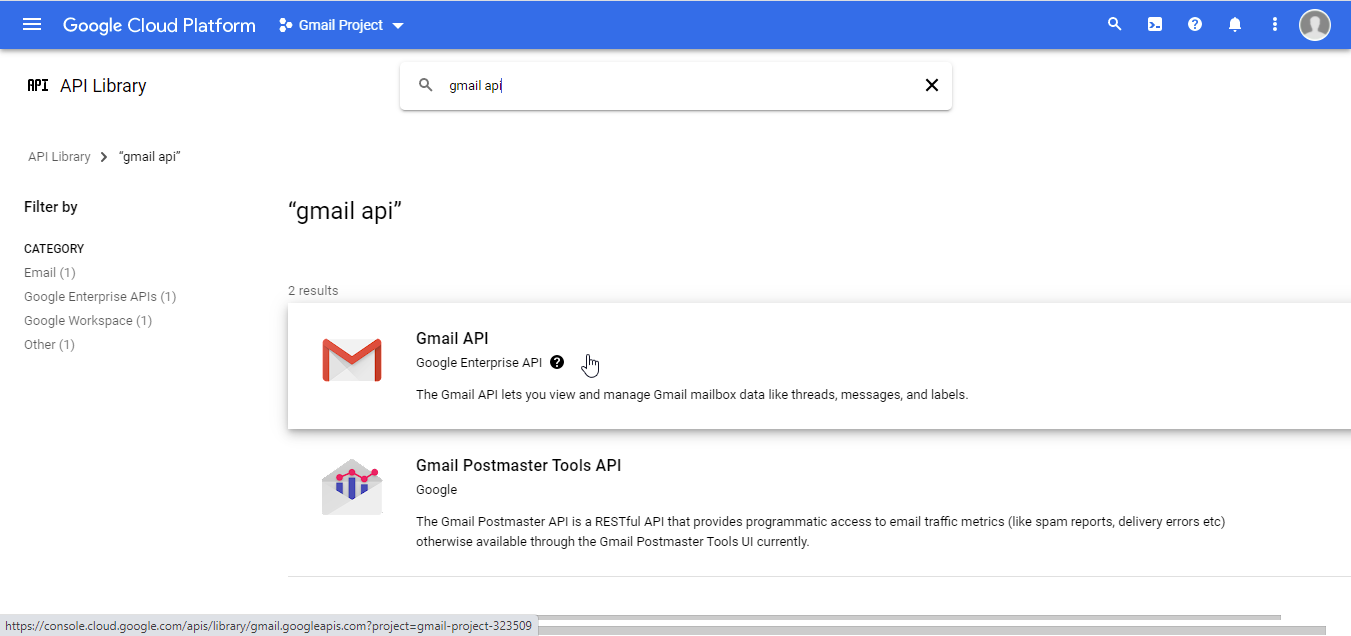
Find and select Gmail API, and then click Enable.
Click Create Credentials in the information banner that appears.
On the Credential Type screen that appears, in the panel Which API are you using select, “Gmail API”.
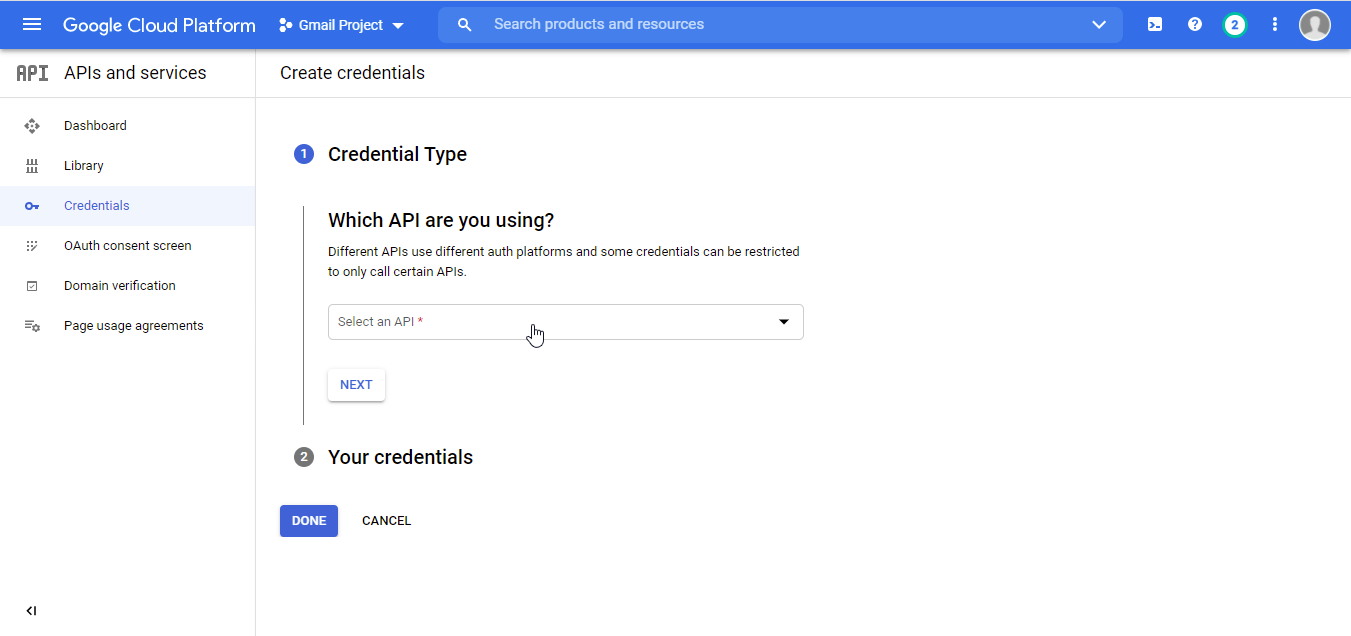
In the sub-panel, What data will you be accessing, choose “User data”, and then click Next.

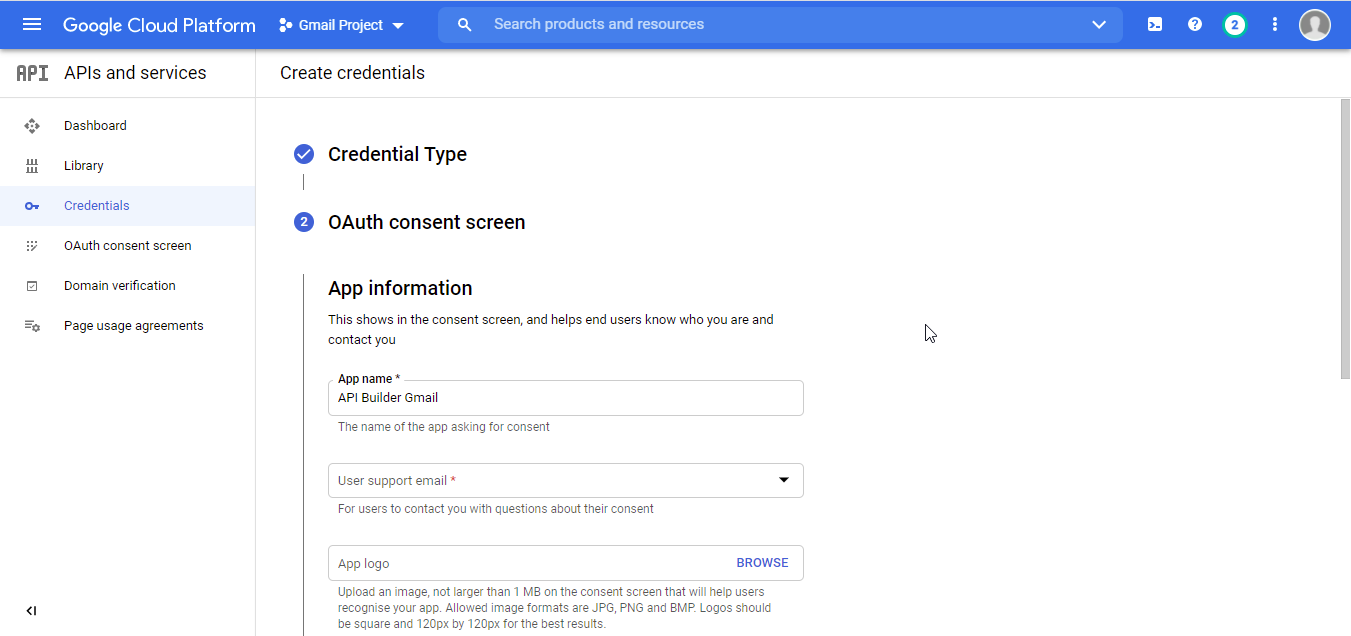
In the OAuth consent screen, enter your App information, where the App name is “API Builder Gmail”, the User support email is one related to this Google account, and the Developer contact information is the same, and then click Save and Continue (do not click Done yet).
You can skip the optional Scopes, click Save and Continue. In the OAuth Client ID screen, choose the Application type, “Web application”.
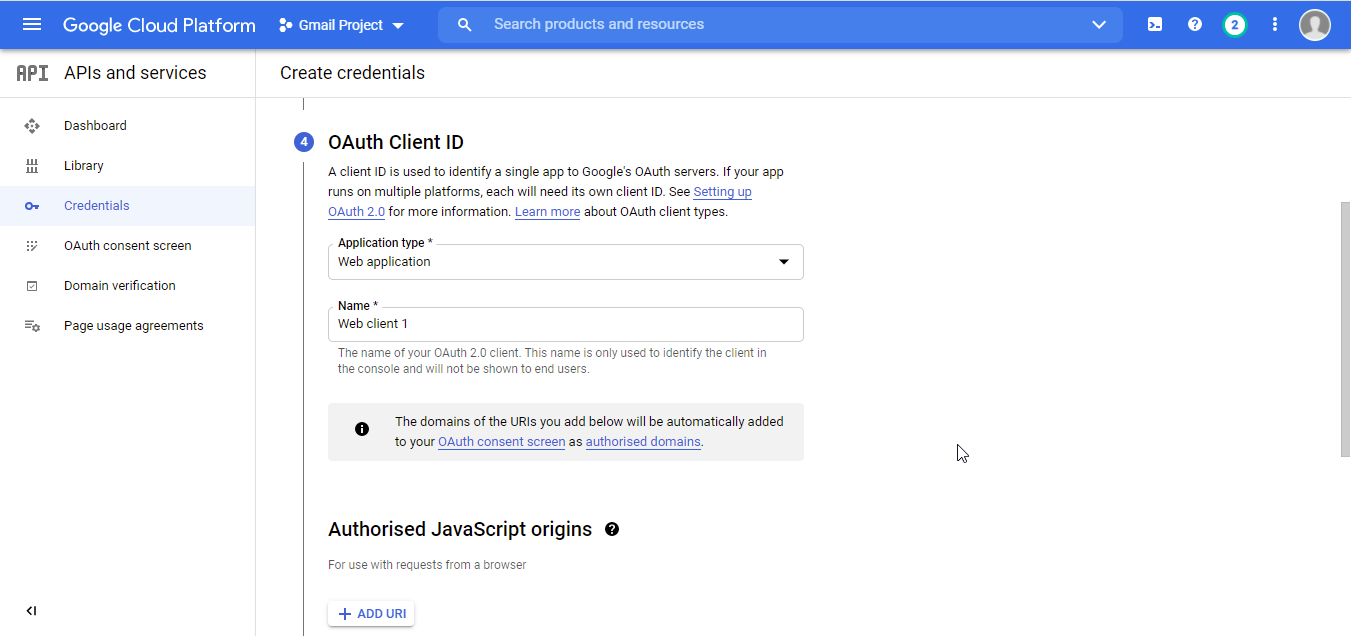
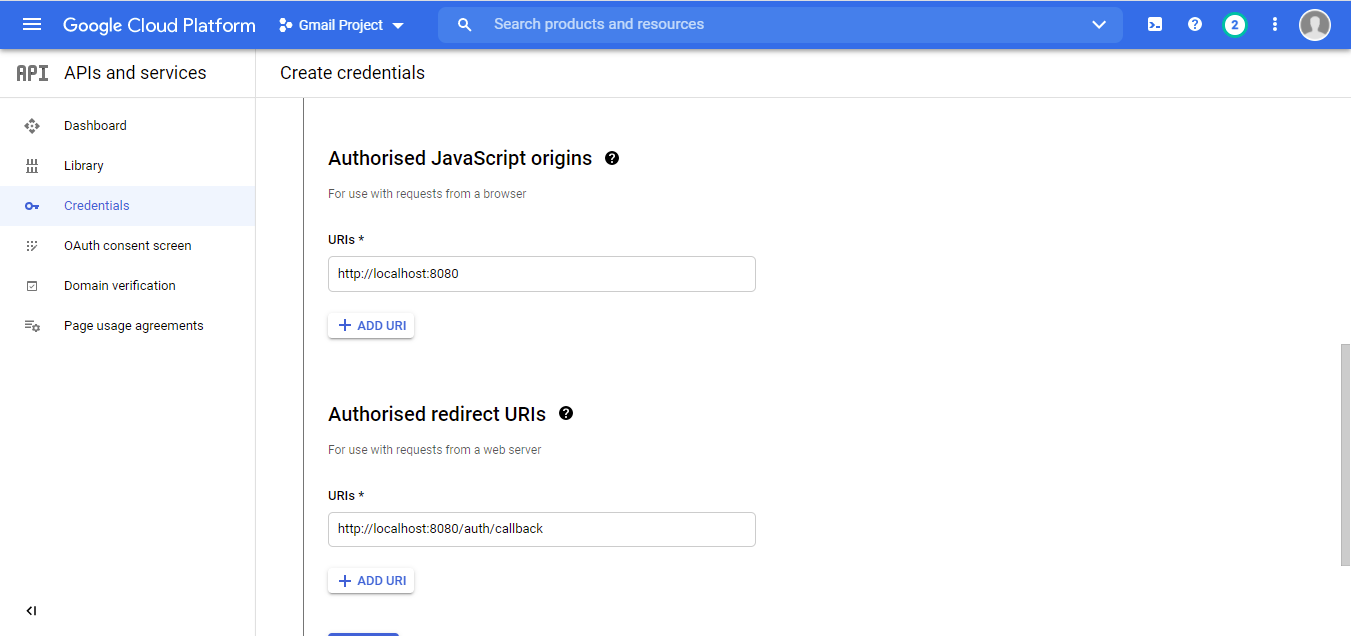
In the Authorized JavaScript origins, add the URL “http://localhost:8080”, and dd an Authorized redirect URI to “http://localhost:8080/auth/callback”, and then click Create.
You can then copy or Download your client credentials, and then click Done.
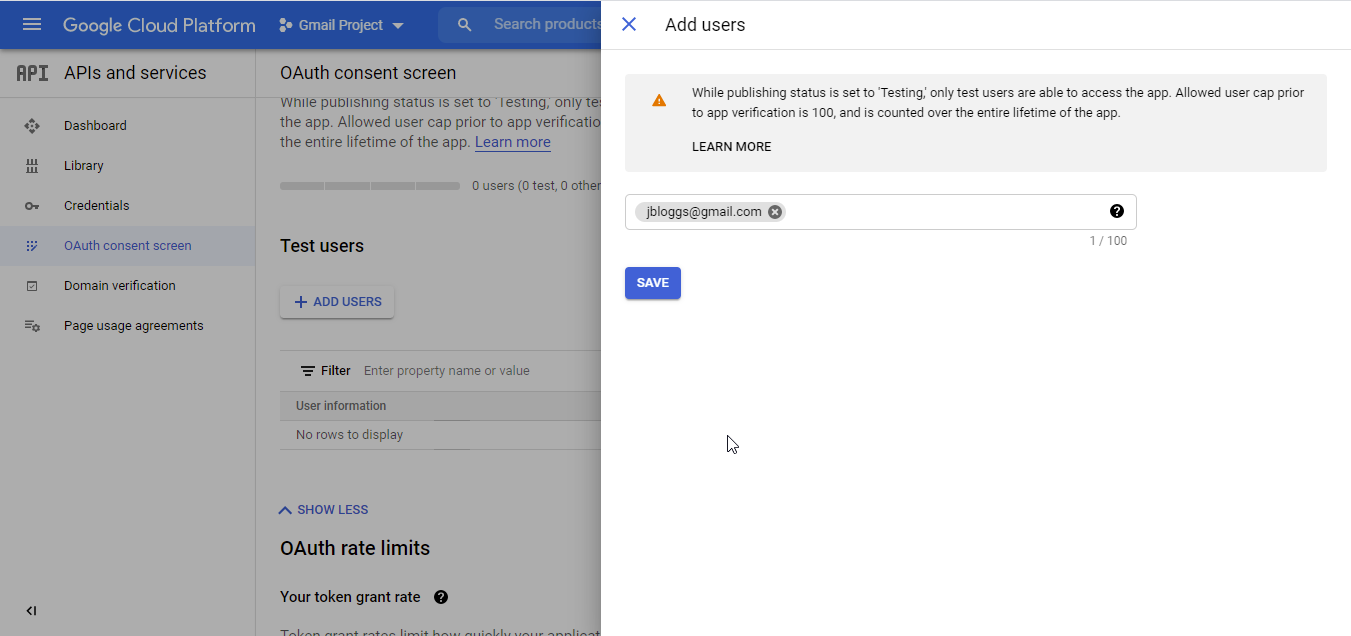
Finally, click on OAuth consent screen from the left menu, and find the Test users section, and add the gmail address of the user that you will use to test this OAuth application. The same user that created the application can be used to test, then click Save.
Setting up API Builder
Create an example application:
axway builder init gmail-auth
cd gmail-auth
npm start
Your service is now running and is accessible onhttp://localhost:8080/console.
Import the Gmail OpenAPI specification
- We will use the OpenAPI client to connect to the Gmail service. To do this, we can use a simplified Gmail OpenAPI specification is that available here. Download gmail.json and copy it into the
./swaggerdirectory asgmail.json. - Navigate to https://www.iconfinder.com/icons/132837/gmail_icon and save this icon as
./swagger/gmail.png(it is important that the base file names are the same). Note that any of the following image formats can be used:svg,png,gif,bmp,jpg, andtiff. - Restart your service (npm start)
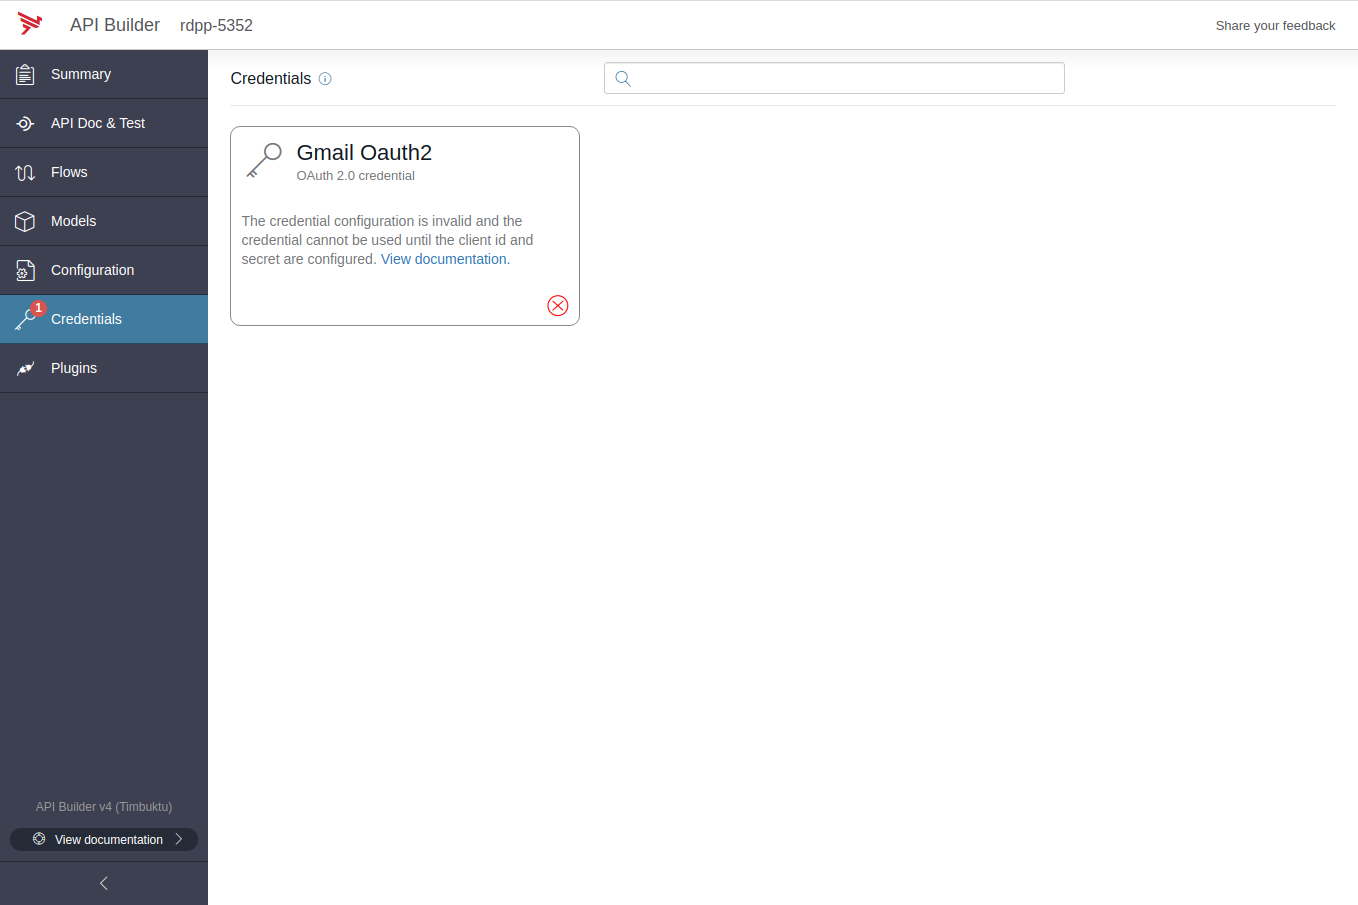
- Navigate to the Credentials tab and notice that a Gmail credential has been automatically created. Note that the credential is not ready to be used. For the credential to be ready, we need to provide the client id and client secret that we created above in Creating a new Google application.
Configure Gmail credential
For more information on OAuth 2.0 credentials, see OAuth 2.0 credentials.
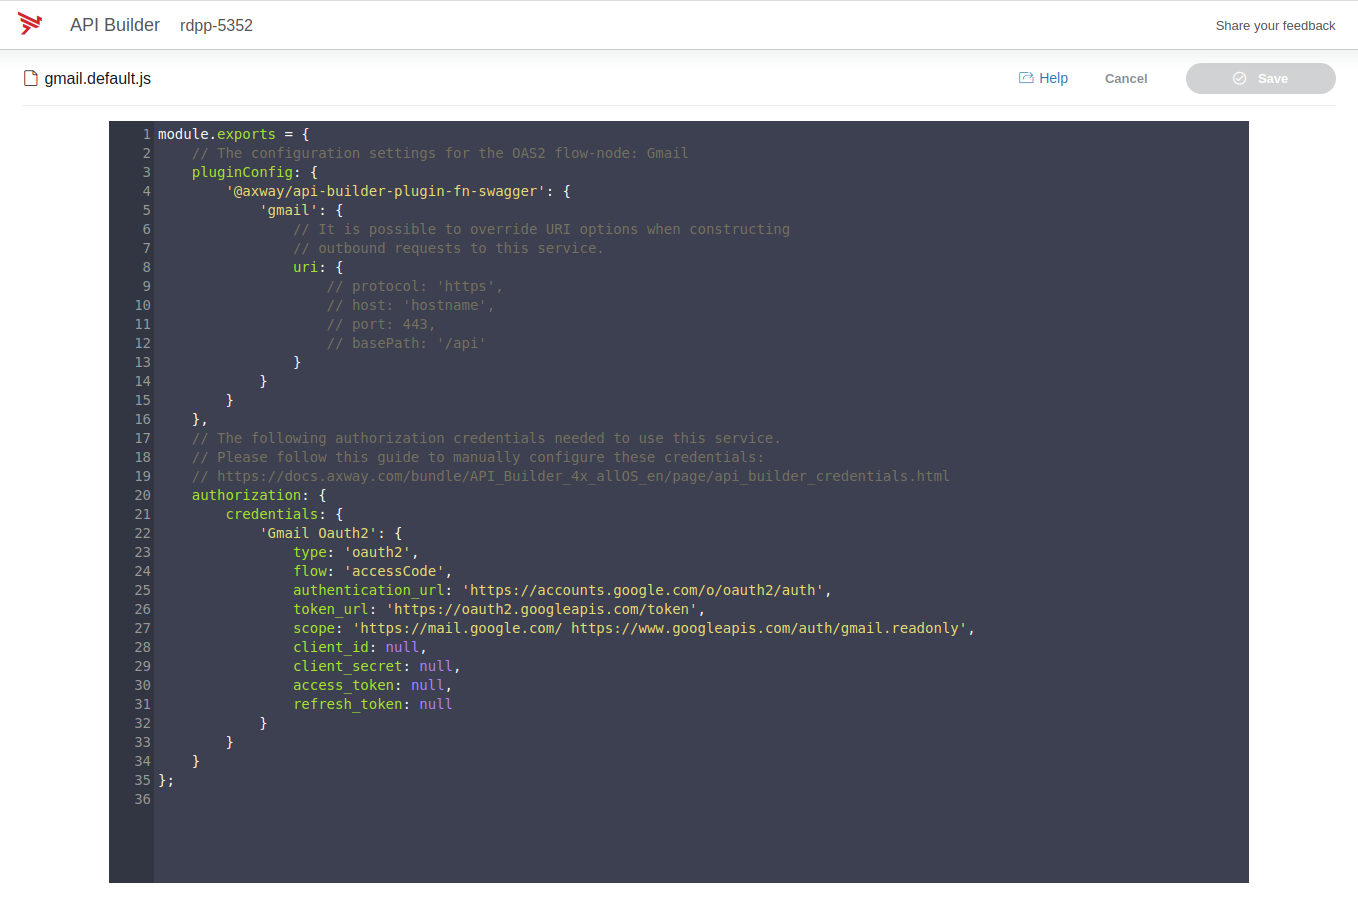
For Gmail, to get the credential ready, we need to configure the generated credential with our client_id and client_secret. This credential is within a configuration file that was generated by the OpenAPI client plugin when the service was last started. Navigate to the Configuration tab.

Select the gmail.default.js configuration file (this is the configuration file that was generated by the OpenAPI client plugin), and enter the Gmail client_id and client_secret that you downloaded previously.
Click Save and then Proceed on the subsequent modal.
After the service restarts, open the Credentials tab.
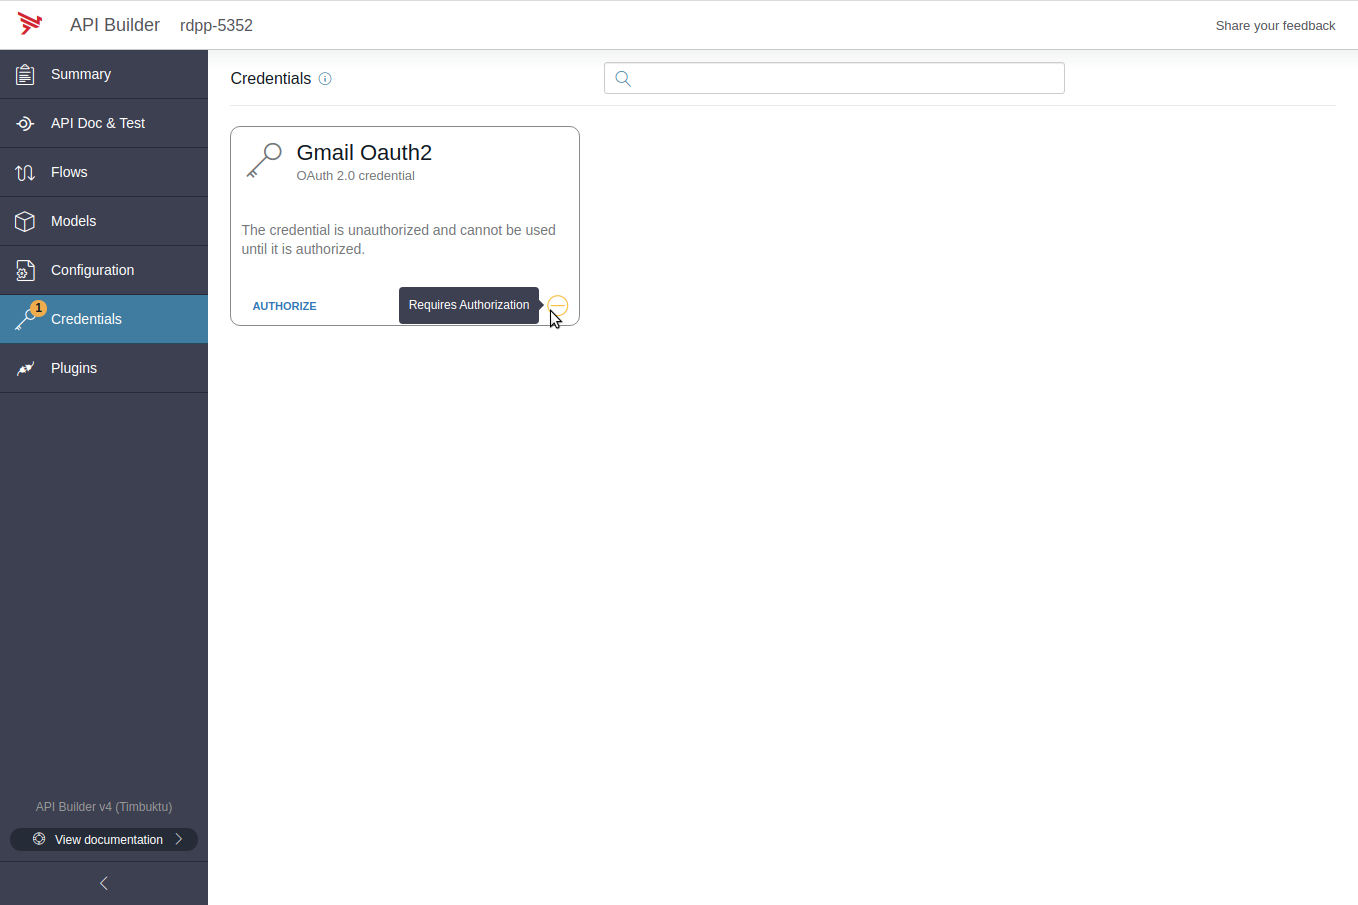 If everything went well, your Gmail Oauth2 credential is now in a state “Requires Authorization”.
Authorize the Gmail credential
Once the Gmail credential is configured, you need to manually authorize the credential to use it. Click on the Credentials tab and click Authorize. You will be prompted to choose a Google account or log in. The account must also have the Gmail service enabled.
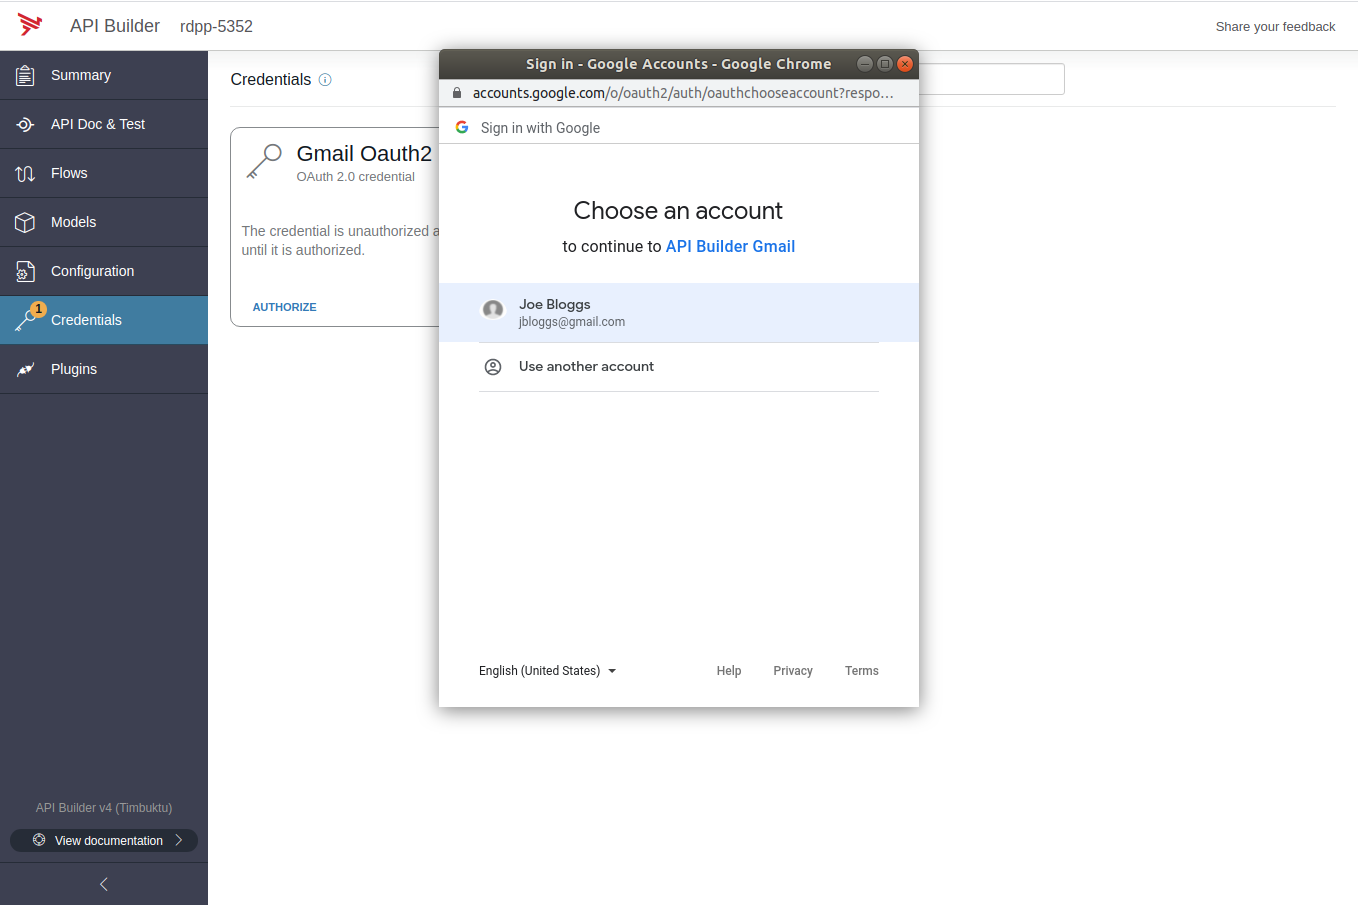
You may see a screen informing you that Google has not yet verified the application. That can be done from the Google console at a later stage when you publish your application, for now, click Continue, and then click Allow to approve the scope(s) to access to the account.
 The credential is now “green”, and ready to use.

Note
By default, the access tokens issued by Google will expire in 1 hour. API Builder will keep the access token valid by refreshing it before its expiration. However, the access token and refresh token are stored in memory only, and if you restart API Builder, you will need to authorize the credential again.Create a flow to count your emails
In API Builder, create a new flow by clicking Flows and then the add Flow button in the upper-right. This will bring you into the flow editor.
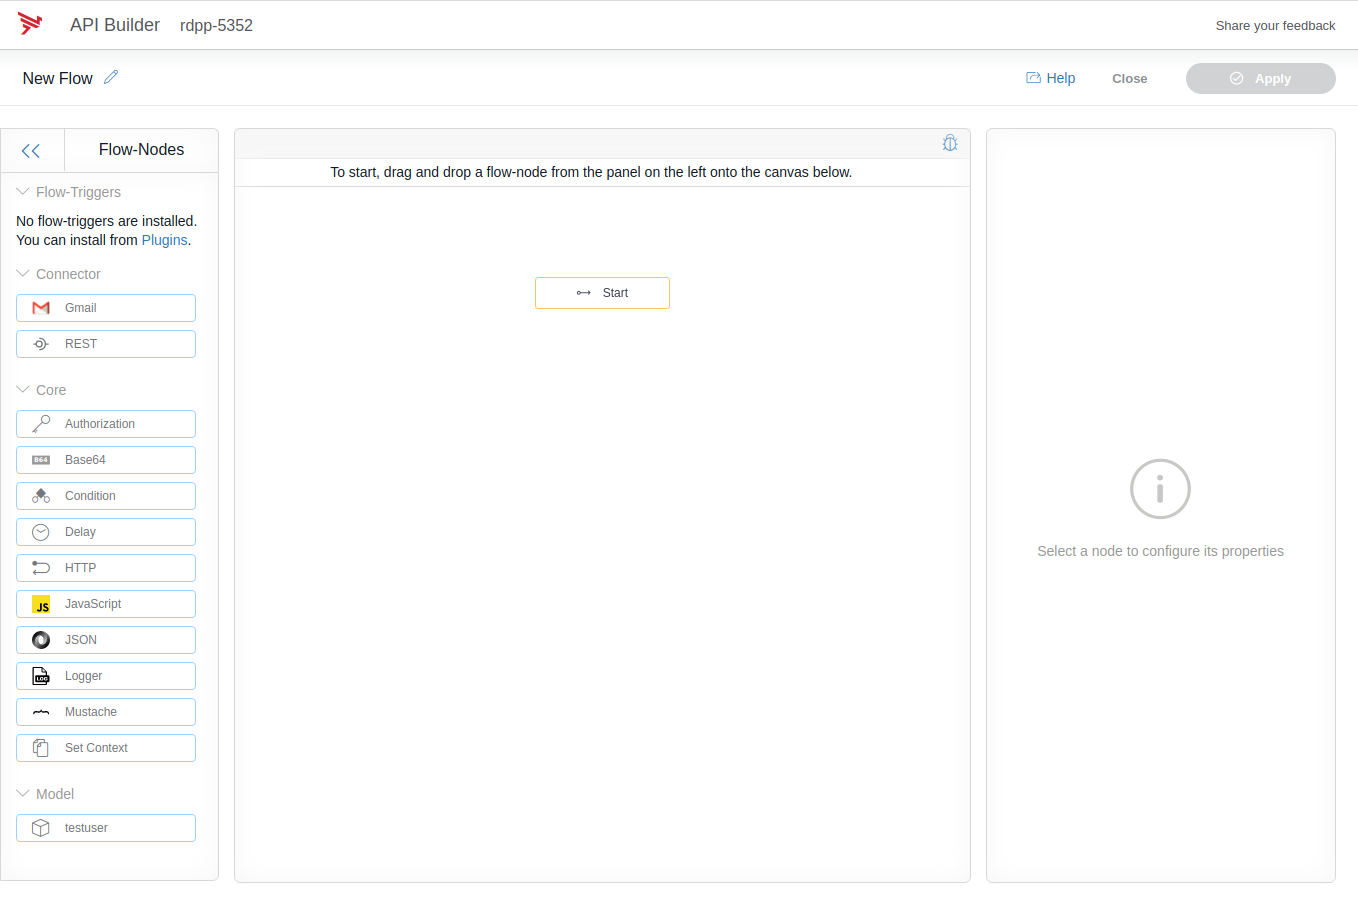
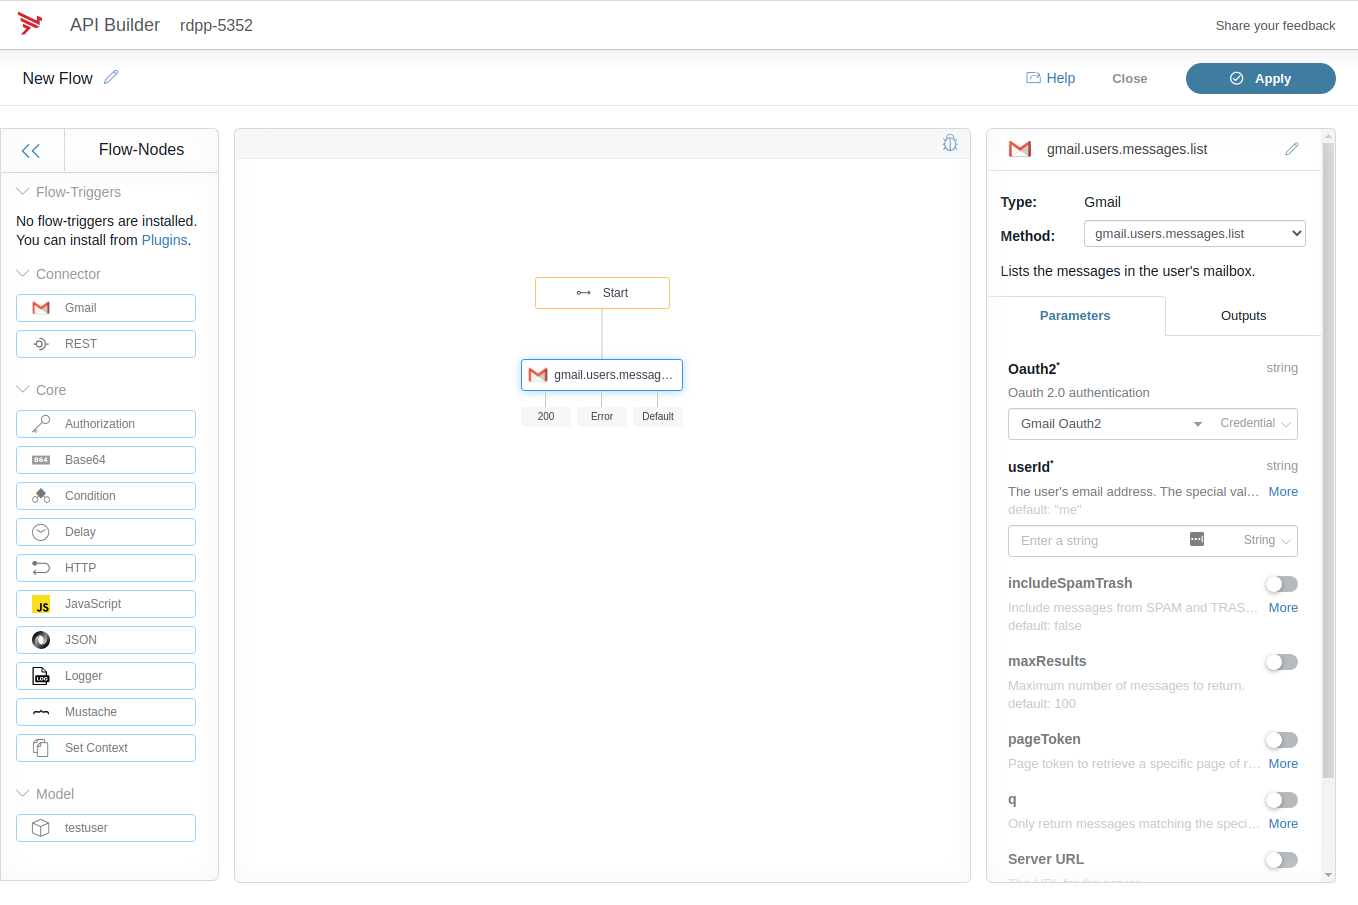
Drag and drop the Gmail icon from the Flow-Nodes panel on the left into the graph on the right.
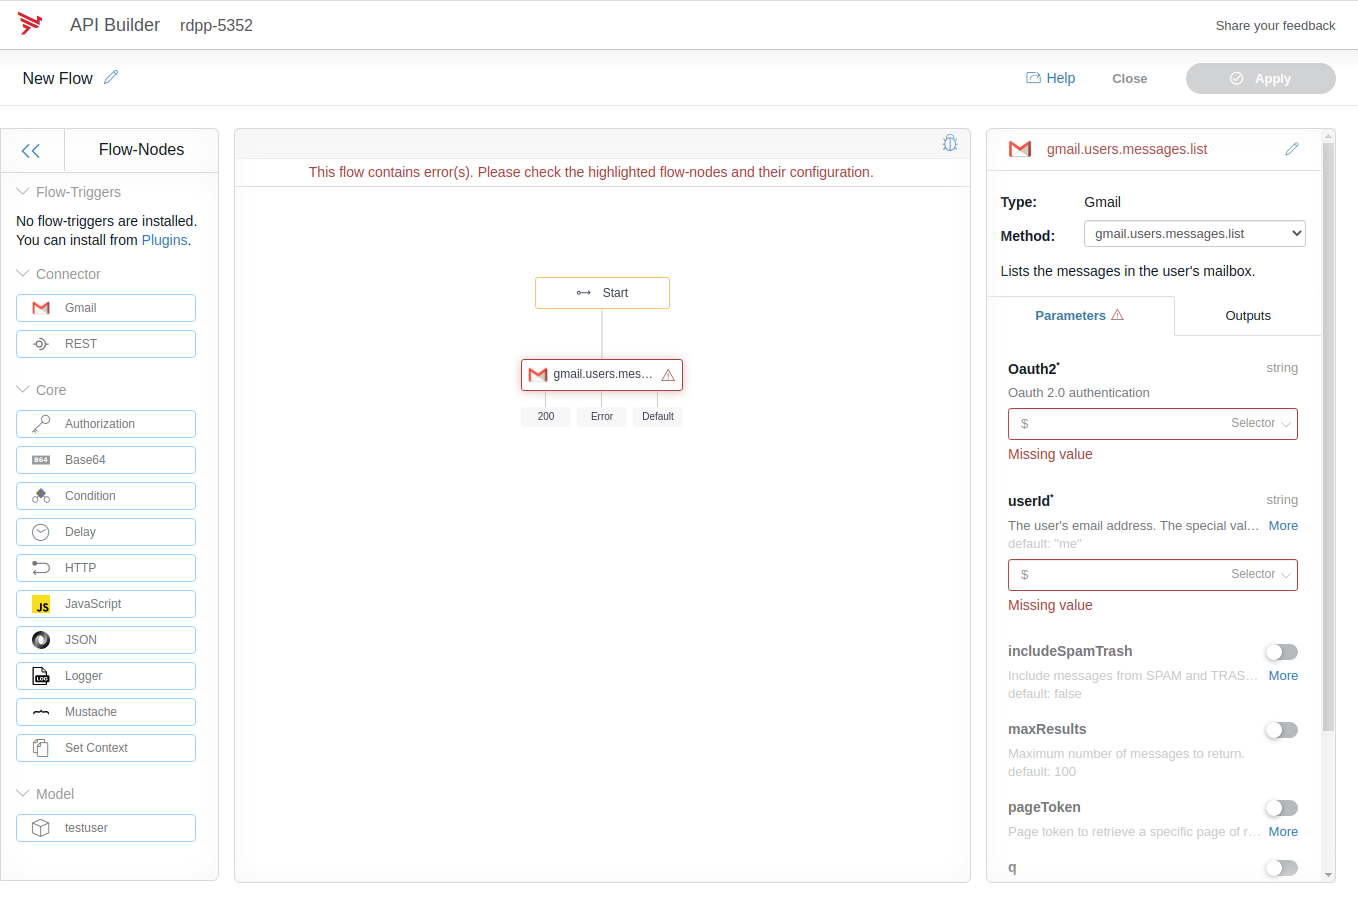
In property panel on the right, change the Oauth2 input to “Credential” and use the “Gmail Oauth2” credential. Then, change the userId to String, and enter “me”. It should look like the image below.
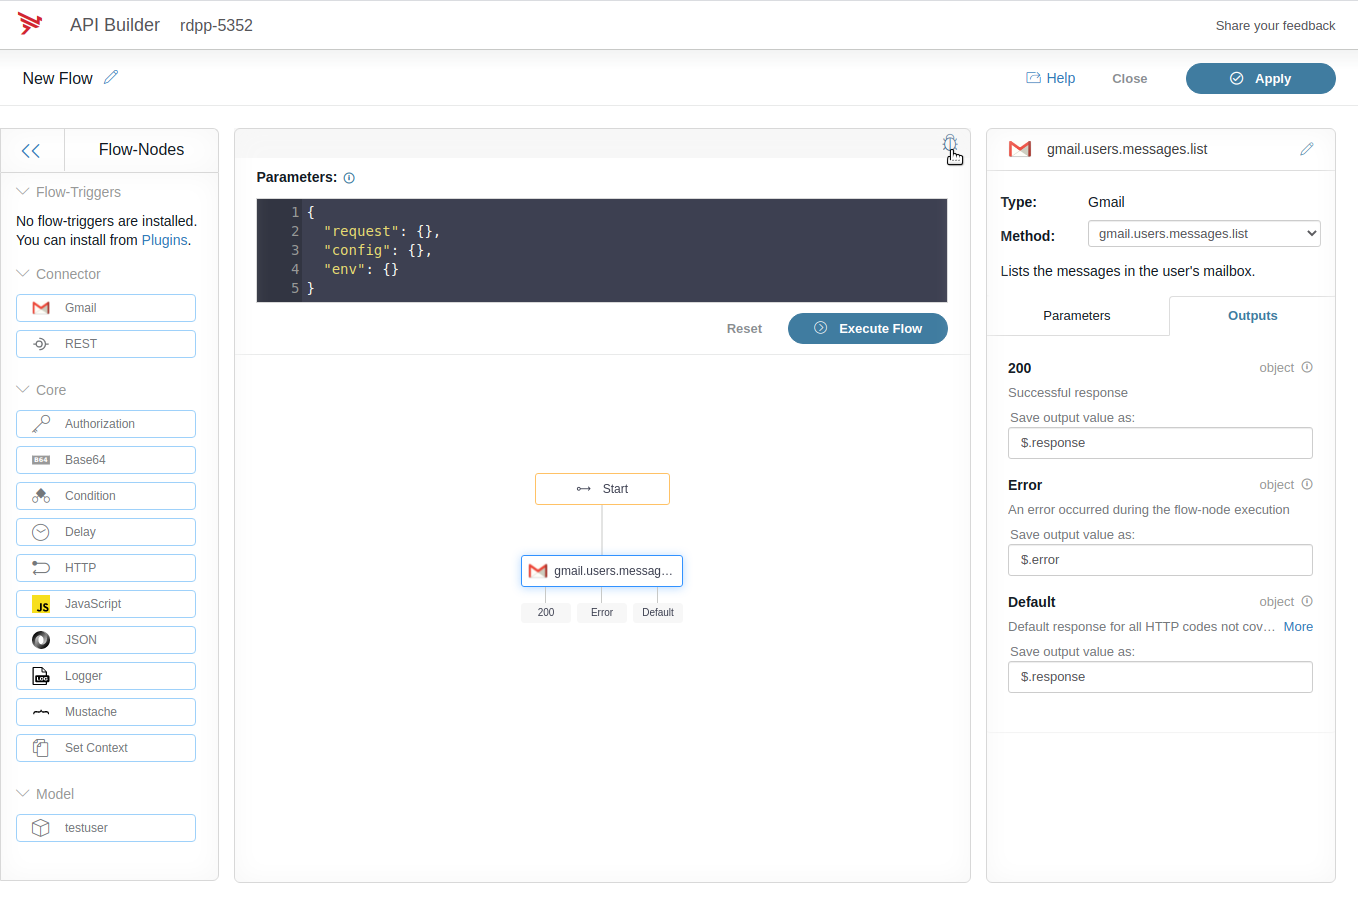
Then click the debug icon in the upper-right of the flow graph, and then click Execute Flow.
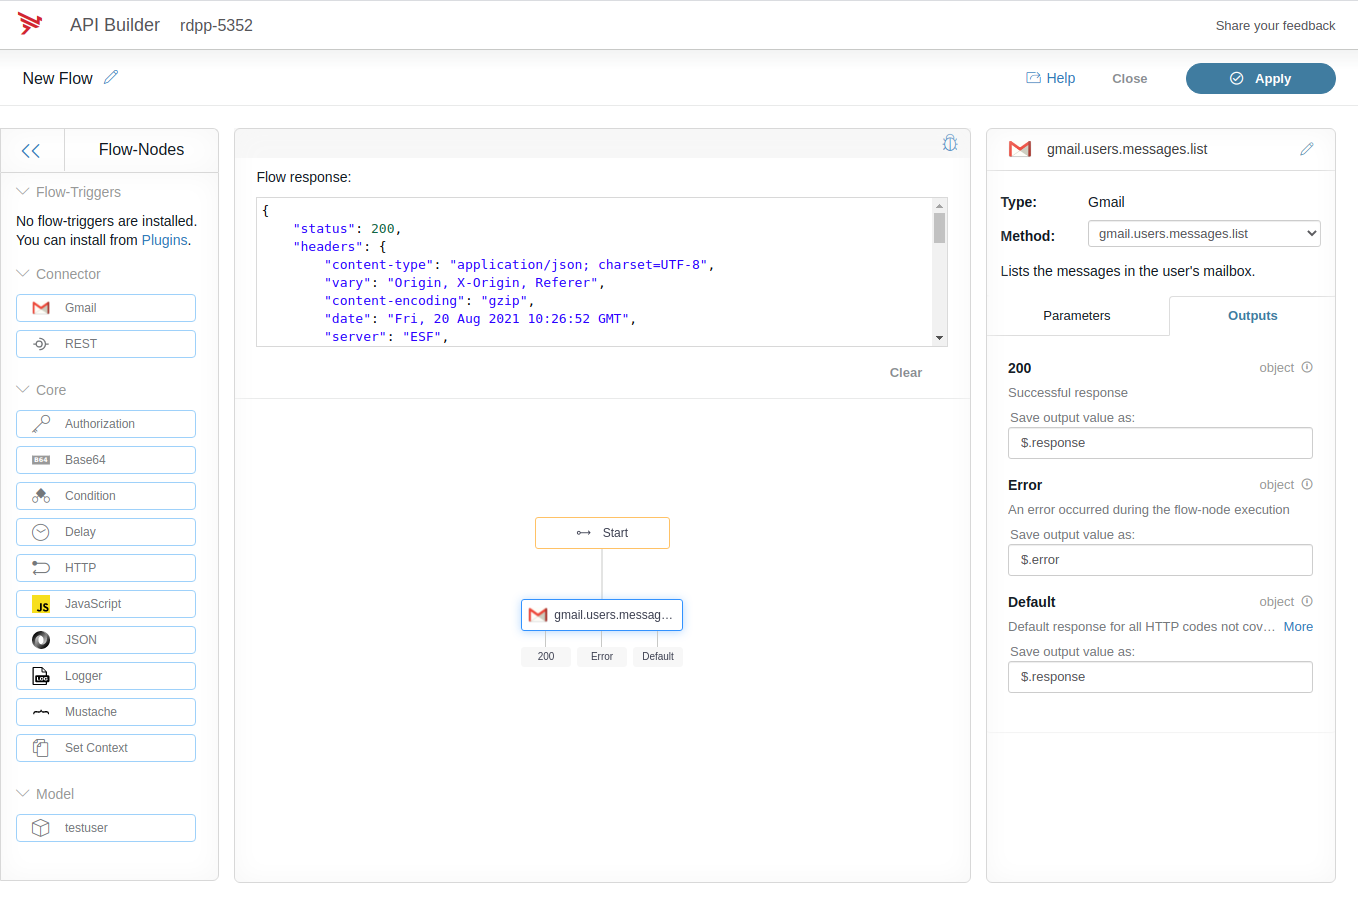
All going well, you should see a list of message identifiers retrieved from the Gmail service in the debug panel, and in the console.
This was a simple integration between API Builder and Gmail to access the list of contents. You can use a similar approach to work with any API; all you need to provide is the OpenAPI specification describing the API and API Builder can integrate with it seamlessly.