Models - create
3 minute read
Create a new model
Let’s create a new model. In the Admin Console:
-
Click the Models tab.
-
Click the + Model button on the right side.
-
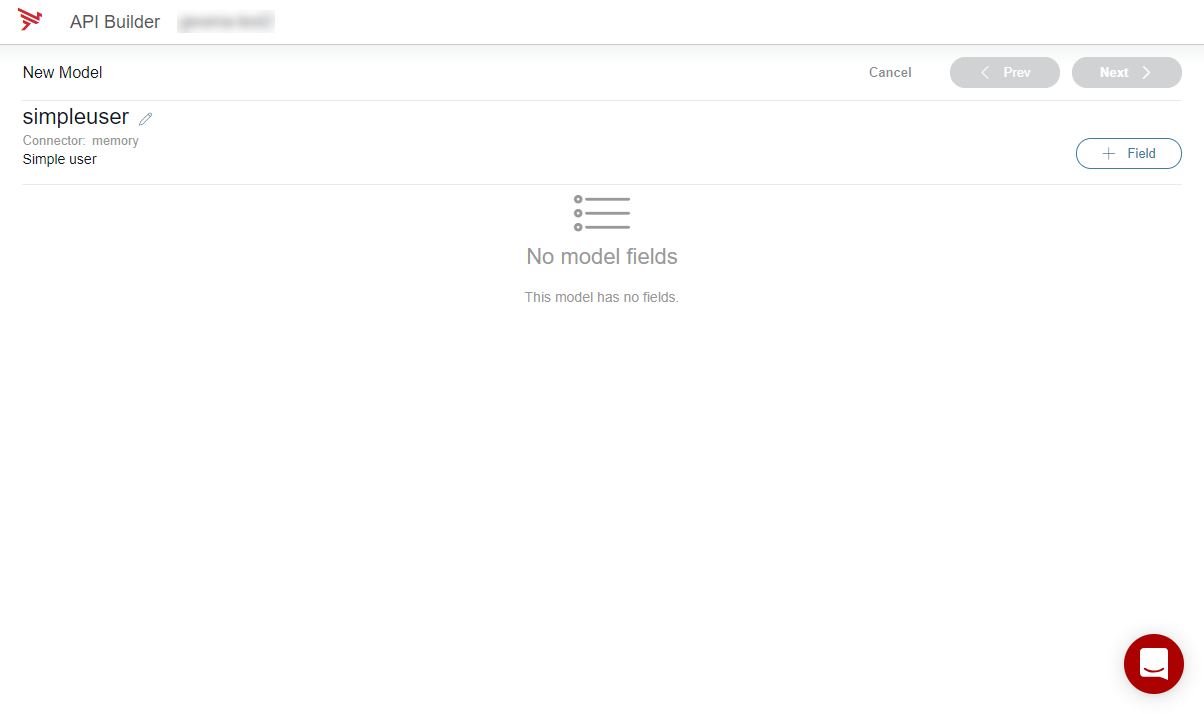
In the New Model step:
_latest.png)
- Enter “simpleuser” in the Model name field (required). The name must be unique for all of the application’s models.
- Select a Connector from the drop-down list (required). Connectors are used to persist data to the model.
- Add a description.
- Click Next to move onto the fields step.
-
In the Create Model Fields step:
- Click the + Field button.
- Enter “first_name” in the Field name field (required).
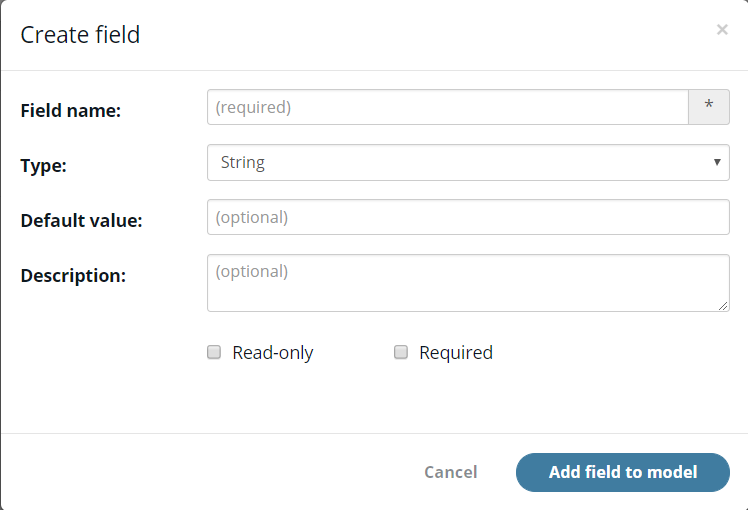
- Set Type to String.
- Leave Default value empty.
- Add a description.
- Check the boxes for Read-only or Required as necessary.
- Click the Add field to model button.
- Repeat step 4 as necessary to add the “last_name” and “email” fields to this model. After you add the fields, you can configure them by changing properties or adding validation or return logic.
- Click Next to move onto the endpoint step.
-
In the API endpoint page:
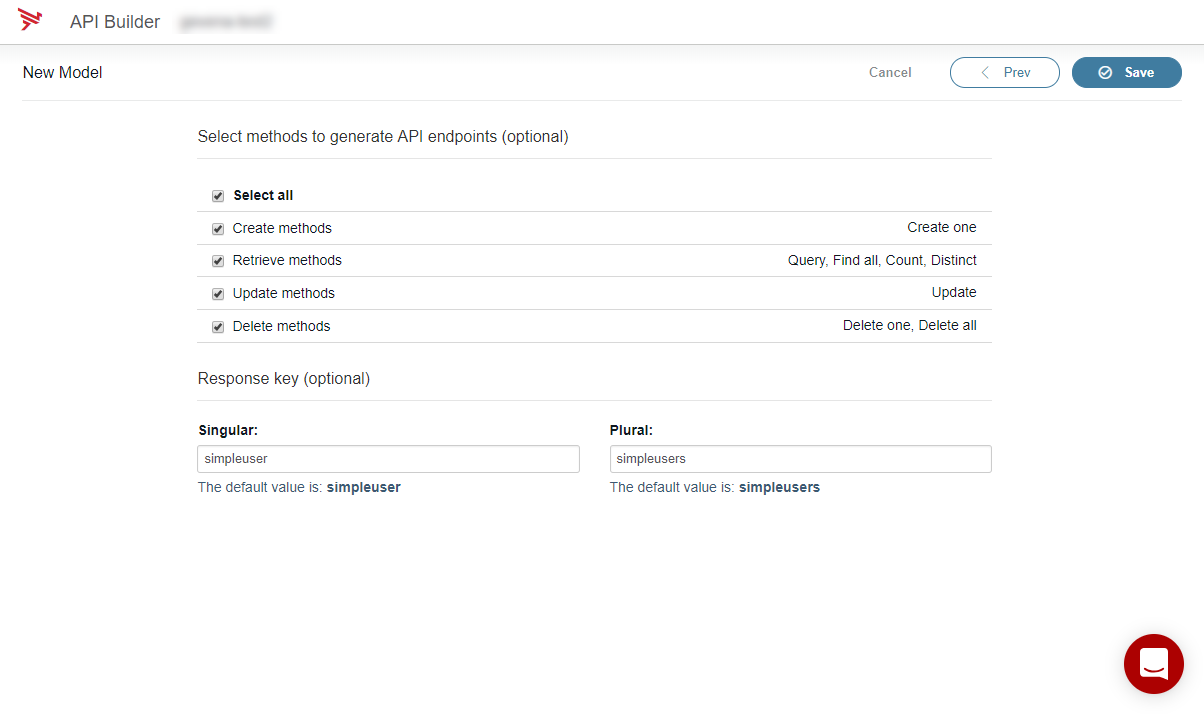
- Make sure the Create, Retrieve, Update, and Delete methods are checked.
- Click Save to commit your new model to the app.
If you look in your project’s models folder, notice you have a new file called simpleuser.js. This file was just created by the Admin Console. Instead of creating a model using the Admin Console, you can define one using JavaScript files in the project’s models folder.
Access model data
Now that you have created the simpleuser model, let’s try to retrieve the model data from the application.
In the Admin Console
- Click the API Docs & Test tab. This page lists all the API endpoints that your application exposes. You can also add or import API endpoints via the + API button. For additional information, refer to Manage Endpoints.
- Click anywhere on the row of any one of the API endpoints that you recently created. The Admin Console presents all the API endpoints that can be used to access a particular model. You can also export API endpoints via the Download Swagger button. For additional information, refer to Manage Endpoints.
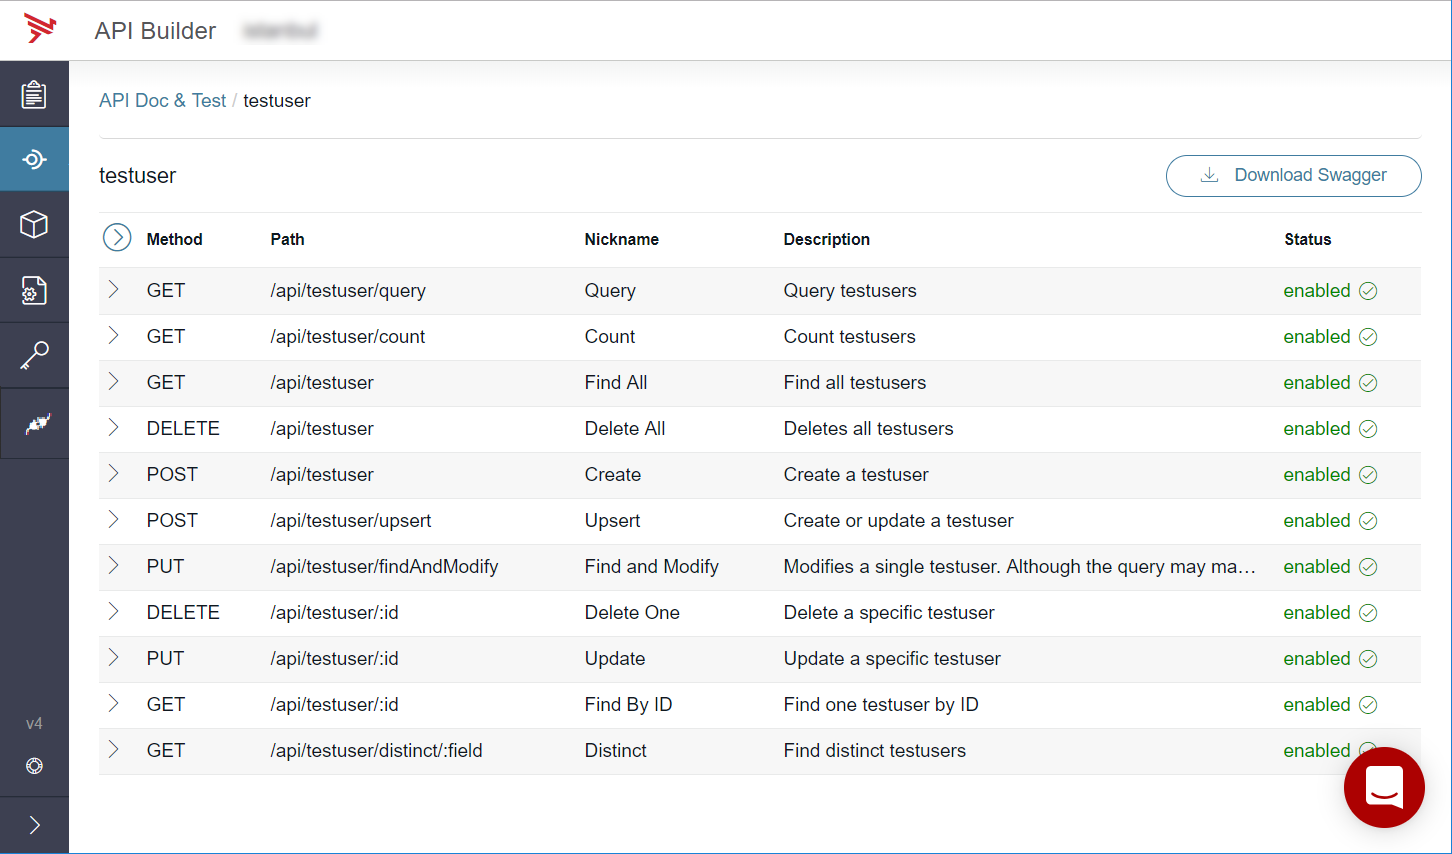
- Expand one of the GET methods in your endpoint. The code example for the curl should be visible. If it is not, scroll down until the Examples section is visible and select curl.

- Copy a curl command and run it in a terminal. Note the message returned by this command. Alternatively, you can test the select GET method in the user interface. Scroll until the Test API section is visible; if available complete the Request, Path parameters, and Query parameters fields and then click Execute. Note the Result returned in the user interface.
Last modified November 23, 2022: fixed formatting issues after Zoomin upgrade to new doc portal (#124) (3961249)