Flow listener flow-trigger
4 minute read
Overview
The Flow Listener flow-trigger is part of the Invoke Flow plugin, @axway/api-builder-plugin-invoke-flow. The plugin also contains the Flow Invoke flow-node, and the Flow Listener Response flow-node, and all work together to enable one flow to invoke a different flow. It is a mechanism that can be used to create reusable flows. It can be used to invoke a flow once or multiple times, looping over an array of items. The Flow Listener flow-trigger enables the flow to be invoked via the Flow Invoke flow-node.
To install the plugin, execute the following command:
npm install @axway/api-builder-plugin-invoke-flow
Flow-trigger details
The Flow Listener flow-trigger enables the flow, to which it is attached, to be invoked via the Flow Invoke flow-node. When you use this flow-trigger, you should always use the Flow Listener Response flow-node to set the response to be returned, and it should be set for all code paths through the flow, both success and error paths.
The following sections provide details of the available Flow Listener parameters.
Flow-trigger parameters
| Parameter | Type | Description | Configuration selection | Required |
|---|---|---|---|---|
| Flow Listener ID | String | A unique identifier used by the Invoke Flow flow-node to invoke this flow. This value is case-sensitive. | Selector, String | Yes |
Flow-trigger outputs
| Parameter | Type | Description | Type | Required |
|---|---|---|---|---|
| Data | String | The data sent as the request. | any | Yes |
How to use the plugin
Example - Yummy fruit
For this example, we will create two flows. The first will call the second with a string, “banana”, and the second will transform the input data into a sentence and return “Yummy banana!”. The first flow is named “Invoke”, and the second flow is named, “Invoke Listener”. The Invoke Flow plugin is required for this example.
Create the Invoke Listener flow
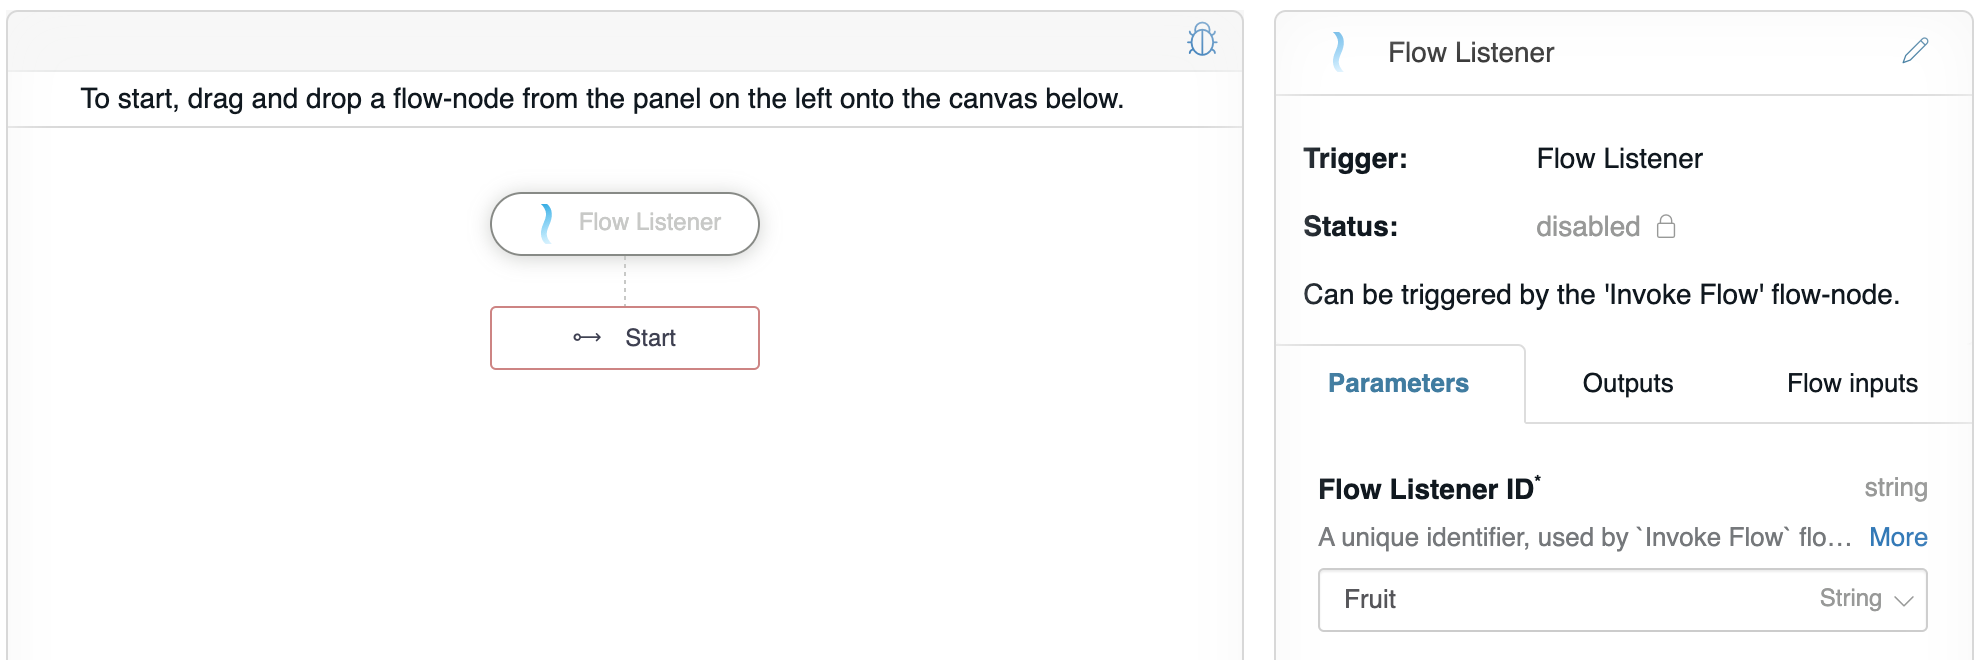
Follow the instructions on Create a new flow to create the “Invoke Listener” flow. In this flow, you will want to drag the Flow Listener flow-trigger from the Flow-Nodes > Flow-Triggers panel on the left, into the graph on the right.
You want to give the Flow Listener a unique Flow Listener ID, “Fruit”, which enables this flow to be triggered later using the Flow Invoke flow-node.
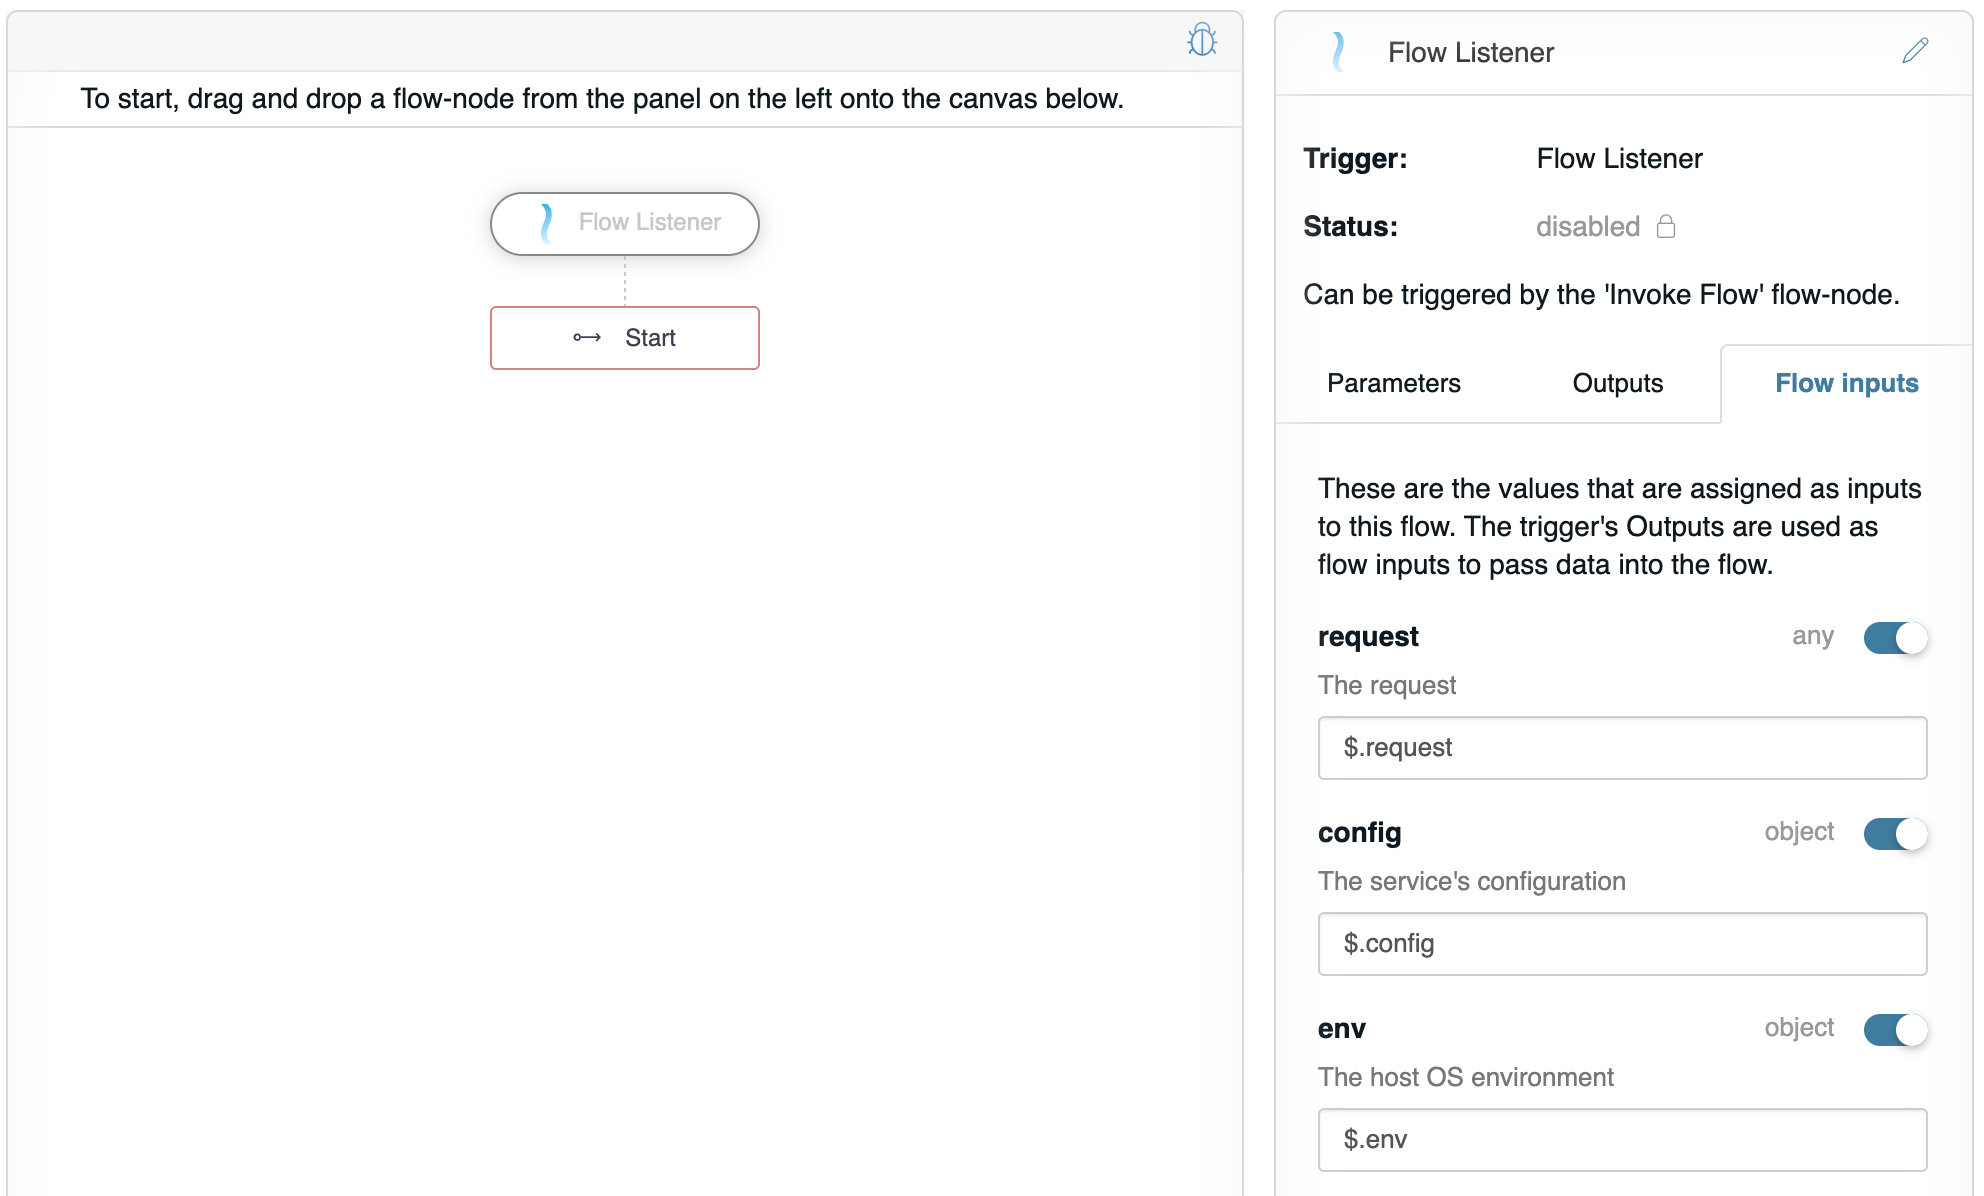
When the flow is triggered, the data that is passed to the flow (the “request”), will be passed to the flow via $.request as seen on the Flow inputs tab.
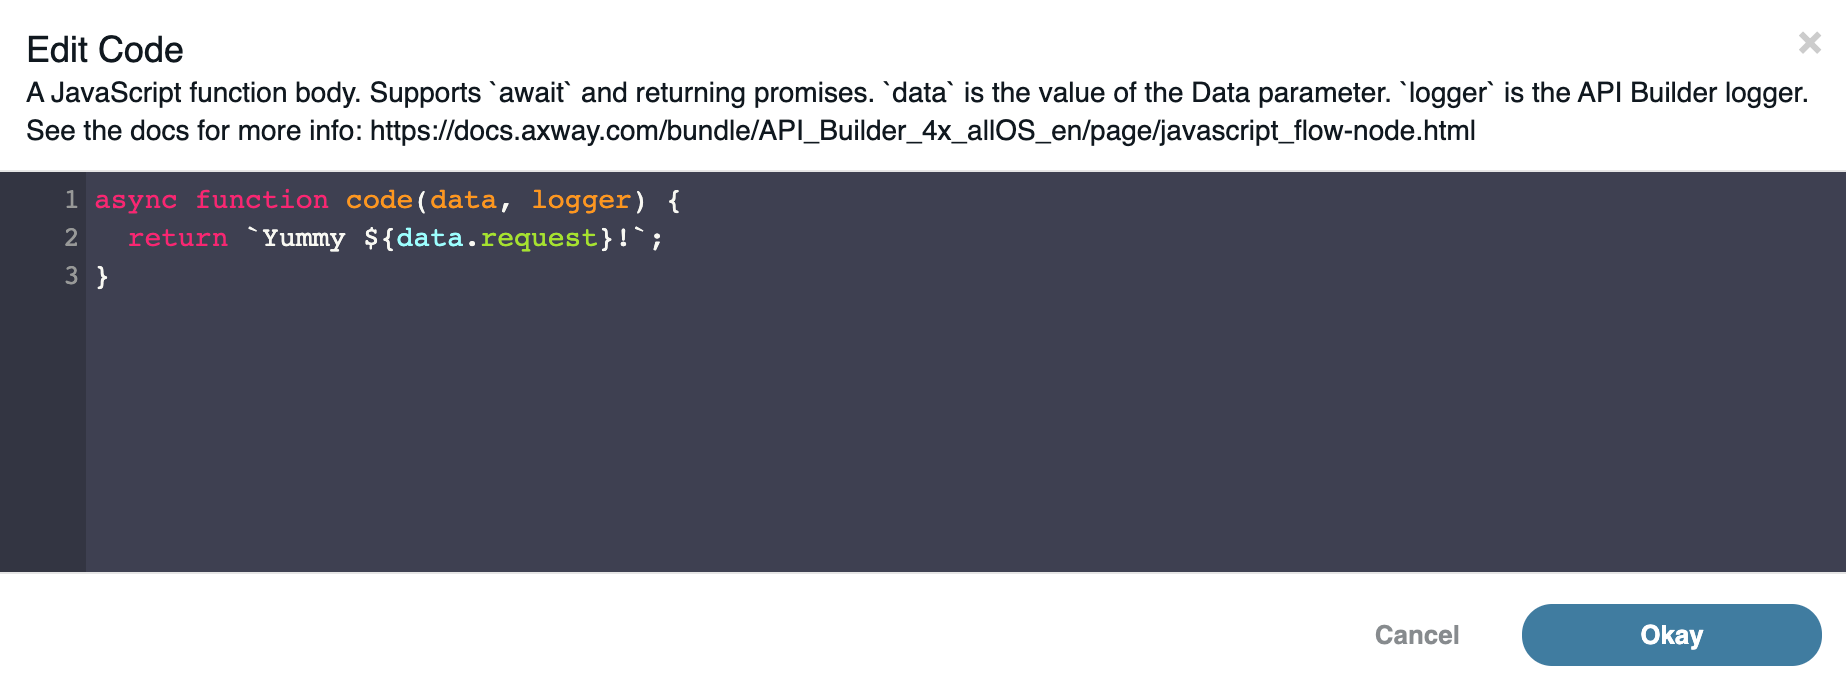
The “Invoke Listener” needs to make a sentence, “Yummy banana!”, so we will use the JavaScript flow-node. Drag a JavaScript flow-node on to the graph. Enable Data and leave the value as a $ Selector.
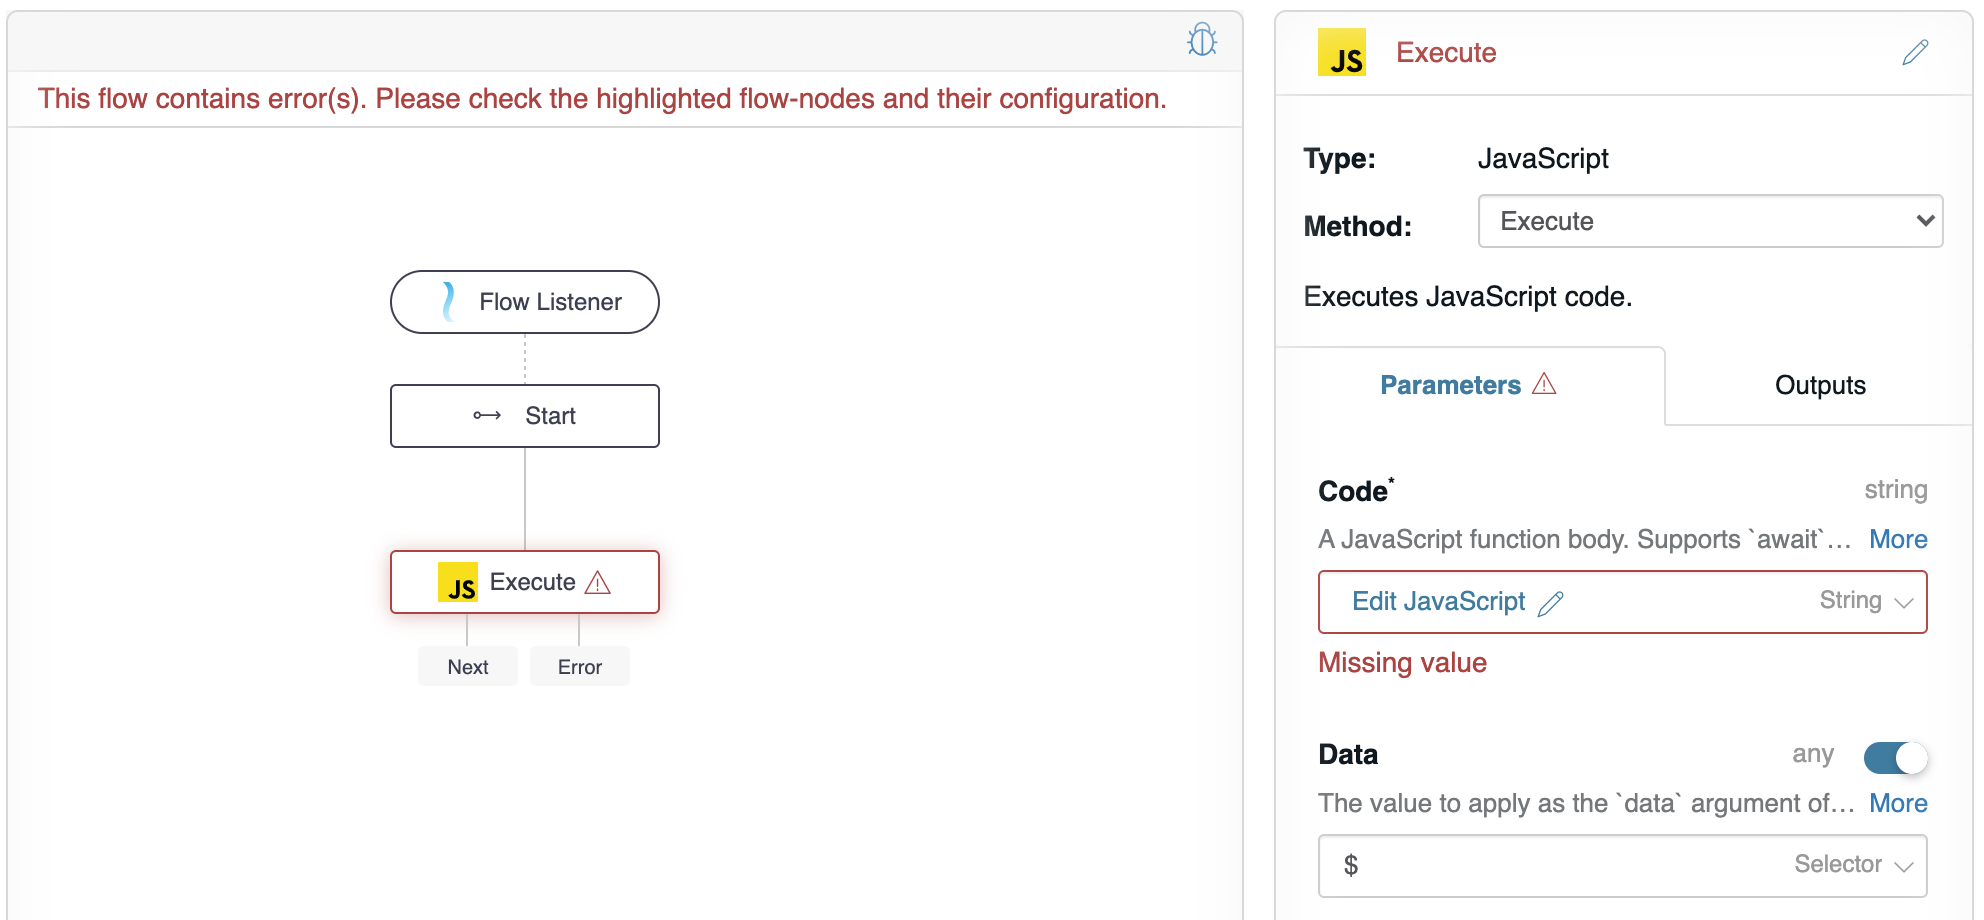
Then, click Edit JavaScript to open the input editor, and configure it to return a string, formatted with the request data - ``
We need to return a successful response for the Flow Listener using the Flow Listener Response flow-node. Drag the Flow Listener Response flow-node on to the graph, drag a wire from Next to the new flow-node, and configure it so that Is Error is false, the response Data is $.result (note this is the JavaScript flow-node’s Next output value).

Finally, we need to return an error response for the Flow Listener using Flow Listener Response flow-node. Drag the Flow Listener Response flow-node on to the graph, drag a wire from Error to the new flow-node, and configure it so that Is Error is true, the response Data is $.error (note this is the JavaScript flow-node’s Error output value).
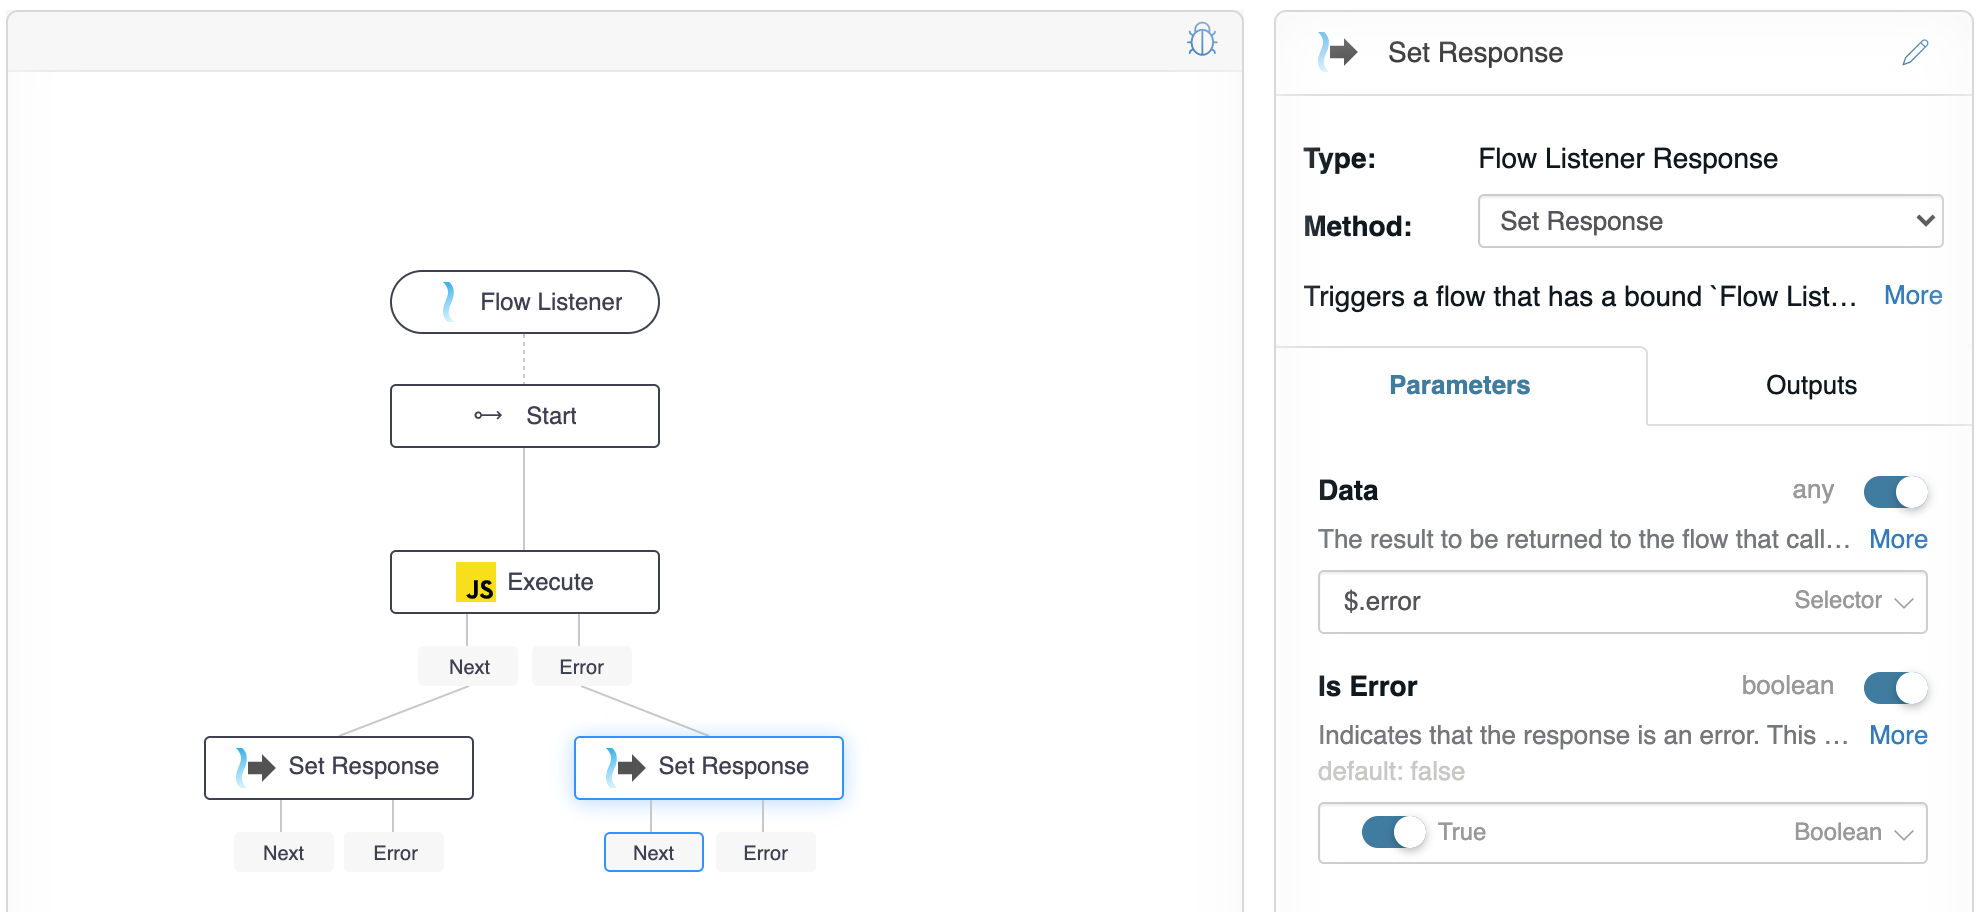
It is important to note that the outputs for Flow Listener Response should be unchanged from the default value of $.response.
Create the invoke flow
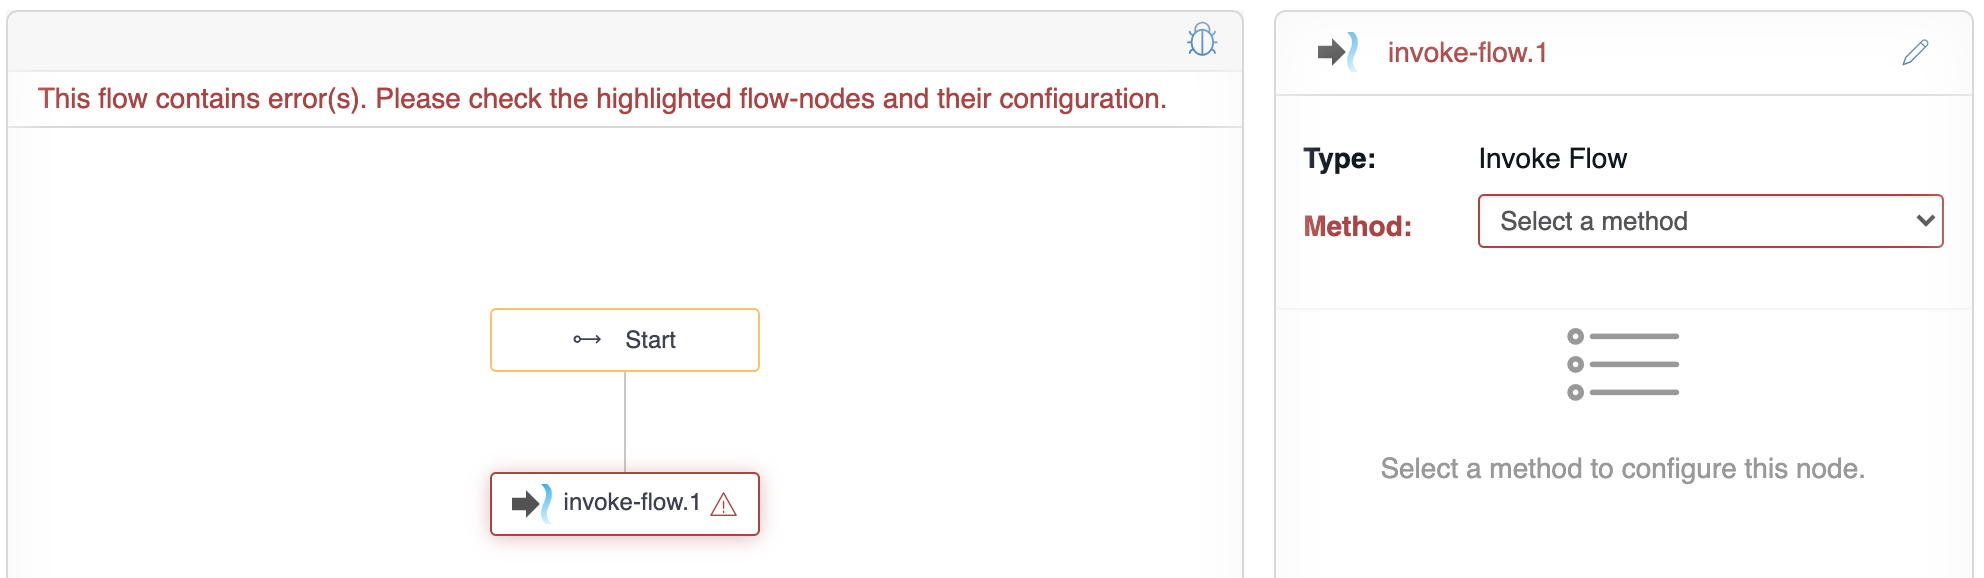
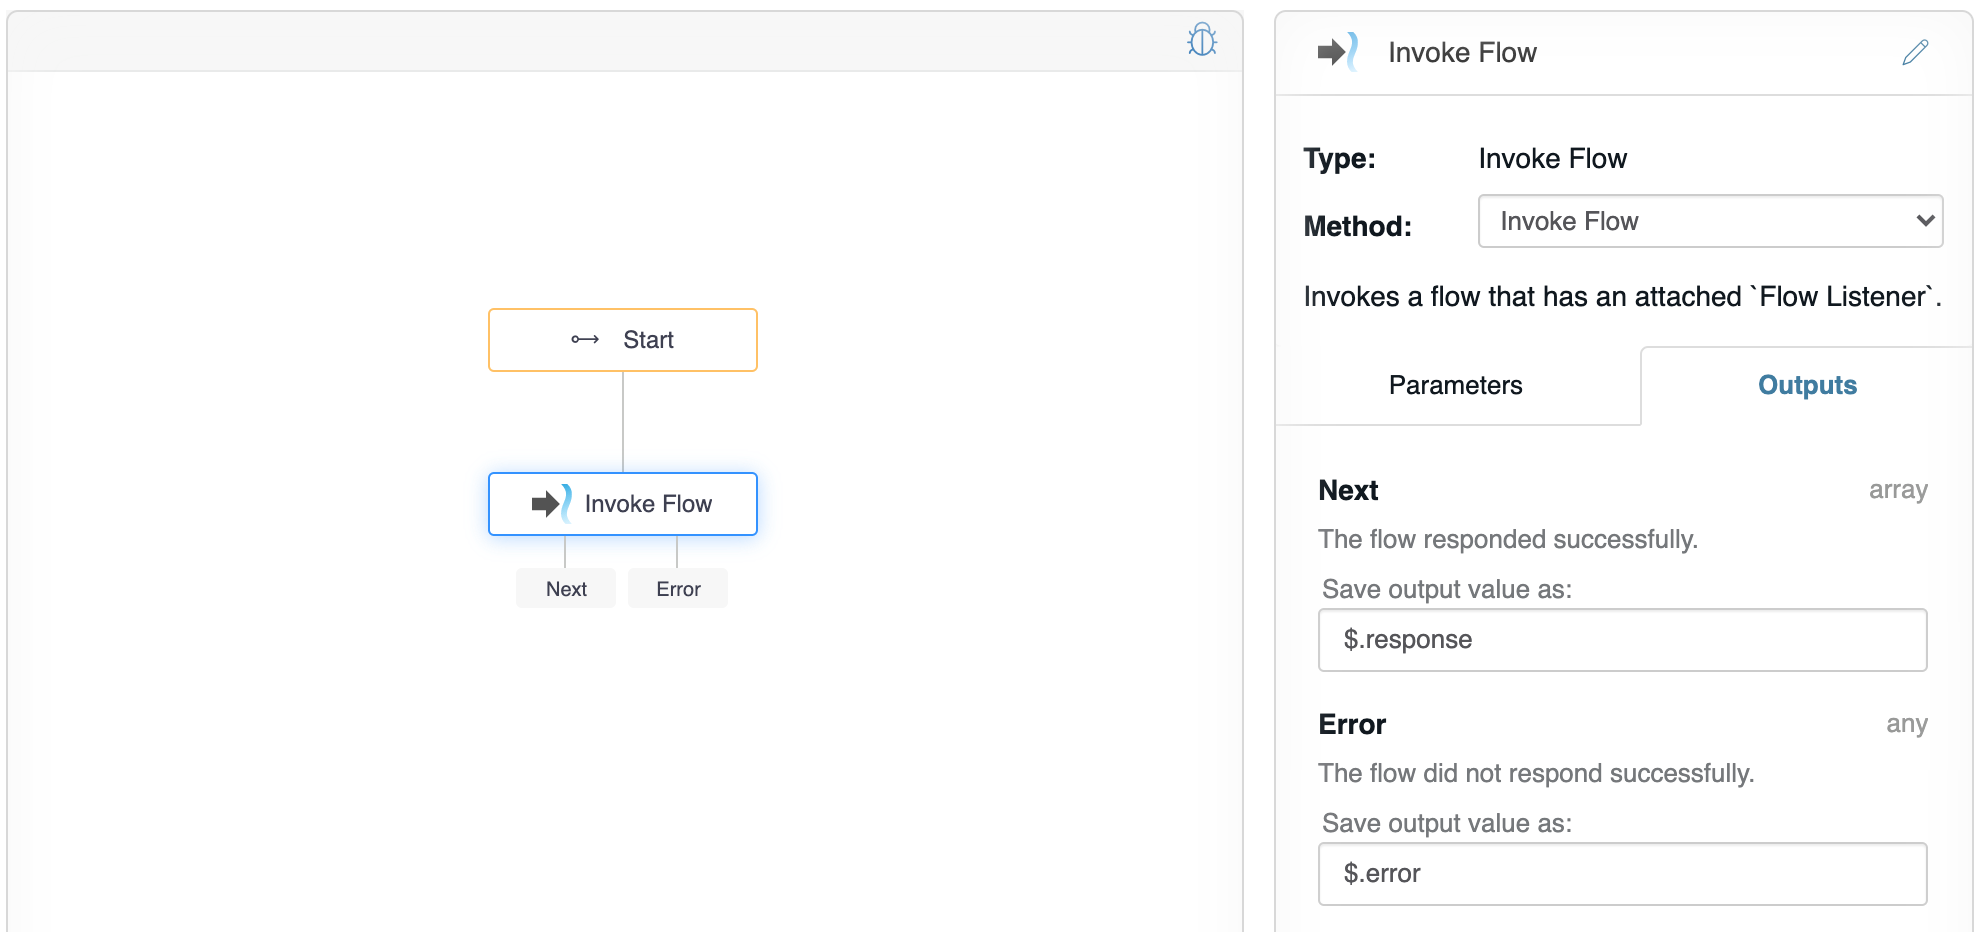
Follow the instructions on Create a new flow to create the “Invoke” flow. In this flow, you will want to drag the Invoke Flow flow-node on to the graph and connect it to Start (it should connect automatically).
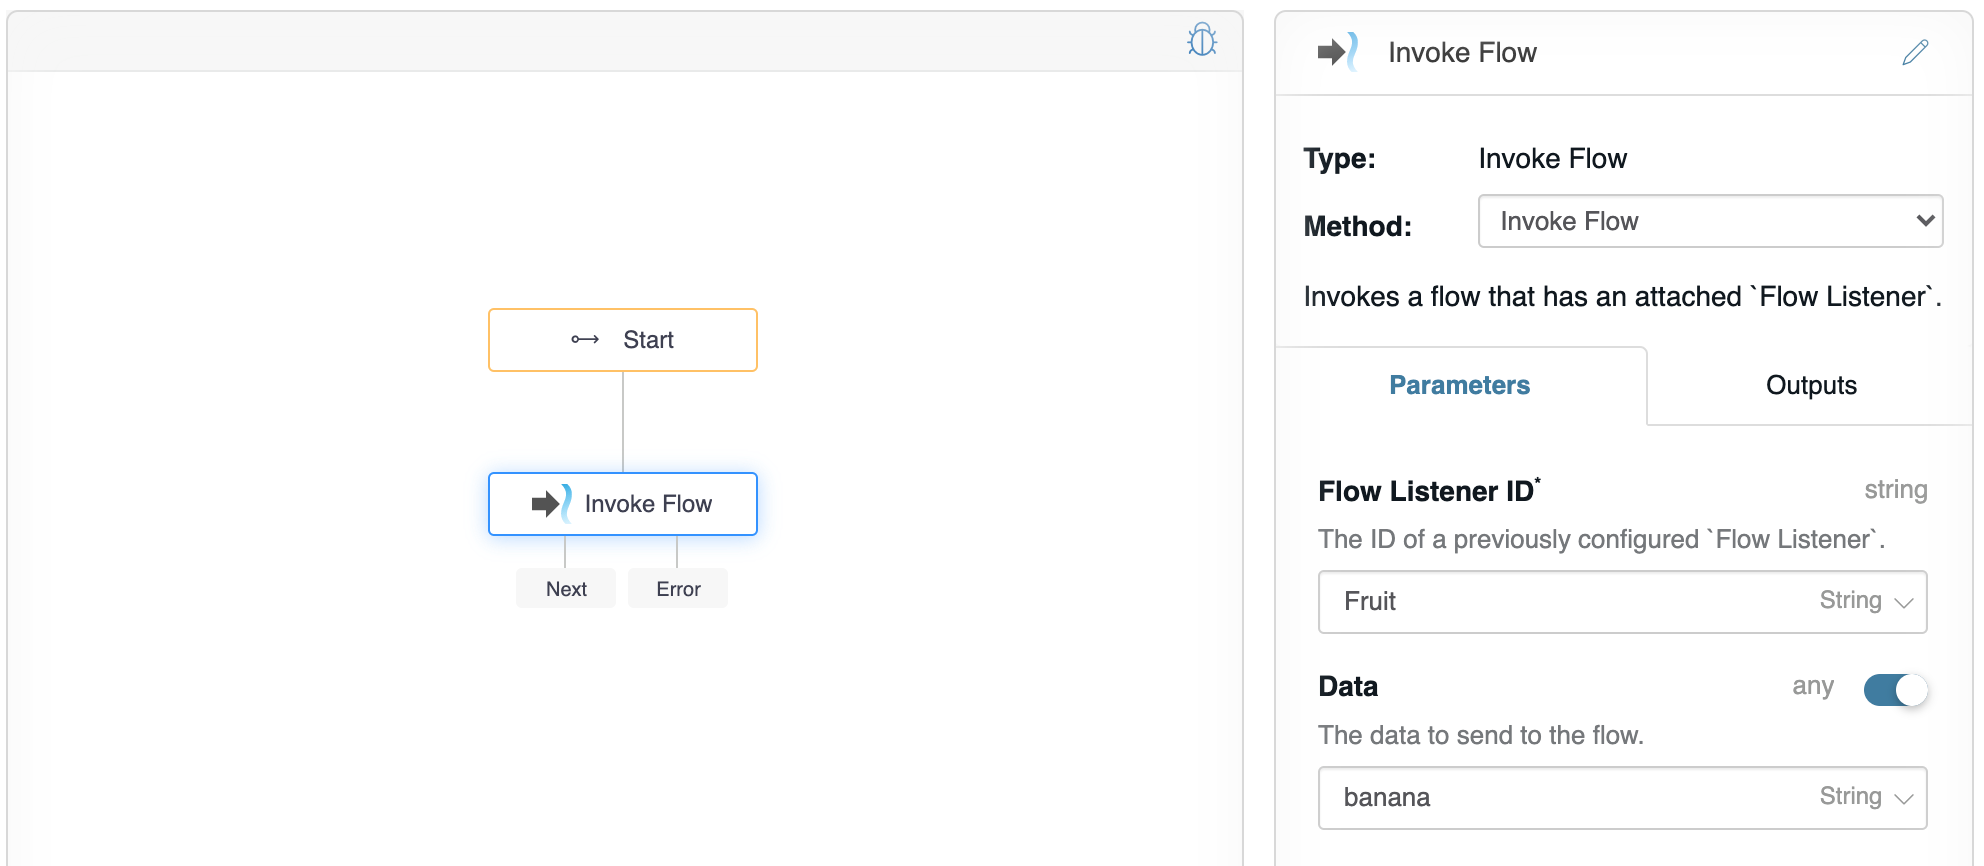
Then, choose the “Invoke Flow” method, and configure the Flow Listener ID as “Fruit”, and then enable Data, choose “String” from the drop-down, and enter value “banana”.
Finally, click the Outputs tab and change Next output value to $.response. This will set the response for the whole flow and the value will ultimately be visible in the debugger.
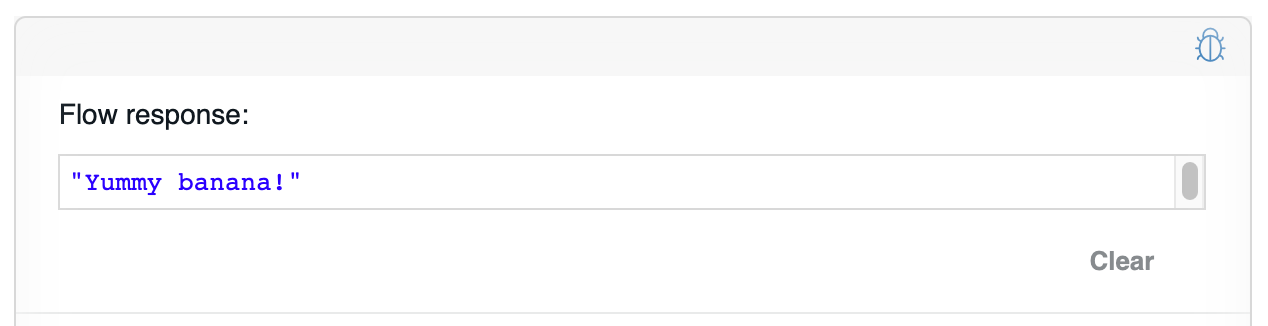
To run, click the debug icon  and click Execute Flow. You should see a string output:
 "Yummy banana!"
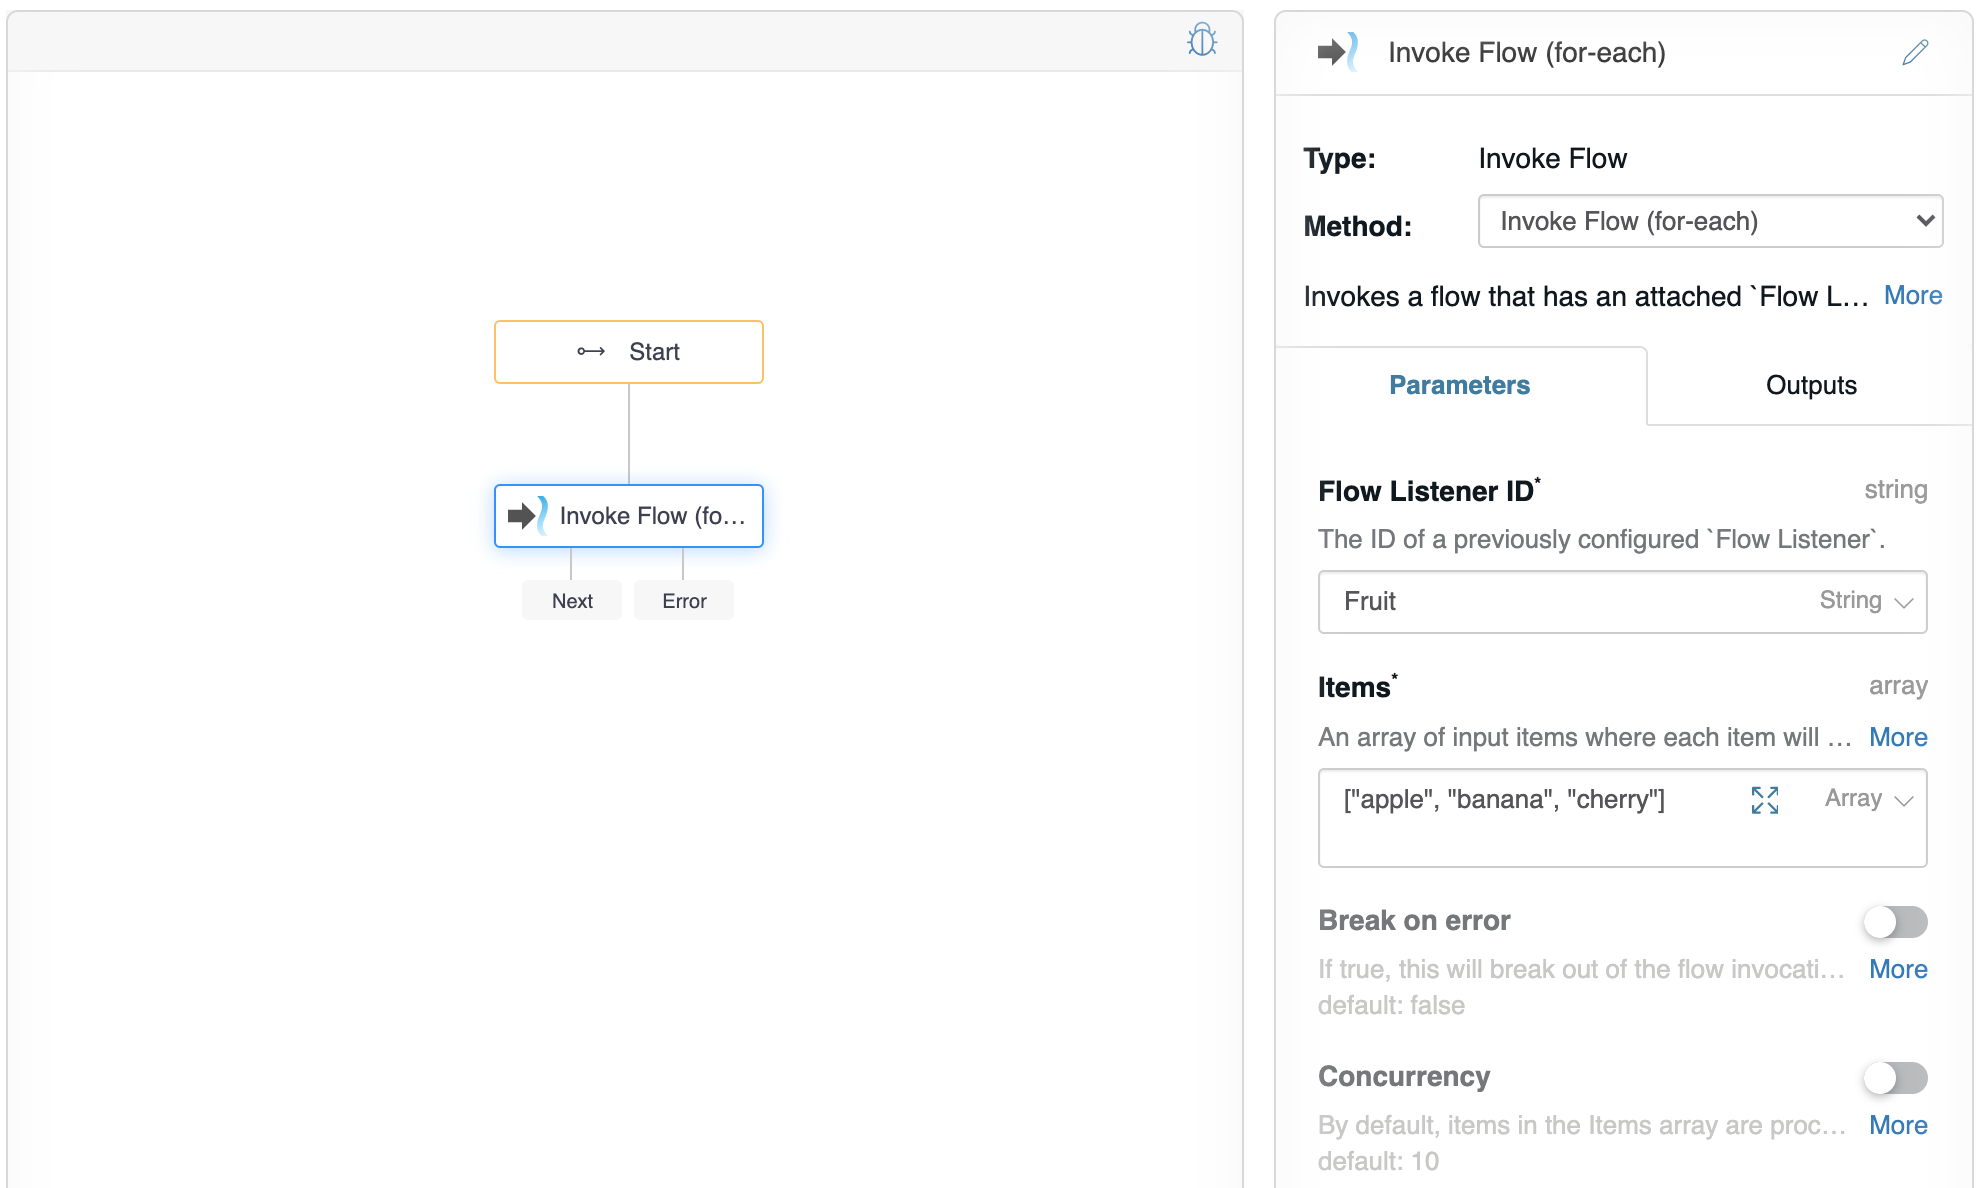
Create the invoke flow (for-each)
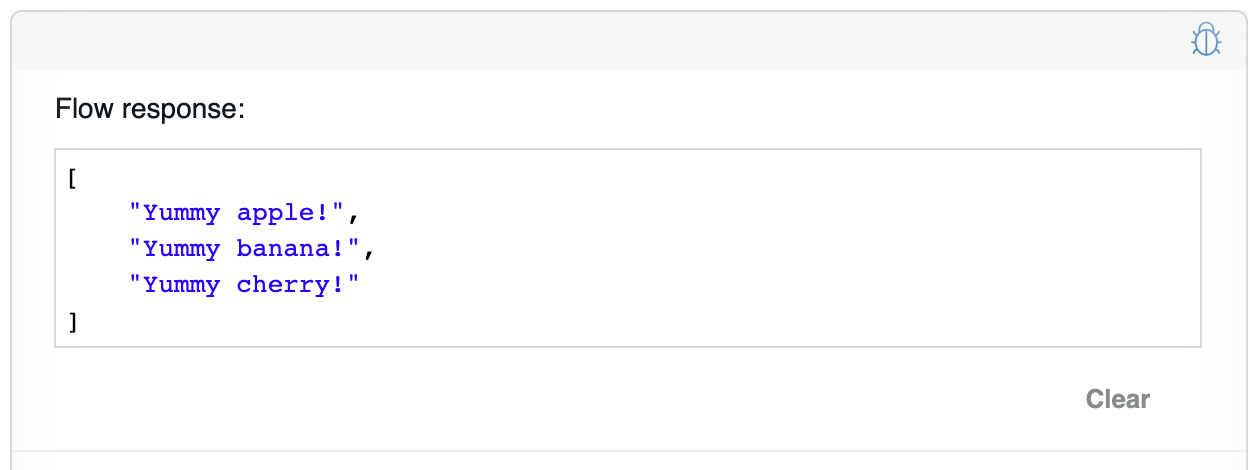
Start by creating the “Invoke flow” example from above. Then, click on the “Invoke flow” flow-node on the graph and change the Method to “Invoke Flow (for-each)”. Then, configure the Parameters such that Flow Listener ID is “Fruit”, Items is of type Array and the value is: [“apple”, “banana”, “cherry”].
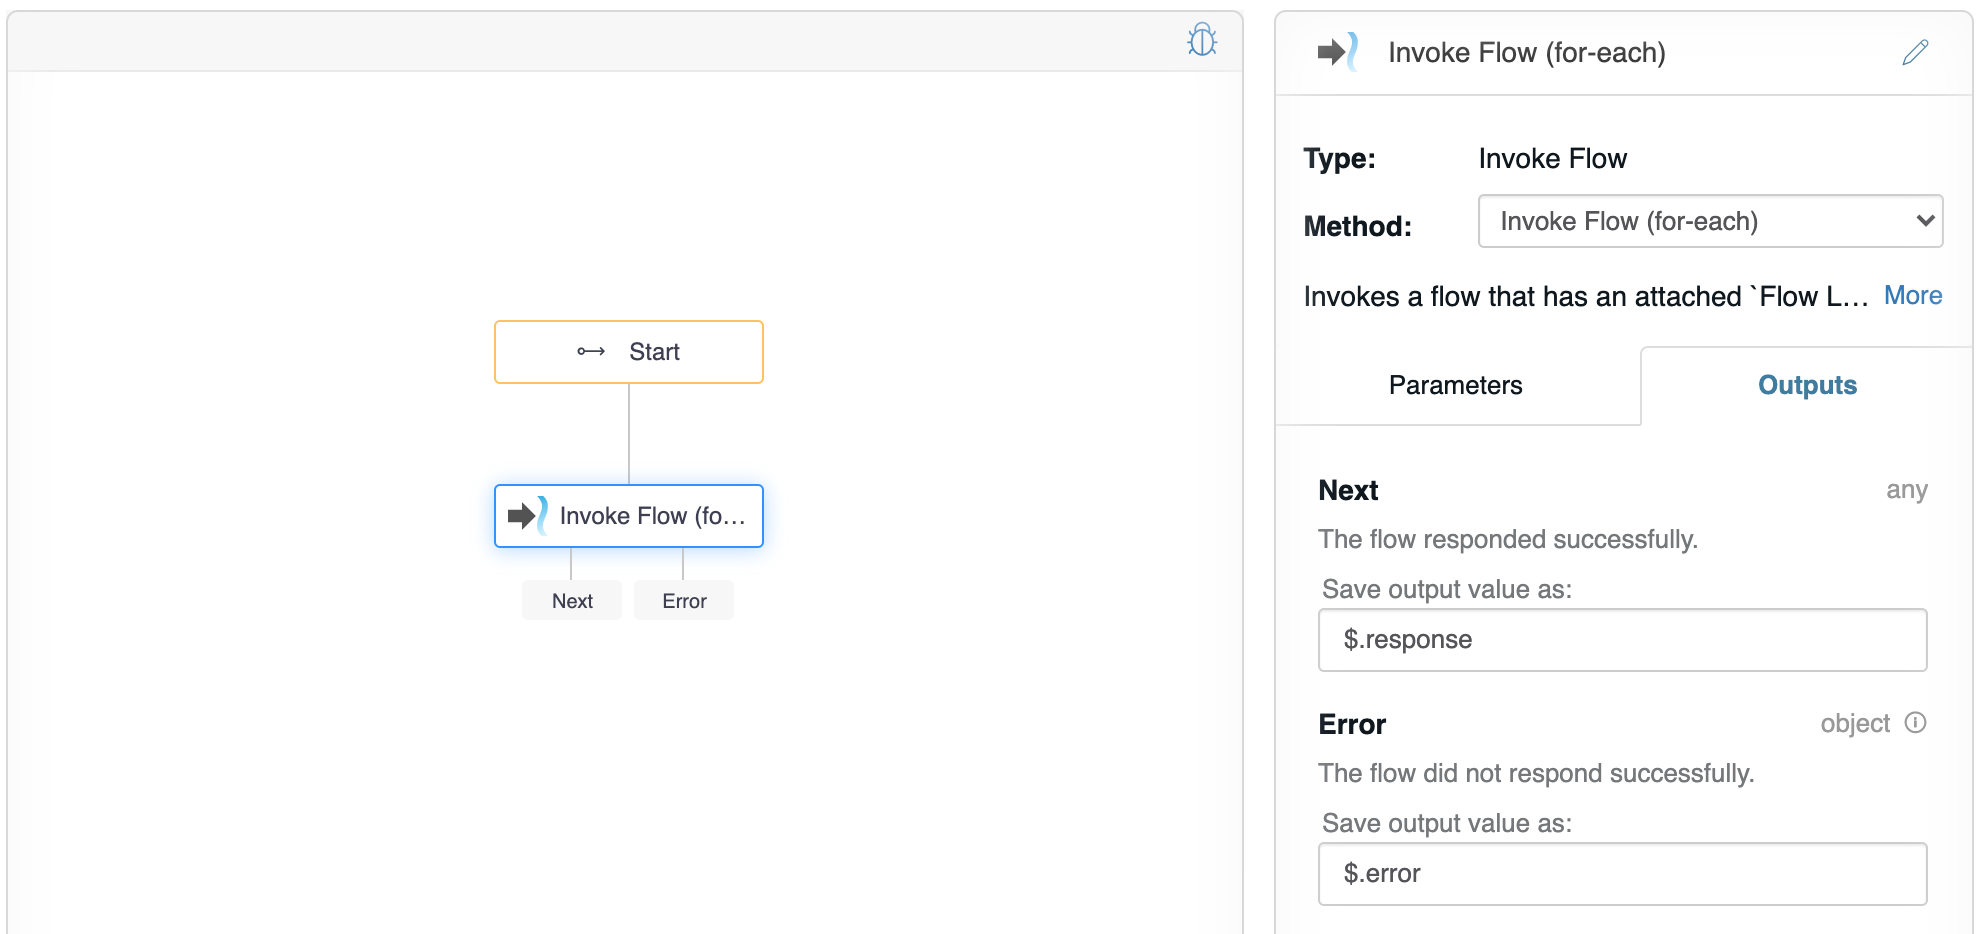
Finally, click the Outputs tab and change Next output value to $.response. This will set the response for the whole flow and the value will ultimately be visible in the debugger.
To run, click the debug icon and click Execute Flow. You should see an array output: ["Yummy apple!", "Yummy banana!", "Yummy cherry!"].