Event consumer flow-trigger
4 minute read
Overview
The Event Consumer flow-trigger is part of the Event plugin, @axway/api-builder-plugin-ft-event. The plugin also contains an Event Producer flow-node, and both work together to enable an event to be emitted from a flow that will trigger another flow via the Event Consumer flow-trigger. It is a mechanism that can be used to kick-off flows that run concurrently. It is useful for spinning off relevant tasks, e.g. “new order” flow might emit a “check-inventory” event and kick off a flow that checks inventory and issues re-stock purchase orders if necessary.
To install the Event plugin, execute the following command:
npm install @axway/api-builder-plugin-ft-event
For additional getting started information, refer to the Getting Started With API Builder.
Flow-trigger details
The following sections provide details of the available Event Consumer parameters.
Trigger parameters
| Parameter | Type | Description | Configuration selection | Required |
|---|---|---|---|---|
| Event | String | The name of the event. | Selector, String | Yes |
How to use the event flow-trigger
Example - Beep
For this example, we will create a “Consumer flow” that will handle an event named “BEEP”, and a “Producer flow” that will emit an event named “BEEP” with a message. The Event plugin is required for this example.
Create a consumer flow
Follow the instructions on Create a new flow to create a “Consumer flow”. In this flow, you will want to drag the Event Consumer from the Flow-Nodes > Flow-Triggers panel on the left, into the flow graph on the right. Configure the Event Consumer flow-trigger as shown below.
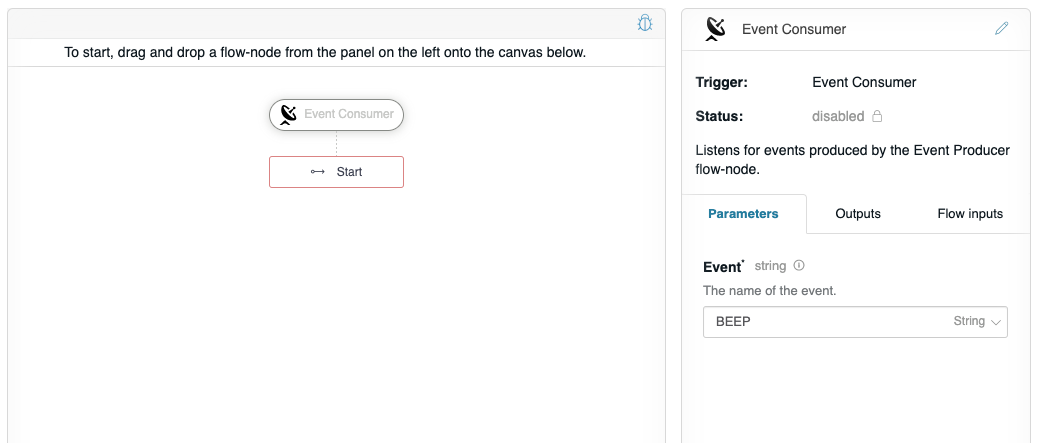
This configures the Event Consumer to receive the Event named “BEEP”. We also want to receive data for the event, and do something with that data in the flow. To configure this click on the Flow inputs tab.
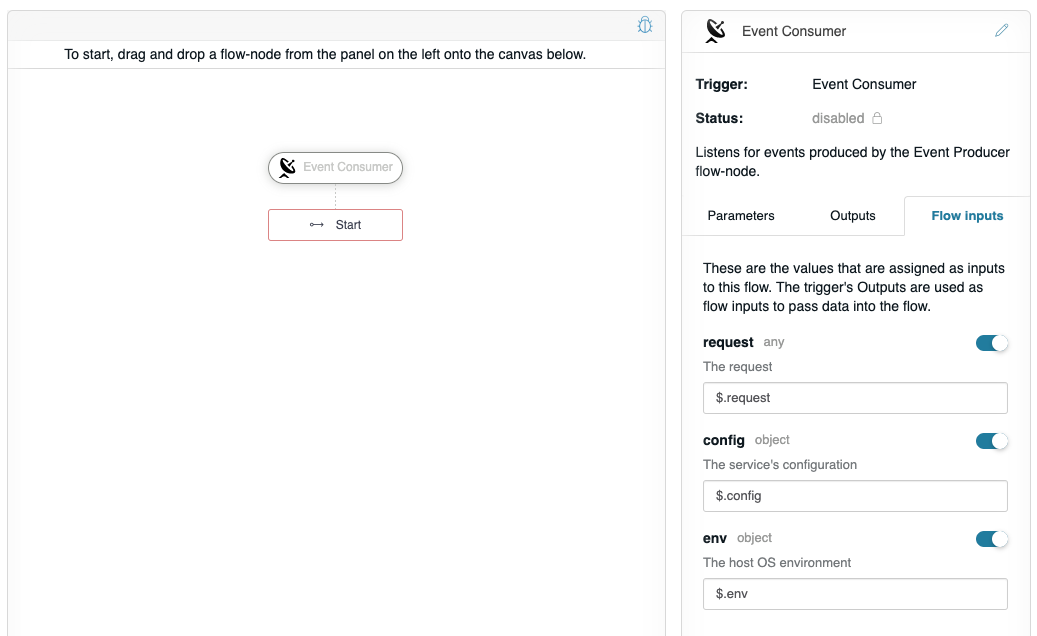
This tab configures the Event Consumer to provide the event’s Data as input into the flow. The Event Consumer outputs a value called $.request, which can be seen on the Outputs tab. On the Flow inputs tab, it lists the optional named inputs that can be provided to the flow: request, config, and env. These keys are hard-coded into the flow and their JSONPath selectors are provided automatically. From within the flow, the respective input values can be accessed as $.request, $.config, and $.env.
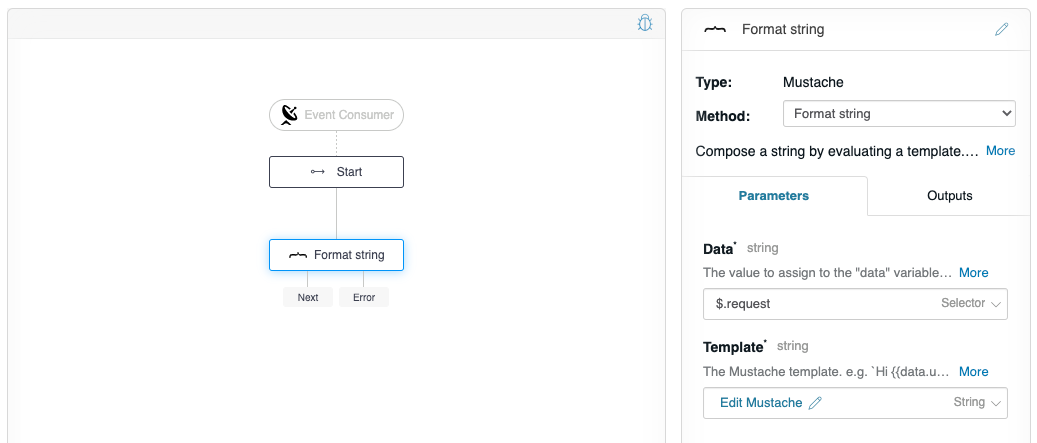
Now, let’s do something with $.request by adding the Mustache flow-node to the graph, and configuring Data to be $.request, and the Template to be “{{data}}” (without quotes).
Now the flow is ready to be triggered by an Event Producer. However, let’s verify that the flow works as expected. Click on the debugger icon in the upper-right of the graph to reveal the debug panel. Change the “request” to have the value “banana” as we plan on this flow receiving a string input from the “Producer flow”.
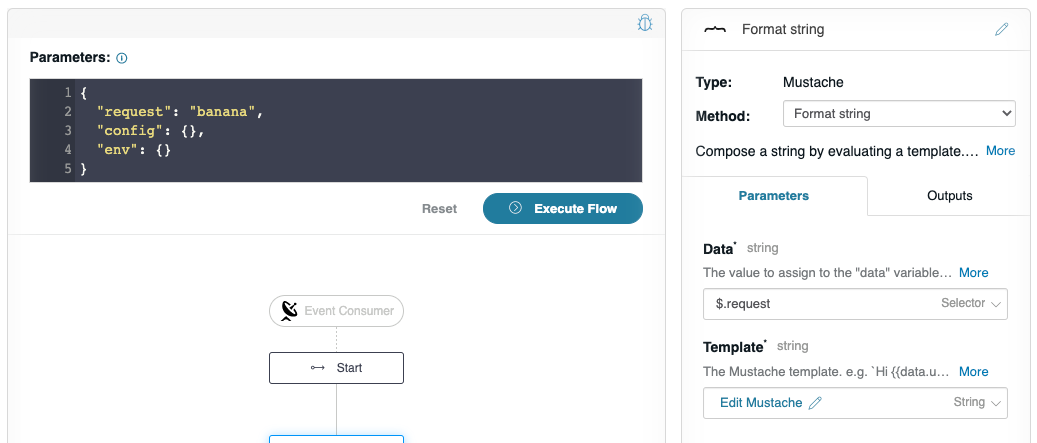
Click Execute Flow. The flow editor will not show much, just a message, “Flow successfully executed with no response”. However, if you check the console window where you launched your API Builder application, you see a detailed debug log showing the execution, and that it handled the “banana” message as expected:
// Flow output

1618573541236 DEBUG [request-id: 3be8345a-be60-464d-b5df-ef1aa312dfe5] Flow invoked by debugger: Event Consumer
1618573541237 DEBUG [request-id: 3be8345a-be60-464d-b5df-ef1aa312dfe5] Waiting: Format string (mustache.1)
1618573541237 DEBUG [request-id: 3be8345a-be60-464d-b5df-ef1aa312dfe5] Invoking: Format string (mustache.1)
1618573541238 DEBUG [request-id: 3be8345a-be60-464d-b5df-ef1aa312dfe5]   finished flow-node Format string (mustache.1) route: []
1618573541239 DEBUG [request-id: 3be8345a-be60-464d-b5df-ef1aa312dfe5]   Format string (mustache.1) writing "banana" to ctx as: $.value
1618573541239 DEBUG [request-id: 3be8345a-be60-464d-b5df-ef1aa312dfe5] Flow debugging completed: Event Consumer
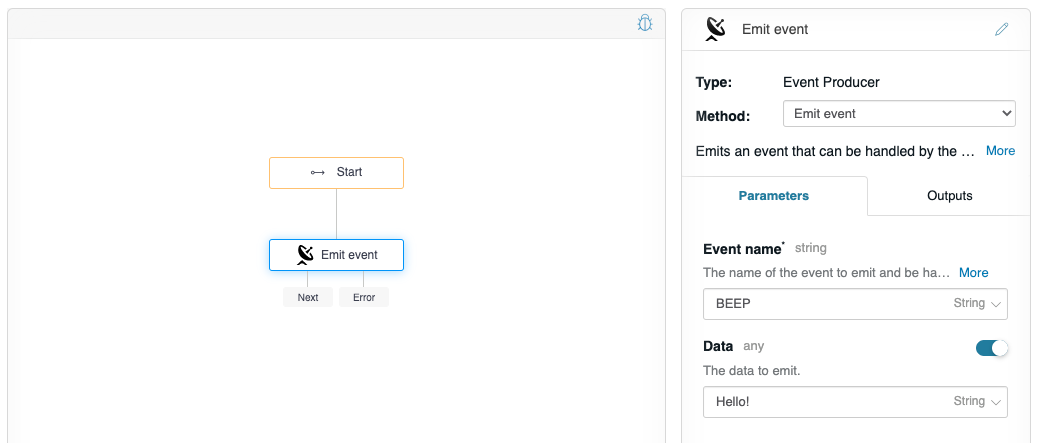
Create a producer flow
Follow the instructions on Create a new flow to create a “Producer flow”. In this flow, you will want to drag the Event Producer from the Flow-Nodes > Flow-Triggers panel on the left, into the flow graph on the right. Configure the flow-node to have the properties as shown below.
Click on the debugger icon in the upper-right of the graph, do not change any values, and click Execute Flow, and check your console debug log, you should see:
Format string (mustache.1) writing “Hello!” to ctx as: $.value